Yamaha CRX-M5 Owner's Manual - Page 29
CD synchronized recording, Before recording
 |
View all Yamaha CRX-M5 manuals
Add to My Manuals
Save this manual to your list of manuals |
Page 29 highlights
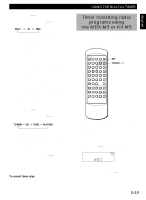
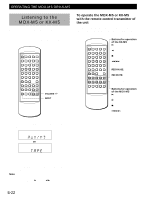
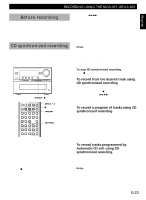
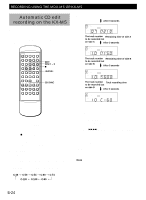
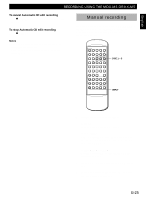
English GettPinlagyiSntgarCteDds RECORDING USING THE MDX-M5 OR KX-M5 Before recording When you record by using the MDX-M5 or KX-M5, you must first make the connections as shown in "Connecting other components" on page 5. For details, refer to the instructions supplied with the MDX-M5 or KX-M5. CD synchronized recording You can record a CD on a MD or tape by pressing just one button when you connect the MDX-M5 or KX-M5. STANDBY/ON INPUT VOLUME RANDOM TIME RDS REPEAT PTY EDIT PROGRAM RT MEMORY DISC 1 DISC 2 DISC 3 DISC SELECT FM/AM TUNING/PRESET PHONES 4/¢ 7 FM/AM ST/MONO DISC 1 2 3 MEMORY PRESET PGM / TUNER CD 1 2 3 4 5 6 7 8 9 0 REC/ REC/ PAUSE MUTE CD SYNC / +10 TAPE MD INPUT SLEEP MUTE VOLUME -+ DISC 1 - 3 7 4/¢ CD SYNC 1 Insert the desired CD into the unit, and load the blank MD into the MDX-M5 or blank tape into the KX-M5. • When you use the cassette deck, set the cassette deck to forward direct and reverse mode (see the instructions of the cassette deck). 2 Press DISC 1 - 3 to select the desired CD, then press 7 after playing for several seconds. 3 Press CD SYNC while both units are in stop mode. The recording source appears in the display. 4 Press 4/¢ repeatedly to select the recording source (TAPE or MD). 5 Press CD SYNC. The unit starts CD play from the beginning of a disc and the MDX-M5 or KX-M5 starts recording automatically. 6 Each unit stops automatically when recording is finished. Notes • If you select MD in step 4, the digital signal is recorded automatically. For details, refer to the instructions of the MDX-M5. • When you press INPUT to set the unit MD mode, if you press CD SYNC, the KX-M5 starts recording the MD source. Be careful. To stop CD synchronized recording Press 7 (TUNER CD). To record from the desired track using CD synchronized recording Press DISC 1 - 3 to select the disc which contains the desired track and press 7 after playing for several seconds, then press 4/¢ repeatedly to select the desired track before pressing CD SYNC in step 3 above. To record a program of tracks using CD synchronized recording Before pressing CD SYNC in step 3 above: 1. Program the CD tracks you want to record (see page 12). 2. Press PGM so that "PROGRAM" appears in the display. 3. Press CD SYNC. To record tracks programmed by Automatic CD edit using CD synchronized recording Program the tracks by using the Automatic CD edit function (see the next page) before pressing CD SYNC in step 3 above. Notes • When the MD or tape becomes full before the end of recording, each unit stops. • Adjusting the VOLUME control has no effect on the recording level. E-23
-
 1
1 -
2
-
3
-
4
-
5
-
6
-
7
-
8
-
9
-
10
-
11
-
12
-
13
-
14
-
15
-
16
-
17
-
18
-
19
-
20
-
21
-
22
-
23
-
 24
24 -
 25
25 -
 26
26 -
 27
27 -
 28
28 -
 29
29 -
 30
30 -
 31
31 -
 32
32 -
 33
33 -
 34
34 -
35
 |
 |
