ZyXEL V310 User Guide - Page 49
Network Settings
 |
View all ZyXEL V310 manuals
Add to My Manuals
Save this manual to your list of manuals |
Page 49 highlights
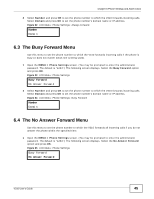
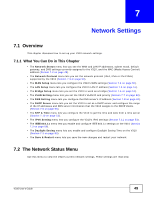
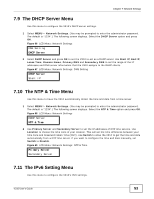
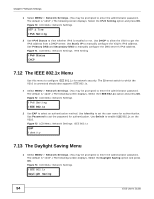
CHAPTER 7 Network Settings 7.1 Overview This chapter discusses how to set up your V310 network settings. 7.1.1 What You Can Do in This Chapter • The Network Status menu lets you see the WAN and LAN IP addresses, subnet mask, default gateway, and DNS settings currently assigned to the V310, and the MAC (Media Access Control) address (Section 7.2 on page 49). • The Network Protocol menu lets you set the network protocol (IPv4, IPv6 or IPv4/IPv6) supported by the V310 (Section 7.3 on page 50). • The WAN Setup menu lets you configure the V310's WAN settings (Section 7.4 on page 50). • The LAN Setup menu lets you configure the V310's LAN IP address (Section 7.5 on page 51). • The Bridge Setup menu lets you set the V310 to work as a bridge (Section 7.6 on page 51). • The VLAN Setting menu lets you set the V310's VLAN ID and priority (Section 7.7 on page 52). • The DNS Setting menu lets you configure the DNS server's IP address (Section 7.8 on page 52). • The DHCP Server menu lets you set the V310 to act as a DHCP server and configure the range of the IP addresses and DNS server information that the V310 assigns to the DHCP clients (Section 7.9 on page 53). • The NTP & Time menu lets you configure the V310 to get the time and date from a time server (Section 7.10 on page 53). • The IPv6 Setting menu lets you configure the V310's IPv6 settings (Section 7.11 on page 53). • The IEEE 802.1x menu lets you enable and configure IEEE 802.1x settings on the V310 (Section 7.3 on page 50). • The Daylight Saving menu lets you enable and configure Daylight Saving Time on the V310 (Section 7.3 on page 50). • The Save & Restart menu lets you save the new changes and restart your network. 7.2 The Network Status Menu Use this menu to view the V310's current network settings. These settings are read-only. V310 User's Guide 49
-
 1
1 -
2
-
3
-
4
-
5
-
6
-
7
-
8
-
9
-
10
-
11
-
12
-
13
-
14
-
15
-
16
-
17
-
18
-
19
-
20
-
21
-
22
-
23
-
24
-
25
-
26
-
27
-
28
-
29
-
30
-
31
-
32
-
33
-
34
-
35
-
36
-
37
-
38
-
39
-
40
-
41
-
42
-
43
-
 44
44 -
 45
45 -
 46
46 -
 47
47 -
 48
48 -
 49
49 -
 50
50 -
 51
51 -
 52
52 -
 53
53 -
 54
54 -
55
-
56
-
57
-
58
-
59
-
60
-
61
-
62
-
63
-
64
-
65
-
66
-
67
-
68
-
69
-
70
-
71
-
72
-
73
-
74
-
75
-
76
-
77
-
78
-
79
-
80
-
81
-
82
-
83
-
84
-
85
-
86
-
87
-
88
-
89
-
90
-
91
-
92
-
93
-
94
-
95
-
96
-
97
-
98
-
99
-
100
-
101
-
102
-
103
-
104
-
105
-
106
-
107
-
108
-
109
-
110
-
111
-
112
-
113
-
114
-
115
-
116
-
117
-
118
-
119
-
120
-
121
-
122
-
123
-
124
-
125
-
126
-
127
-
128
-
129
-
130
-
131
-
132
-
133
-
134
-
135
-
136
-
137
-
138
-
139
-
140
-
141
-
142
-
143
-
144
-
145
-
146
-
147
-
148
-
149
-
150
-
151
-
152
-
153
-
154
-
155
-
156
-
157
-
158
-
159
-
160
-
161
-
162
-
163
-
164
-
165
-
166
-
167
-
168
-
169
-
170
-
171
-
172
-
173
-
174
-
175
-
176
-
177
-
178
 |
 |
