AIWA NSX-V2100 Operating Instructions - Page 10
Basic Operations, Basic Recording
 |
View all AIWA NSX-V2100 manuals
Add to My Manuals
Save this manual to your list of manuals |
Page 10 highlights
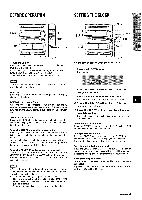
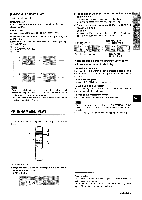
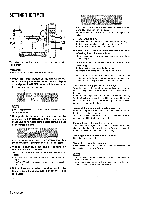
) BASIC OPERATIONS := ~ ==' BASIC RECORDING (Deck 1) (Deck 2) Usable tapes Use only normal (type I) tapes. 1 Press the TAPE button. 2 Press the s l= button to open the cassette holder and insert a tape exposed side down. Push the cassette holder to close it. 3 Press the F button to start playback. Only the side facing you can be played back. To stop playback Press the W= button. To pause Press the II button. To resume play, press it again. To fast forward or rewind In the stop mode, press the++ or bb the s 14 button to stop winding. button, and then press When both deck 1 and deck 2 are set in the playback mode Deck 2 is heard. 9 ENGLISH Preparation q Wind up the tape to the point recording starts. q Note that recording is done on only one side of the tape. q Use only normal (type I) tapes. 1 Insert the tape to be recorded on into deck 1 and push the cassette holder to close it. 2 Get ready for the source to be recorded. To record from a CD Press the CD button and load a disc. To record from a tape Press the TAPE button. Then, insert the original tape into deck 2 and play it. To record from a radio broadcast Press the TUNER/BAND button and tune in to a station. To record from the connected source Press the ViDEO/AUX button and play it. 3 Press the q button to start recording. The F button is depressed simultaneously. When recordina from a CD, playing and recording start simultaneously from the first track. To stop recording Press the WA button on deck 1. To pause recording Press the II button on deck 1. To resume recording, press it again. To record selected tracks of the CD Before pressing the q button, program the tracks (see page 8). To start recording precisely (except when recording from a CD) Before pressing the q button at step 3, press the 11 button on deck 1. Then, press the q button. The deck enters recording pause mode. When you wish to start recording, press the II button again. To record part of the CD When the q button is pressed, recording always starts from the first track. To start in the middle of a track, play the CD first and press the 11 button for CD at the point you wish to start recording from. Then, press the q button. The pause mode for CD button is released automatically and recording starts. m Do not press the buttons on deck 2 during recording.
-
 1
1 -
2
-
3
-
4
-
 5
5 -
 6
6 -
 7
7 -
 8
8 -
 9
9 -
 10
10 -
 11
11 -
 12
12 -
 13
13 -
 14
14 -
 15
15 -
16
-
17
-
18
-
19
-
20
-
21
-
22
-
23
-
24
-
25
-
26
-
27
-
28
-
29
-
30
-
31
-
32
-
33
-
34
-
35
-
36
-
37
-
38
-
39
-
40
-
41
-
42
-
43
-
44
-
45
-
46
-
47
-
48
-
49
-
50
-
51
-
52
 |
 |
