Asus M4A88TD-V EVO/USB3 User Manual - Page 126
Monitor] on ATI Radeon HD 4250 - graphics card
 |
View all Asus M4A88TD-V EVO/USB3 manuals
Add to My Manuals
Save this manual to your list of manuals |
Page 126 highlights
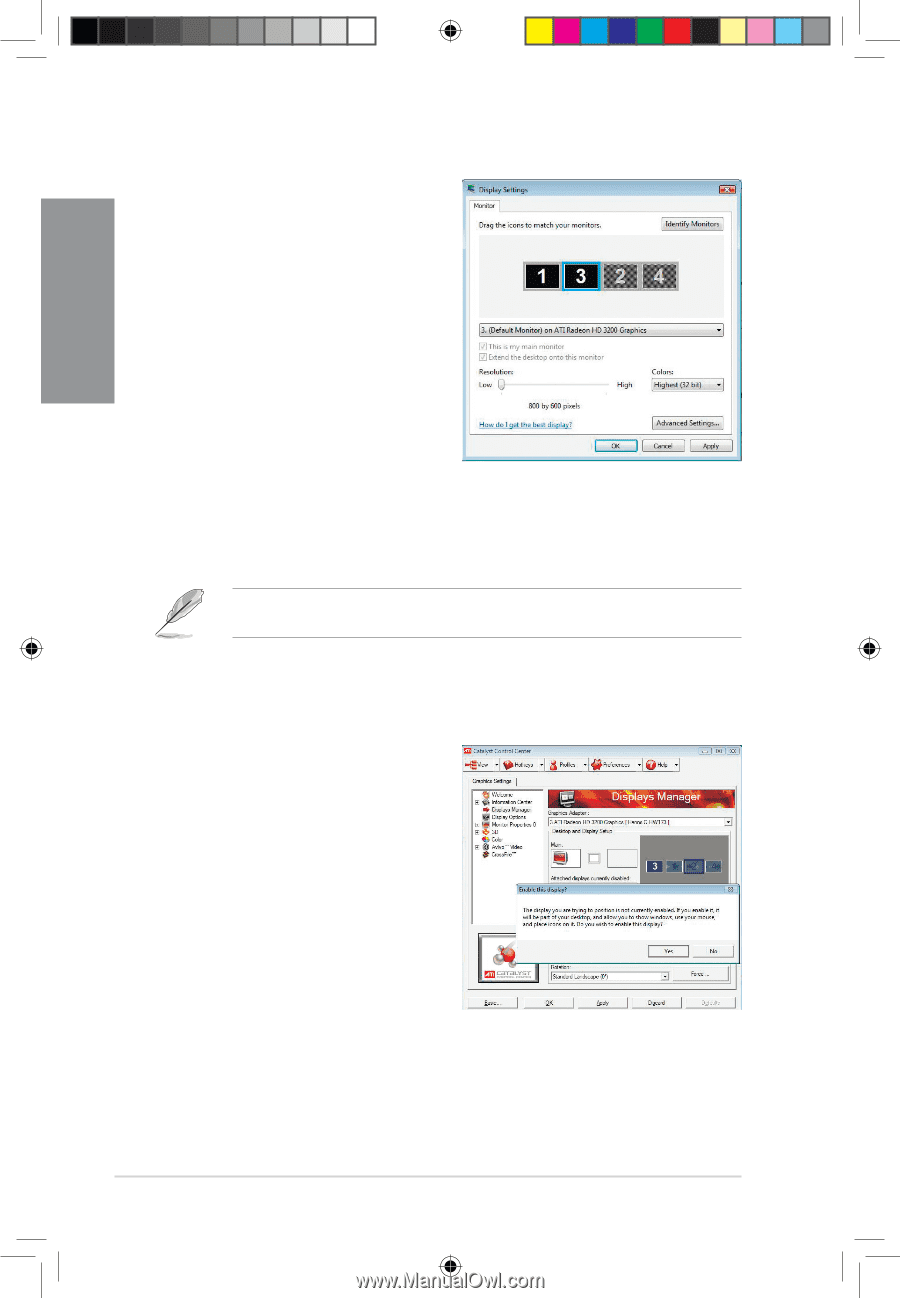
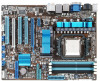
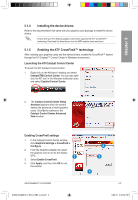
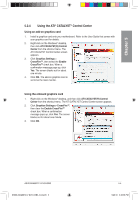
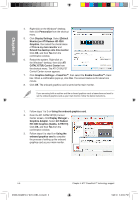
Chapter 5 4. Right-click on the Windows® desktop, then click Personalize from the shortcut menu. 5. Click Display Settings. Select [Default Monitor] on ATI Radeon HD 4250 Graphics, then select the check boxes of This is my main monitor and Extend the desktop onto this monitor. Click OK, and then Yes from the confirmation window. 6. Restart the system. Right-click on the Windows® desktop, then click ATI CATALYST(R) Control Center from the shortcut menu. The ATI CATALYST Control Center screen appears. 7. Click Graphics Settings > CrossFire™, then select the Enable CrossFire™ check box. When a confirmation pops up, click Yes. The screen blacks out for about one minute. 8. Click OK. The onboard graphics card is set to be the main monitor. If you are using both an add-on and the on-board graphics cards at same time and want to set the onboard graphics card as your main monitor, follow the below instructions. 1. Follow steps 1 to 3 on Using the onboard graphics card. 2. From the ATI CATALYST(R) Control Center screen, click Display Manager > Graphics Adapter. Select ATI Radeon HD 4250 Graphics [Gabbs, G HW173]. Click OK, and then Yes from the confirmation window. 3. Follow steps 6 to step 8 on Using the onboard graphics card to complete the process of setting up the onboard graphics card as your main monitor. 5-6 E5888_M4A88TD-V EVO-USB3_Content6 6 Chapter 5: ATI® CrossFireX™ technology support 5/26/10 3:46:40 PM
-
 1
1 -
2
-
3
-
4
-
5
-
6
-
7
-
8
-
9
-
10
-
11
-
12
-
13
-
14
-
15
-
16
-
17
-
18
-
19
-
20
-
21
-
22
-
23
-
24
-
25
-
26
-
27
-
28
-
29
-
30
-
31
-
32
-
33
-
34
-
35
-
36
-
37
-
38
-
39
-
40
-
41
-
42
-
43
-
44
-
45
-
46
-
47
-
48
-
49
-
50
-
51
-
52
-
53
-
54
-
55
-
56
-
57
-
58
-
59
-
60
-
61
-
62
-
63
-
64
-
65
-
66
-
67
-
68
-
69
-
70
-
71
-
72
-
73
-
74
-
75
-
76
-
77
-
78
-
79
-
80
-
81
-
82
-
83
-
84
-
85
-
86
-
87
-
88
-
89
-
90
-
91
-
92
-
93
-
94
-
95
-
96
-
97
-
98
-
99
-
100
-
101
-
102
-
103
-
104
-
105
-
106
-
107
-
108
-
109
-
110
-
111
-
112
-
113
-
114
-
115
-
116
-
117
-
118
-
119
-
120
-
 121
121 -
 122
122 -
 123
123 -
 124
124 -
 125
125 -
 126
126 -
 127
127 -
 128
128
 |
 |