Bernina 1150MDA Owners Manual - Page 50
Notes, Sergers, Elasticator
 |
View all Bernina 1150MDA manuals
Add to My Manuals
Save this manual to your list of manuals |
Page 50 highlights
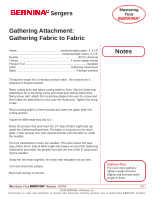
Sergers Elasticator Mastering Your BERNINA® Fabric mediumweight cotton, 3" x 12 12" length of ½" nylon or cotton braid elastic Needle 75/11 Stretch or Ballpoint Thread 2 cones serger thread 2 cones YLI Woolly Nylon Presser Foot Elasticator Stitch 4-thread overlock Notes Thread the serger for a 4-thread overlock stitch. Set tensions for a balanced stitch. Attach the Elasticator to the serger. Adjust stitch length to 4mm. Increase the presser foot pressure. Locate and raise the roller guide in the front of the presser foot. Turn the handwheel to lower the needles. (This also lowers the feed dog.) Raise the presser foot and insert the elastic through the slot and under the presser foot until it touches the needles. Lower the presser foot and serge a few stitches to catch and straighten the elastic along the right edge of the slot. Turn the handwheel to lower the needles. Lower the roller guide. Using the small screwdriver, adjust the guide plate on the presser foot to the width of the elastic. Locate the pressure adjustment set screw (on the top of the roller guide) and turn the screw counterclockwise to completely loosen the pressure on the roller. Place the fabric under the presser foot and begin serging. Slowly tighten the pressure adjustment set screw to increase the pressure on the roller and stretch the elastic. Note: Do not over tighten the screw. Excessive pressure on the elastic will bind the fabric. Serge the elastic onto the fabric letting the presser foot stretch the elastic for you. Trim and mount the sample. Return all settings to normal. MASTERING YOUR BERNINA® SERGERS 6/2006 50 ©2006 BERNINA® of America, Inc. Permission to copy and distribute in printed and electronic formats granted only to Authorized BERNINA® Dealers
-
 1
1 -
2
-
3
-
4
-
5
-
6
-
7
-
8
-
9
-
10
-
11
-
12
-
13
-
14
-
15
-
16
-
17
-
18
-
19
-
20
-
21
-
22
-
23
-
24
-
25
-
26
-
27
-
28
-
29
-
30
-
31
-
32
-
33
-
34
-
35
-
36
-
37
-
38
-
39
-
40
-
41
-
42
-
43
-
44
-
 45
45 -
 46
46 -
 47
47 -
 48
48 -
 49
49 -
 50
50 -
 51
51 -
 52
52 -
 53
53 -
 54
54 -
 55
55 -
56
-
57
-
58
-
59
-
60
-
61
-
62
-
63
-
64
-
65
-
66
-
67
-
68
-
69
-
70
-
71
-
72
-
73
-
74
-
75
-
76
-
77
-
78
-
79
-
80
-
81
-
82
-
83
-
84
-
85
-
86
-
87
-
88
-
89
-
90
-
91
-
92
-
93
-
94
-
95
-
96
-
97
-
98
-
99
-
100
-
101
-
102
-
103
-
104
-
105
-
106
-
107
-
108
-
109
-
110
-
111
-
112
-
113
-
114
-
115
-
116
-
117
-
118
-
119
-
120
-
121
-
122
-
123
-
124
-
125
-
126
-
127
-
128
-
129
-
130
-
131
-
132
-
133
-
134
-
135
-
136
-
137
-
138
-
139
-
140
 |
 |