Bernina 1150MDA Owners Manual - Page 70
Notes, Sergers, Inside Corners
 |
View all Bernina 1150MDA manuals
Add to My Manuals
Save this manual to your list of manuals |
Page 70 highlights
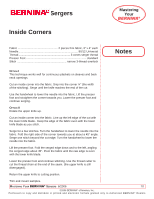
Sergers Inside Corners Mastering Your BERNINA® Fabric 2 pieces firm fabric, 3" x 4" each Needle 80/12 Universal Thread 3 cones serger thread Presser Foot standard Stitch narrow 3-thread overlock Notes OPTION I This technique works well for continuous plackets on sleeves and back neck openings. Cut an inside corner into the fabric. Snip into the corner ¼" (the width of the stitching). Serge until the knife reaches the end of the cut. Use the handwheel to lower the needle into the fabric. Lift the presser foot and straighten the corner towards you. Lower the presser foot and continue serging. OPTION II Rotate the upper knife up. Cut an inside corner into the fabric. Line up the left edge of the cut with the lower knife blade. Keep the edge of the fabric even with the lower knife blade as you stitch. Serge for a few stitches. Turn the handwheel to lower the needle into the fabric. Fold the right side of the corner towards you at about a 45° angle. Serge one stitch beyond the cut edge. Turn the handwheel to lower the needle into the fabric. Lift the presser foot. Fold the serged edge down and to the left, angling the serged edge about 45°. Pivot the fabric until the raw edge is even with the lower knife blade. Lower the presser foot and continue stitching. Use the thread cutter to cut the thread chain at the end of the seam. (the upper knife is still disengaged). Return the upper knife to cutting position. Trim and mount samples. MASTERING YOUR BERNINA® SERGERS 6/2006 70 ©2006 BERNINA® of America, Inc. Permission to copy and distribute in printed and electronic formats granted only to Authorized BERNINA® Dealers
-
 1
1 -
2
-
3
-
4
-
5
-
6
-
7
-
8
-
9
-
10
-
11
-
12
-
13
-
14
-
15
-
16
-
17
-
18
-
19
-
20
-
21
-
22
-
23
-
24
-
25
-
26
-
27
-
28
-
29
-
30
-
31
-
32
-
33
-
34
-
35
-
36
-
37
-
38
-
39
-
40
-
41
-
42
-
43
-
44
-
45
-
46
-
47
-
48
-
49
-
50
-
51
-
52
-
53
-
54
-
55
-
56
-
57
-
58
-
59
-
60
-
61
-
62
-
63
-
64
-
 65
65 -
 66
66 -
 67
67 -
 68
68 -
 69
69 -
 70
70 -
 71
71 -
 72
72 -
 73
73 -
 74
74 -
 75
75 -
76
-
77
-
78
-
79
-
80
-
81
-
82
-
83
-
84
-
85
-
86
-
87
-
88
-
89
-
90
-
91
-
92
-
93
-
94
-
95
-
96
-
97
-
98
-
99
-
100
-
101
-
102
-
103
-
104
-
105
-
106
-
107
-
108
-
109
-
110
-
111
-
112
-
113
-
114
-
115
-
116
-
117
-
118
-
119
-
120
-
121
-
122
-
123
-
124
-
125
-
126
-
127
-
128
-
129
-
130
-
131
-
132
-
133
-
134
-
135
-
136
-
137
-
138
-
139
-
140
 |
 |
