Bernina 730 Manual - Page 44
sewing, buttonhole, effected, follows, lefthand, Sewing, first, stitches, righthand, second
 |
View all Bernina 730 manuals
Add to My Manuals
Save this manual to your list of manuals |
Page 44 highlights
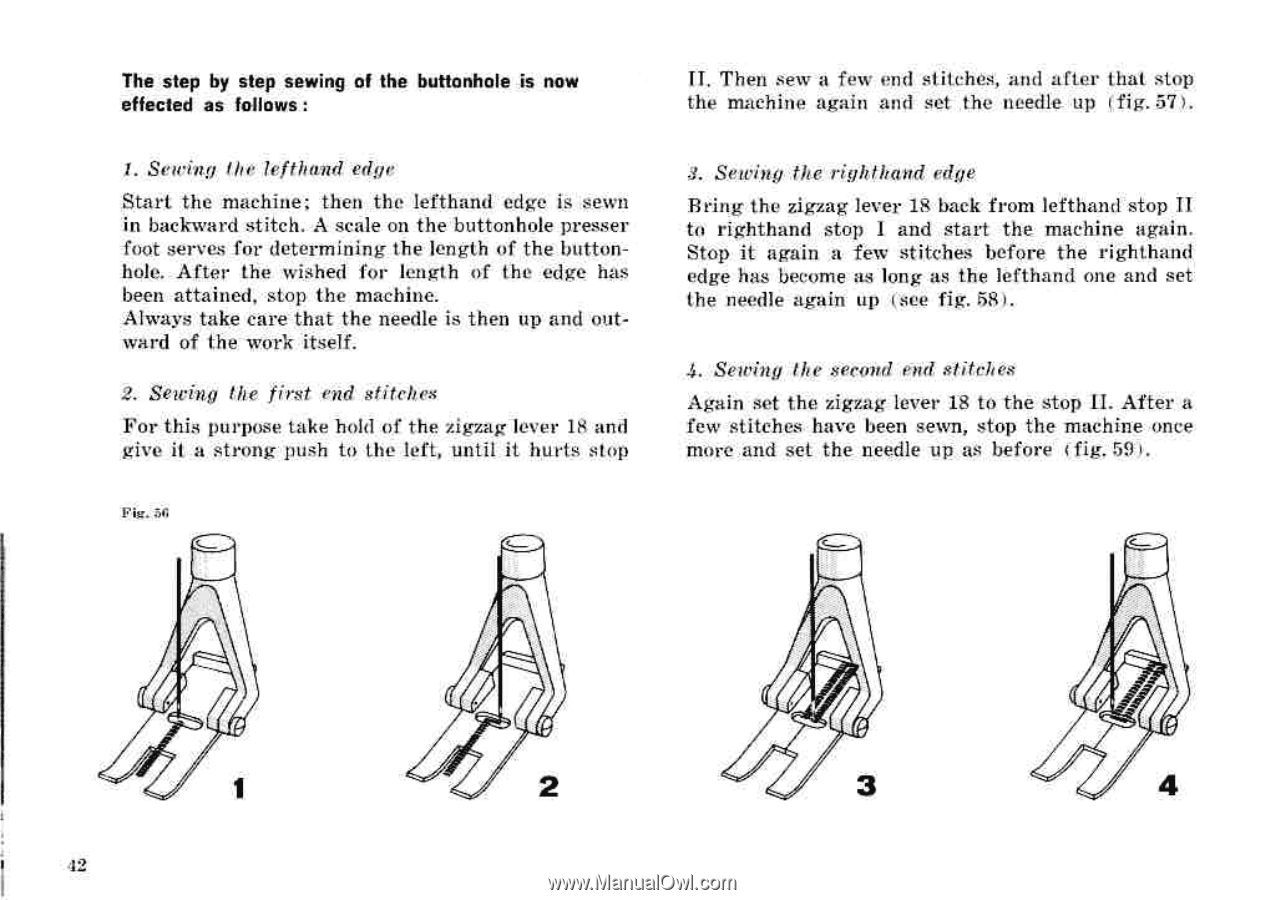
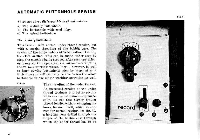
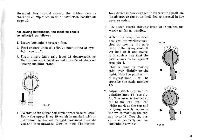
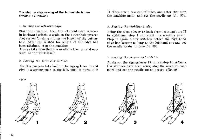
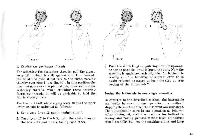
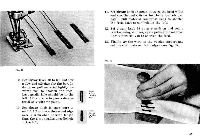
The step by step sewing of the buttonhole is now effected as follows: 1. Sewing Ile' lefthand Start the machine; then the lefthand edge is sewn in backward stitch. A scale on the buttonhole presser foot serves for determining the length of the buttonhole. After the wished for length of the edge has been attained, stop the machine. Always take care that the needle is then up and outward of the work itself. 2. Sewing the first end stitches For this purpose take hold of the zigzag lever 18 and give it a strong push to the left, until it hurts stop Pig. zg Ti. Then sew a few end stitches, and after that stop the machine again and set the needle up fig. 57). 3. Sewing the righthand edge Bring the zigzag lever 18 back from lefthand stop II to righthand stop I and start the machine again. Stop it again a few stitches before the righthand edge has become as long as the lefthand one and set the needle again up I see fig. 581. 4. Sewing the second end stitches Again set the zigzag lever 18 to the stop II. After a few stitches have been sewn, stop the machine once more .and set the needle up as before ( fig. 591. 3 12
-
 1
1 -
2
-
3
-
4
-
5
-
6
-
7
-
8
-
9
-
10
-
11
-
12
-
13
-
14
-
15
-
16
-
17
-
18
-
19
-
20
-
21
-
22
-
23
-
24
-
25
-
26
-
27
-
28
-
29
-
30
-
31
-
32
-
33
-
34
-
35
-
36
-
37
-
38
-
 39
39 -
 40
40 -
 41
41 -
 42
42 -
 43
43 -
 44
44 -
 45
45 -
 46
46 -
 47
47 -
 48
48 -
 49
49 -
50
-
51
-
52
-
53
-
54
-
55
-
56
-
57
-
58
-
59
-
60
-
61
-
62
-
63
-
64
-
65
-
66
-
67
-
68
-
69
-
70
-
71
-
72
-
73
-
74
-
75
-
76
-
77
-
78
-
79
-
80
-
81
-
82
-
83
-
84
 |
 |