Bernina 730 Manual - Page 51
accordingly
 |
View all Bernina 730 manuals
Add to My Manuals
Save this manual to your list of manuals |
Page 51 highlights
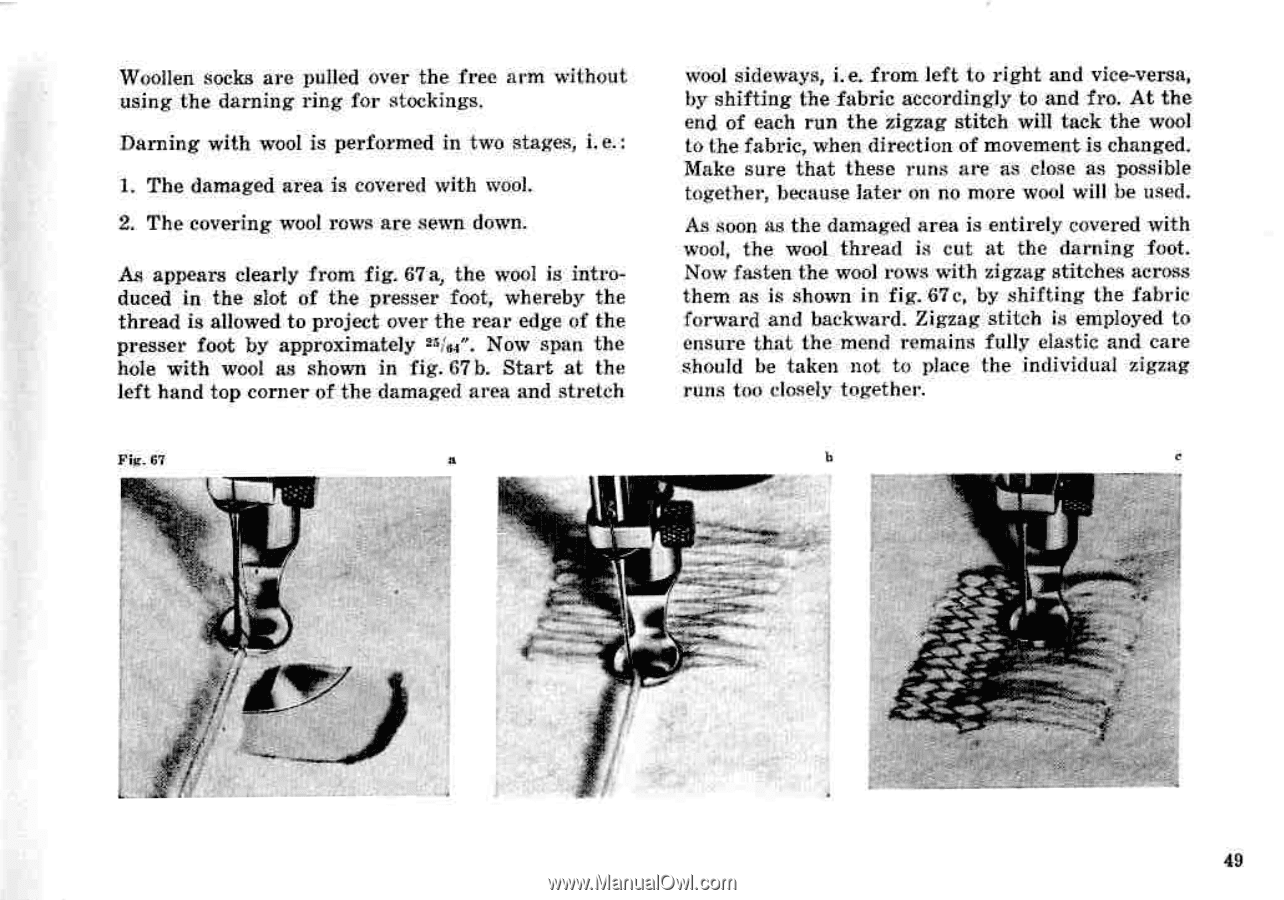
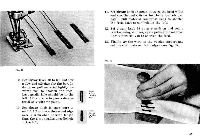
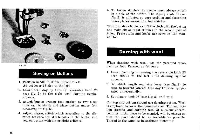
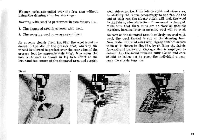
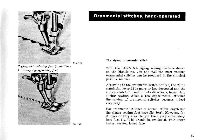
Woollen socks are pulled over the free arm without using the darning ring for stockings. Darning with wool is performed in two stages, i. e.: 1. The damaged area is covered with wool. 2. The covering wool rows are sewn down. As appears clearly from fig. 67 a, the wool is introduced in the slot of the presser foot, whereby the thread is allowed to project over the rear edge of the presser foot by approximately niu". Now span the hole with wool as shown in fig. 67 b. Start at the left hand top corner of the damaged area and stretch wool sideways, i.e. from left to right and vice-versa, by shifting the fabric accordingly to and fro. At the end of each run the zigzag stitch will tack the wool to the fabric, when direction of movement is changed. Make sure that these runs are as close as possible together, because later on no more wool will be used. As soon as the damaged area is entirely covered with wool, the wool thread is cut at the darning foot. Now fasten the wool rows with zigzag stitches across them as is shown in fig. 67c, by shifting the fabric forward and backward. Zigzag stitch is employed to ensure that the mend remains fully elastic and care should be taken not to place the individual zigzag runs too closely together. Fig. 67 b e 49
-
 1
1 -
2
-
3
-
4
-
5
-
6
-
7
-
8
-
9
-
10
-
11
-
12
-
13
-
14
-
15
-
16
-
17
-
18
-
19
-
20
-
21
-
22
-
23
-
24
-
25
-
26
-
27
-
28
-
29
-
30
-
31
-
32
-
33
-
34
-
35
-
36
-
37
-
38
-
39
-
40
-
41
-
42
-
43
-
44
-
45
-
 46
46 -
 47
47 -
 48
48 -
 49
49 -
 50
50 -
 51
51 -
 52
52 -
 53
53 -
 54
54 -
 55
55 -
 56
56 -
57
-
58
-
59
-
60
-
61
-
62
-
63
-
64
-
65
-
66
-
67
-
68
-
69
-
70
-
71
-
72
-
73
-
74
-
75
-
76
-
77
-
78
-
79
-
80
-
81
-
82
-
83
-
84
 |
 |