Bernina 730 Manual - Page 70
Bernina 730 Manual
 |
View all Bernina 730 manuals
Add to My Manuals
Save this manual to your list of manuals |
Page 70 highlights
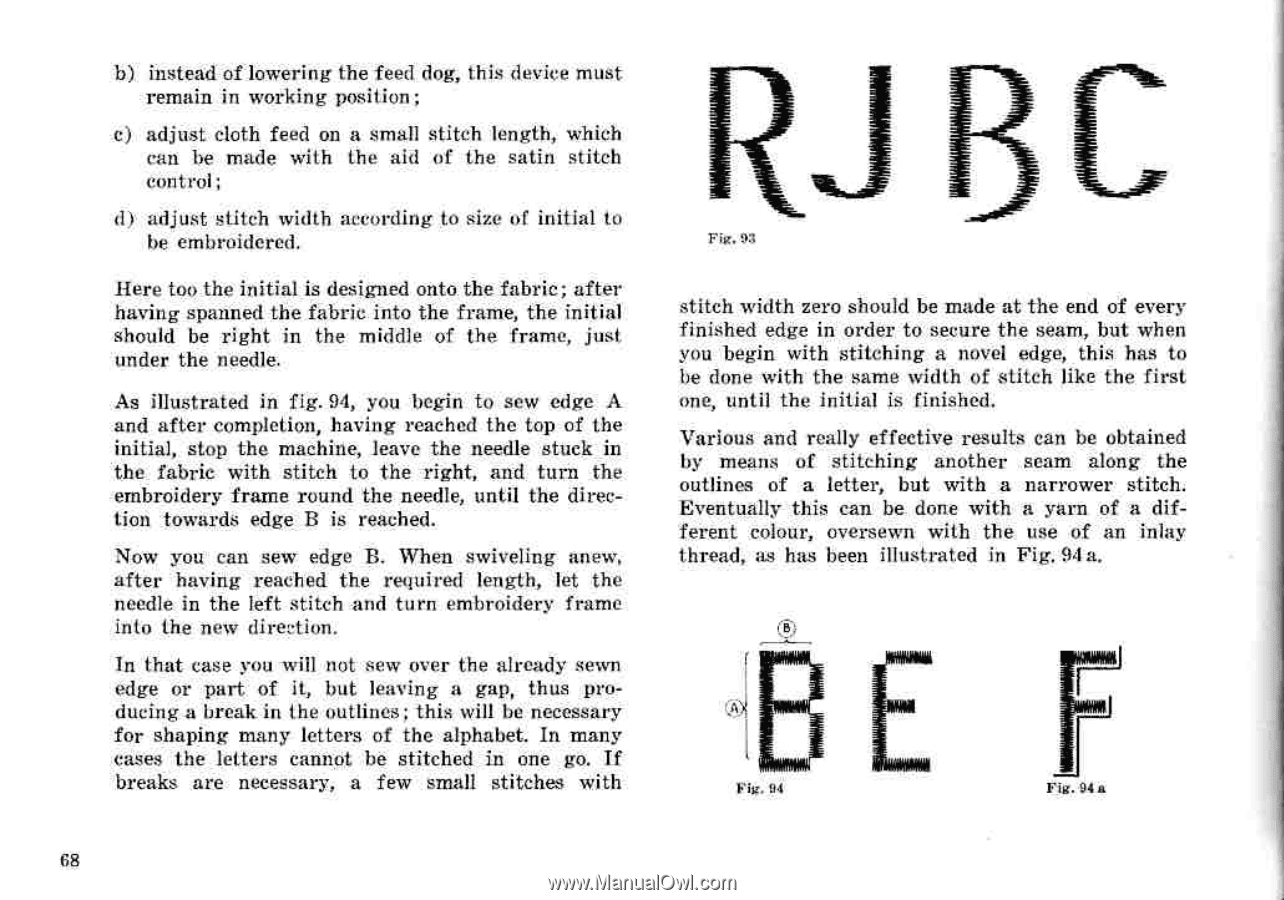
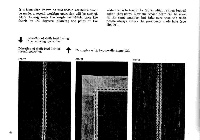
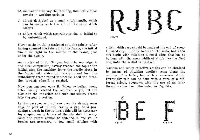
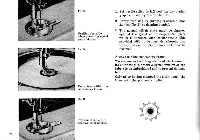
b) instead of lowering the feed dog, this device must remain in working position; c) adjust cloth feed on a small stitch length, which can be made with the aid of the satin stitch control; adjust stitch width according to size of initial to be embroidered. Here too the initial is designed onto the fabric; after having spanned the fabric into the frame, the initial should be right in the middle of the frame, just under the needle. As illustrated in fig. 94, you begin to sew edge A and after completion, having reached the top of the initial, stop the machine, leave the needle stuck in the fabric with stitch to the right, and turn the embroidery frame round the needle, until the direction towards edge B is reached. Now you can sew edge B. When swiveling anew, after having reached the required length, let the needle in the left stitch and turn embroidery frame into the new direction. In that case you will not sew over the already sewn edge or part of it, but leaving a gap, thus producing a break in the outlines; this will be necessary for shaping many letters of the alphabet. In many cases the letters cannot be stitched in one go. If breaks are necessary, a few small stitches with Fig. 93 stitch width zero should be made at the end of every finished edge in order to secure the seam, but when you begin with stitching a novel edge, this has to be done with the same width of stitch like the first one, until the initial is finished. Various and really effective results can be obtained by means of stitching another seam along the outlines of a letter, but with a narrower stitch. Eventually this can be done with a yarn of a different colour, oversewn with the use of an inlay thread, as has been illustrated in Fig. 94 a. (6; in Fog, Fig. A Fla. A IL 68
-
 1
1 -
2
-
3
-
4
-
5
-
6
-
7
-
8
-
9
-
10
-
11
-
12
-
13
-
14
-
15
-
16
-
17
-
18
-
19
-
20
-
21
-
22
-
23
-
24
-
25
-
26
-
27
-
28
-
29
-
30
-
31
-
32
-
33
-
34
-
35
-
36
-
37
-
38
-
39
-
40
-
41
-
42
-
43
-
44
-
45
-
46
-
47
-
48
-
49
-
50
-
51
-
52
-
53
-
54
-
55
-
56
-
57
-
58
-
59
-
60
-
61
-
62
-
63
-
64
-
 65
65 -
 66
66 -
 67
67 -
 68
68 -
 69
69 -
 70
70 -
 71
71 -
 72
72 -
 73
73 -
 74
74 -
 75
75 -
76
-
77
-
78
-
79
-
80
-
81
-
82
-
83
-
84
 |
 |