Bose Lifestyle 48 Installation guide - Page 17
Connecting your TV to the system - optical input
 |
View all Bose Lifestyle 48 manuals
Add to My Manuals
Save this manual to your list of manuals |
Page 17 highlights
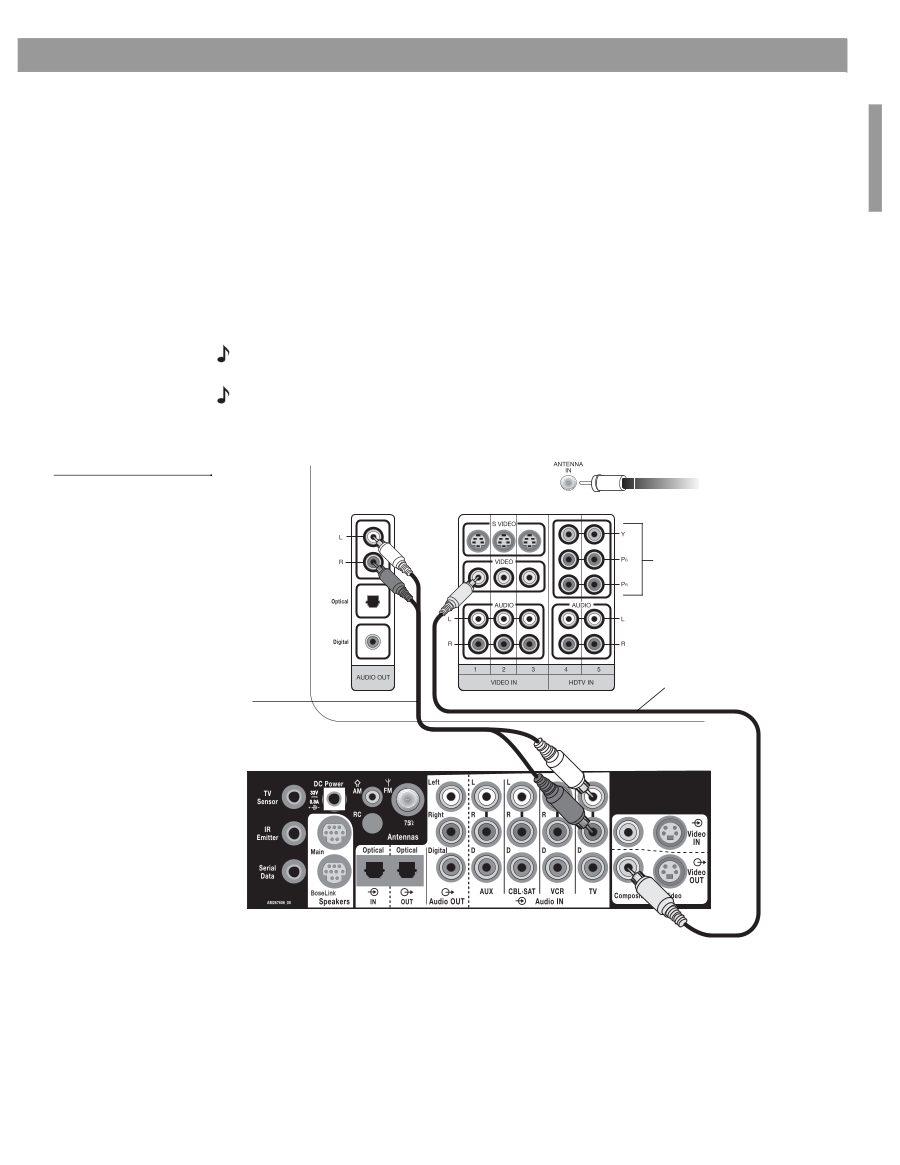
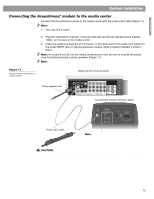
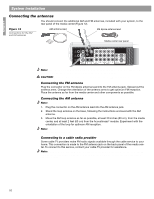
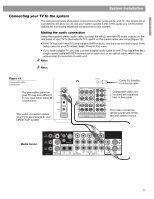
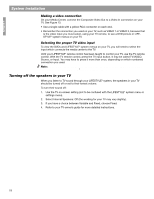
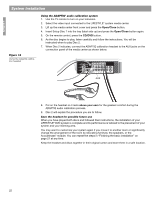
English System Installation Connecting your TV to the system The instructions below show basic connections to the media center and TV. This simple set of connections will allow you to use your system quickly. Later in this guide you will find other options for connecting additional components to your system. Making the audio connection Using the supplied stereo audio cable, connect the left (L) and right (R) audio outputs on the rear panel of your TV to the Audio IN TV L and R on the media center rear panel (Figure 12). • If the TV has both fixed (FIX) and variable (VAR) outputs, use the ones for fixed output. If the setup menu for your TV allows, select Fixed in that menu. • If you have a digital TV, you may connect a digital audio cable as well. This may either be a single coaxial cable with RCA connectors on each end, or an optical cable, which has a unique snap fit connector on each end. Note: It is important to provide the analog connection along with the digital, to prevent a loss of sound caused by any temporary degradation of the digital signal. Note: On the TV, be sure to notice which Video IN jack is used. In the example below, the media center Video OUT is connected to the VIDEO 1 input on the TV. In this case, use your TV remote control to select VIDEO 1 to view DVDs and see LIFESTYLE® system menus. Figure 13 Composite video connection TV Cable TV, Satellite, or Antenna cable The connection panel on your TV may look different. It may have fewer Video IN connections Component video connections are explained later in this guide This audio connection allows your TV to send sound to your LIFESTYLE® system This video connection allows you to view DVDs and see system menus Media Center 17
-
 1
1 -
2
-
3
-
4
-
5
-
6
-
7
-
8
-
9
-
10
-
11
-
 12
12 -
 13
13 -
 14
14 -
 15
15 -
 16
16 -
 17
17 -
 18
18 -
 19
19 -
 20
20 -
 21
21 -
 22
22 -
23
-
24
-
25
-
26
-
27
-
28
-
29
-
30
-
31
-
32
-
33
-
34
-
35
-
36
 |
 |