Brother International 925D Users Manual - Multi - Page 66
Cuchillas superior e, inferior
 |
View all Brother International 925D manuals
Add to My Manuals
Save this manual to your list of manuals |
Page 66 highlights
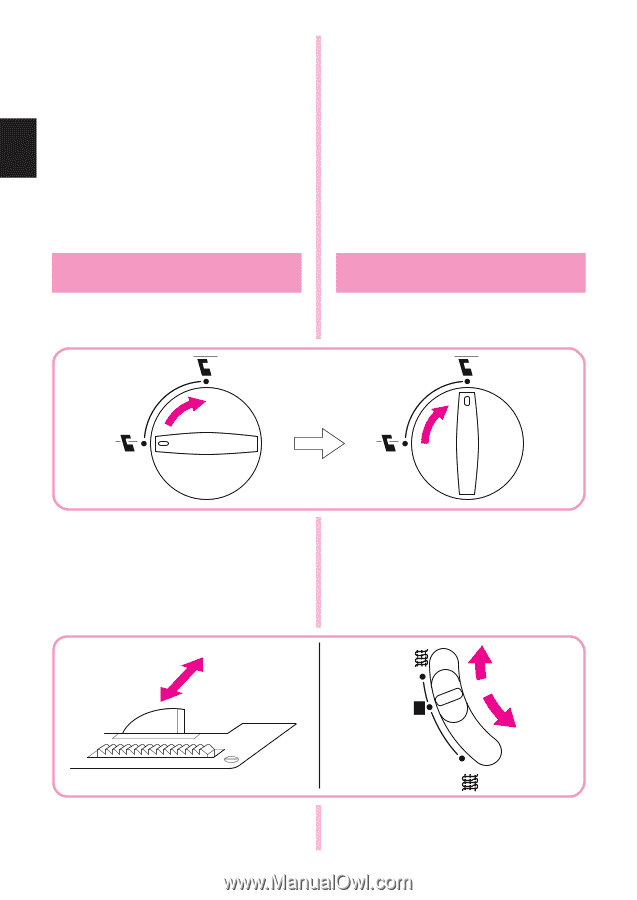
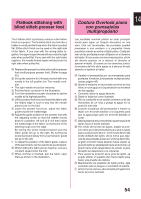
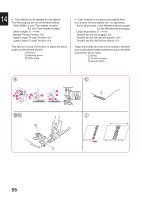
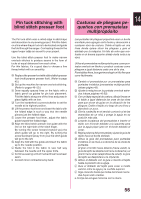
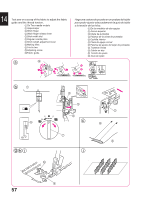
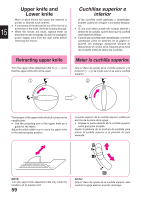
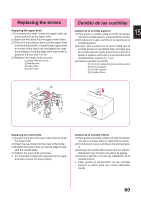
15 Upper knife and Lower knife Worn or blunt knives will cause the material to pucker or stitches to be uneven. • If one strand of thread can be cut off in front of or at the rear of the knife, the knife is sharp enough. • When the knives are blunt, replace them as described on the next page. Be sure to unplug the power supply cord from the wall outlet before removing the knives. Cuchillas superior e inferior Si las cuchillas están gastadas o desafiladas, pueden ocasionar arrugas o puntadas desiguales. • Si una sola hebra puede ser cortada delante o detrás de la cuchilla, quiere decir que la cuchilla está bastante afilada. • Cuando las cuchillas están desafiladas, conviene cambiarlas como se describe en la página siguiente. Sin embargo, asegúrese siempre de desconectar el cordón de la máquina de la toma de corriente antes de retirar las cuchillas. Retracting upper knife Turn the upper knife adjustment dial to 1 → 2 so that the upper knife will not be used. 1 Meter la cuchilla superior. Gire el disco de ajuste de la cuchilla superior a la posición 1 → 2 de modo que no se use la cuchilla superior. 2 The top part of the upper knife will stick out above the needle plate. • Use the projecting part of the upper knife as a guide for the fabric. Adjust the stitch width lever to move the upper knife to the desired guide position. La parte superior de la cuchilla superior saldrá por encima de la placa de la aguja. • Emplee la parte saliente de la cuchilla superior como guía para el tejido. Ajuste la palanca de la anchura de puntada para mover la cuchilla superior a la posición de guía deseada. R 5 6 NOTE: Turn the upper knife adjustment dial only while the needle is at its lowest point. 59 NOTA: Gire el disco de ajuste de la cuchilla superior sólo cuando la aguja esté en el punto más bajo.
-
 1
1 -
2
-
3
-
4
-
5
-
6
-
7
-
8
-
9
-
10
-
11
-
12
-
13
-
14
-
15
-
16
-
17
-
18
-
19
-
20
-
21
-
22
-
23
-
24
-
25
-
26
-
27
-
28
-
29
-
30
-
31
-
32
-
33
-
34
-
35
-
36
-
37
-
38
-
39
-
40
-
41
-
42
-
43
-
44
-
45
-
46
-
47
-
48
-
49
-
50
-
51
-
52
-
53
-
54
-
55
-
56
-
57
-
58
-
59
-
60
-
 61
61 -
 62
62 -
 63
63 -
 64
64 -
 65
65 -
 66
66 -
 67
67 -
 68
68 -
 69
69 -
 70
70 -
 71
71 -
72
-
73
 |
 |