Brother International BAS-342G Thread Break Detector Instruction Manual - Engl - Page 4
de hilo del brazo 6 y la guía de hilo de barra de agujas 7.
 |
View all Brother International BAS-342G manuals
Add to My Manuals
Save this manual to your list of manuals |
Page 4 highlights
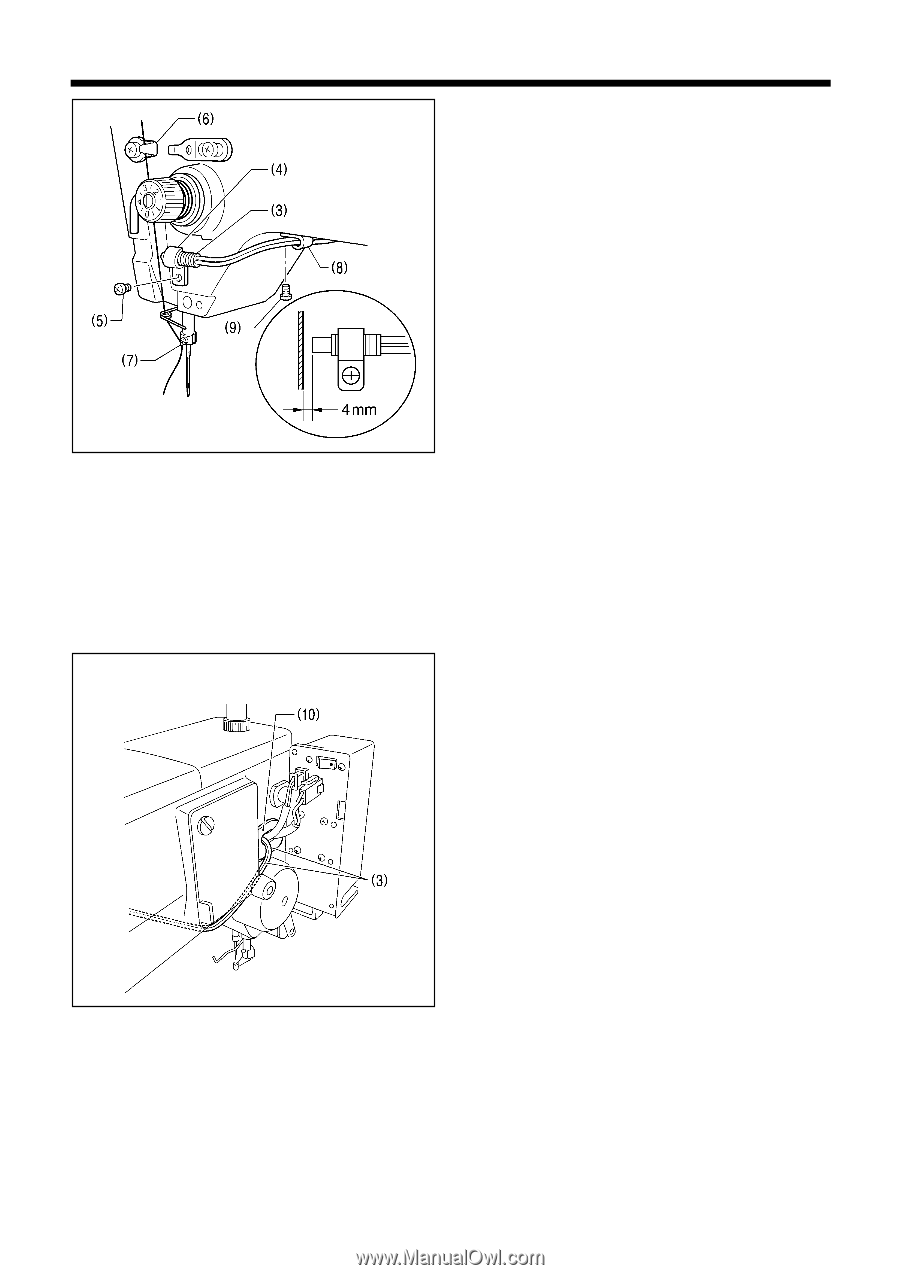
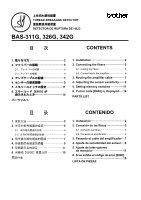
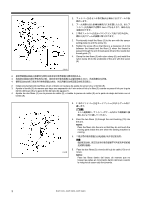
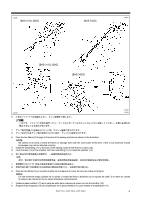
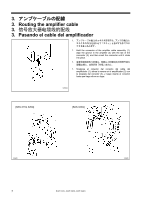
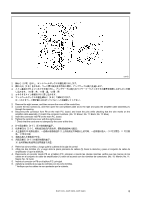
2 3 4 5 3 6 7 3 4mm 5 4. 2 3 8 9 2. Provisionally install the fibers (3) to the arm with the sensor setting plate (4) and the screw (5). 3. Tighten the screw (5) so that there is a clearance of 4 mm between the thread and the fiber (3) when the thread is passed through the arm thread guide (6) and the needle bar thread guide (7). 4. Clamp the two fibers (3) with nylon clamp (8), and install the nylon clamp (8) to the underside of the arm with the screw (9). 1361B 2 4)和螺钉(5 3 3 6 7 3 4mm 5)拧紧。 4 8 3 9 2. Instale provisoriamente las fibras (3) en el brazo con la placa de ajuste de sensor (4) y el tornillo (5). 3. Apriete el tornillo (5) de manera que haya una separación de 4 mm entre el hilo y la fibra (3) cuando se pasa el hilo por la guía de hilo del brazo (6) y la guía de hilo de barra de agujas (7). 4. Apriete las dos fibras (3) con la prensa de nailón (8), e instale la prensa de nailón (8) en la parte de abajo del brazo con el tornillo (9). 1362B 5. 2 3 10 5. Pass the two fibers (3) through the cord bushing (10) into the arm. NOTE: Pass the fibers into the arm so that they do not touch the moving parts inside the arm when the sewing machine is running. 5 3 10 5. Pase las dos fibras (3) a través del buje de cable (10) en el brazo. NOTA: Pase las fibras dentro del brazo de manera que no toquen las partes en movimiento dentro del brazo cuando la máquina de coser está funcionando. 3 BAS-311G, BAS-326G, BAS-342G
-
 1
1 -
 2
2 -
 3
3 -
 4
4 -
 5
5 -
 6
6 -
 7
7 -
 8
8 -
 9
9 -
 10
10 -
11
-
12
-
13
-
14
-
15
-
16
-
17
-
18
-
19
-
20
 |
 |