Brother International BAS-342G Thread Break Detector Instruction Manual - Engl - Page 7
Connecting to the amplifier, 2. Conexión al amplificador
 |
View all Brother International BAS-342G manuals
Add to My Manuals
Save this manual to your list of manuals |
Page 7 highlights
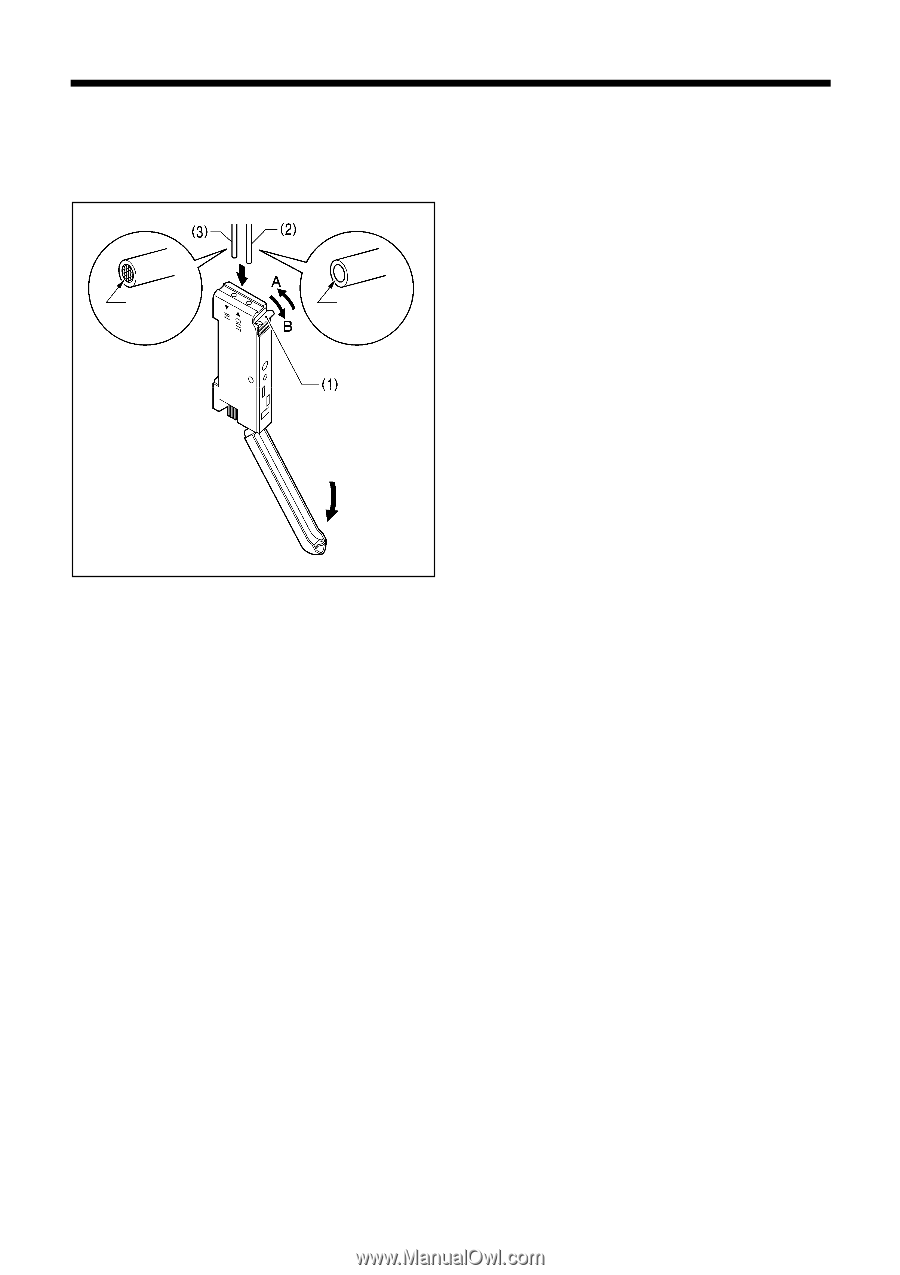
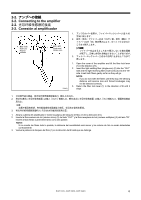
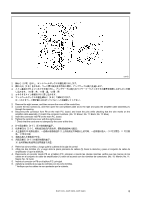
2-2 2-2. Connecting to the amplifier 2-2 2-2. Conexión al amplificador Multi-core/ Núcleos múltiples Single-core/ Núcleo único 5264Q 1 1)を A 2 2)を「OUT 3)を「IN 3 1)を B 1. Open the cover of the amplifier and tilt the fiber lock lever (1) in the direction of A. 2. Insert the light emitting fiber (single-core) (2) into the "OUT" side and the light receiving fiber (multi-core) (3) into the "IN" side. Insert both fibers gently as far as they will go. NOTE: If you do not insert the fibers until they stop, the sensing distance will become less and thread breakages may not be detected correctly. 3. Return the fiber lock lever (1) in the direction of B until it stops. 1 1) 推向 A 2 2)插入「OUT 3)插入「IN 底为止。 3 1) 向 B 1. Abra la cubierta del amplificador e incline la palanca de bloqueo de fibra (1) en la dirección de A. 2. Inserte la fibra emisora de luz (núcleo único) (2) del lado "OUT" y la fibra receptora de luz (núcleos múltiples) (3) del lado "IN". Inserte ambas fibras suavemente tanto como sea posible. NOTA: Si no inserta las fibras todo lo posible, la distancia del sensibilidad será menor y las roturas de hilo no serán detectadas correctamente. 3. Vuelva la palanca de bloqueo de fibra (1) en la dirección de B hasta que se detenga. BAS-311G, BAS-326G, BAS-342G 6
-
 1
1 -
 2
2 -
 3
3 -
 4
4 -
 5
5 -
 6
6 -
 7
7 -
 8
8 -
 9
9 -
 10
10 -
 11
11 -
 12
12 -
13
-
14
-
15
-
16
-
17
-
18
-
19
-
20
 |
 |