Brother International BAS-342G Thread Break Detector Instruction Manual - Engl - Page 5
BAS-311G, 326G], BAS-342G]
 |
View all Brother International BAS-342G manuals
Add to My Manuals
Save this manual to your list of manuals |
Page 5 highlights
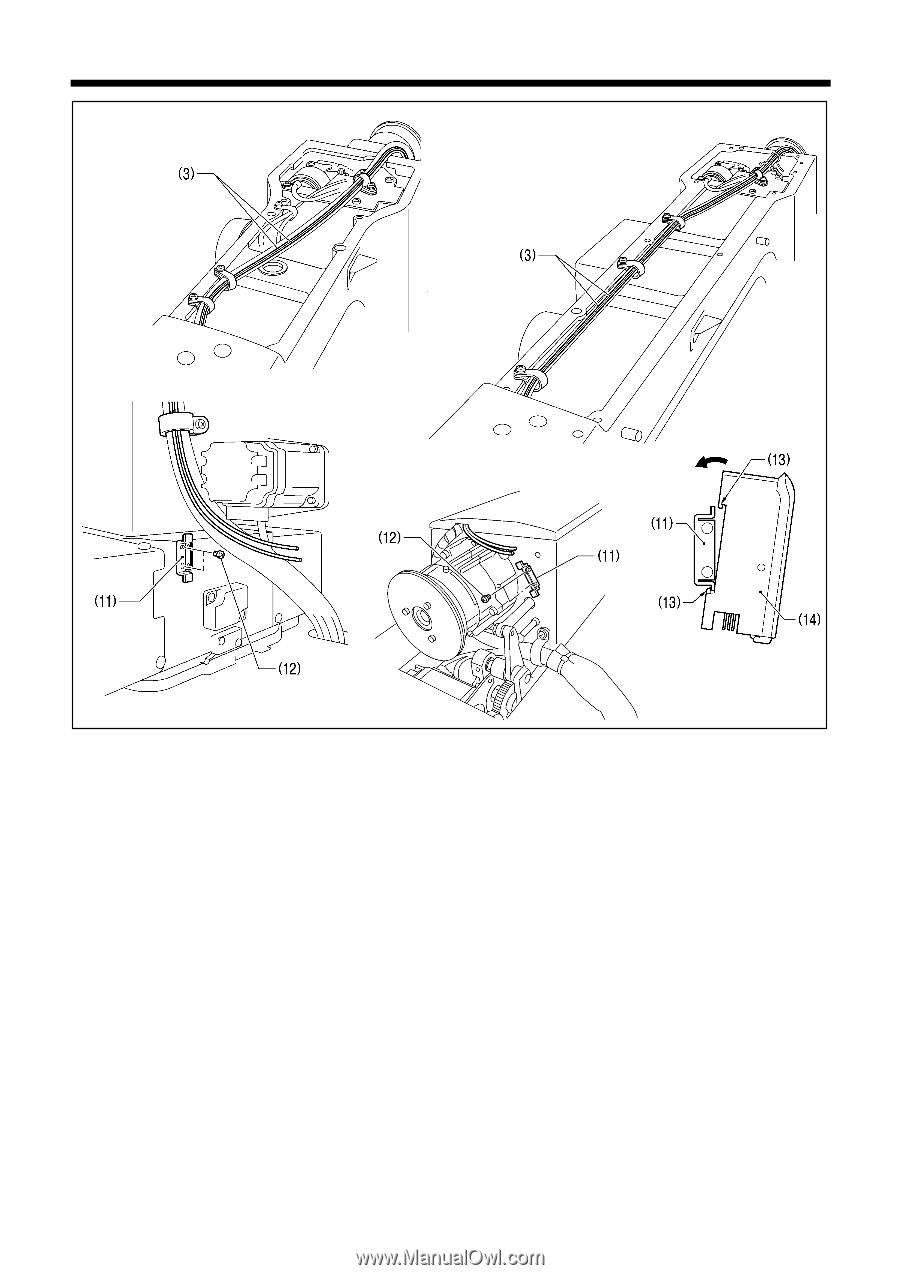
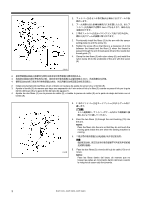
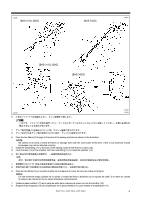
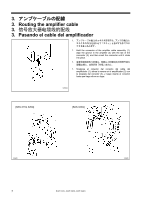
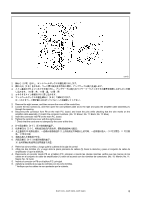
1363B [BAS-311G, 326G] [BAS-342G] 1328B [BAS-311G, 326G] [BAS-342G] 1364B 1350B 1329B 6. 2 3 7 11 12)[2 8 13 11 14 6. Pass the two fibers (3) through to the back of the sewing machine as shown in the illustration. NOTE: Be careful not to bend or break the fibers or damage them with the cord holder at this time. If this is not observed, thread breakages may not be detected correctly. 7. Install the metal fitting (11) to the back of the sewing machine with the two screws (12). 8. Hook the tabs (13) of the amplifier onto the metal fitting (11) to install the amplifier (14). 6. 将 2 3 7 12)[2 11 8 13 11 14)。 6. Pase las dos fibras (3) por la parte de atrás de la máquina de coser tal como se indica en la figura. NOTA: En este momento tenga cuidado de no doblar o romper las fibras o dañarlas con el soporte de cable. Si no tiene en cuenta lo anterior, las roturas de hilo no serán detectadas correctamente. 7. Instale la pieza metálica (11) en la parte de atrás de la máquina de coser con los dos tornillos (12). 8. Enganche las lengüetas (13) del amplificador en la pieza metálica (11) para instalar el amplificador (14). BAS-311G, BAS-326G, BAS-342G 4
-
 1
1 -
 2
2 -
 3
3 -
 4
4 -
 5
5 -
 6
6 -
 7
7 -
 8
8 -
 9
9 -
 10
10 -
 11
11 -
12
-
13
-
14
-
15
-
16
-
17
-
18
-
19
-
20
 |
 |