Brother International MFC 795CW Software Users Manual - English - Page 178
Guidelines for Auto Crop, Photo Capture, Black Start, Color Start, DCP-375CW
 |
UPC - 012502623311
View all Brother International MFC 795CW manuals
Add to My Manuals
Save this manual to your list of manuals |
Page 178 highlights
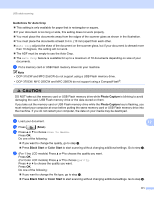
USB cable scanning Guidelines for Auto Crop 12 „ This setting is only available for paper that is rectangular or square. „ If your document is too long or wide, this setting does not work properly. „ You must place the documents away from the edges of the scanner glass as shown in the illustration. „ You must place the documents at least 0.4 in. (10 mm) apart from each other. „ Auto Crop adjusts the skew of the document on the scanner glass, but if your document is skewed more than 10 degrees, this setting will not work. „ The ADF must be empty to use the Auto Crop. „ The Auto Crop feature is available for up to a maximum of 16 documents depending on size of your documents. a Put a memory card or USB Flash memory drive into your machine. Note • DCP-375CW and MFC-255CW do not support using a USB Flash memory drive. • DCP-375CW, MFC-255CW and MFC-295CN do not support using a CompactFlash®. CAUTION DO NOT take out the memory card or USB Flash memory drive while Photo Capture is blinking to avoid damaging the card, USB Flash memory drive or the data stored on them. If you take out the memory card or USB Flash memory drive while the Photo Capture key is flashing, you must restart your computer at once before putting the same memory card or USB Flash memory drive into the machine. If you do not restart your computer, the data on your media may be destroyed. b Load your document. 12 c Press (Scan). d Press a or b to choose Scan to Media. Press OK. Do one of the following: „ If you want to change the quality, go to step e. „ Press Black Start or Color Start to start scanning without changing additional settings. Go to step h. e (For 1 line LCD models) Press a or b to choose the quality you want. Press OK. (For Color LCD models) Press a or b to choose Quality. Press d or c to choose the quality you want. Press OK. Do one of the following: „ If you want to change the file type, go to step f. „ Press Black Start or Color Start to start scanning without changing additional settings. Go to step h. 171
-
 1
1 -
2
-
3
-
4
-
5
-
6
-
7
-
8
-
9
-
10
-
11
-
12
-
13
-
14
-
15
-
16
-
17
-
18
-
19
-
20
-
21
-
22
-
23
-
24
-
25
-
26
-
27
-
28
-
29
-
30
-
31
-
32
-
33
-
34
-
35
-
36
-
37
-
38
-
39
-
40
-
41
-
42
-
43
-
44
-
45
-
46
-
47
-
48
-
49
-
50
-
51
-
52
-
53
-
54
-
55
-
56
-
57
-
58
-
59
-
60
-
61
-
62
-
63
-
64
-
65
-
66
-
67
-
68
-
69
-
70
-
71
-
72
-
73
-
74
-
75
-
76
-
77
-
78
-
79
-
80
-
81
-
82
-
83
-
84
-
85
-
86
-
87
-
88
-
89
-
90
-
91
-
92
-
93
-
94
-
95
-
96
-
97
-
98
-
99
-
100
-
101
-
102
-
103
-
104
-
105
-
106
-
107
-
108
-
109
-
110
-
111
-
112
-
113
-
114
-
115
-
116
-
117
-
118
-
119
-
120
-
121
-
122
-
123
-
124
-
125
-
126
-
127
-
128
-
129
-
130
-
131
-
132
-
133
-
134
-
135
-
136
-
137
-
138
-
139
-
140
-
141
-
142
-
143
-
144
-
145
-
146
-
147
-
148
-
149
-
150
-
151
-
152
-
153
-
154
-
155
-
156
-
157
-
158
-
159
-
160
-
161
-
162
-
163
-
164
-
165
-
166
-
167
-
168
-
169
-
170
-
171
-
172
-
 173
173 -
 174
174 -
 175
175 -
 176
176 -
 177
177 -
 178
178 -
 179
179 -
 180
180 -
 181
181 -
 182
182 -
 183
183 -
184
-
185
-
186
-
187
-
188
-
189
-
190
-
191
-
192
-
193
-
194
-
195
-
196
-
197
-
198
 |
 |
