Canon EOS Rebel T1i EOS Utility 2.9 for Macintosh Instruction Manual - Page 45
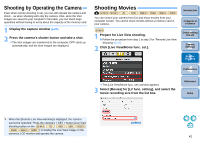
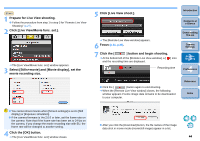
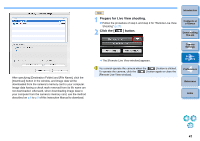
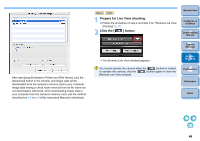
Prepare for Live View shooting., Click the [OK] button.
 |
View all Canon EOS Rebel T1i manuals
Add to My Manuals
Save this manual to your list of manuals |
Page 45 highlights
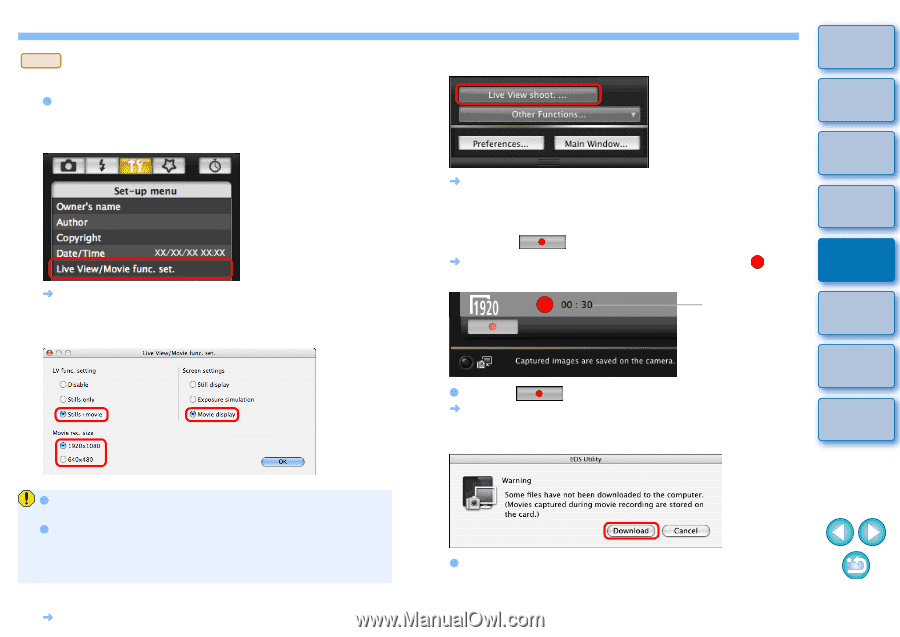
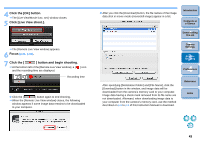
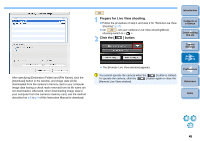
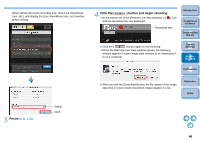
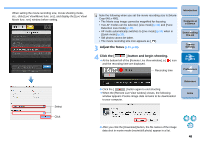
5D Mk II 1 Prepare for Live View shooting. O Follow the procedure from step 1 to step 3 for "Remote Live View Shooting" (p.27). 2 Click [Live View/Movie func. set.]. ¿ The [Live View/Movie func. set.] window appears. 3 Select [Stills+movie] and [Movie display], set the movie recording size. 5 Click [Live View shoot.]. Introduction Contents at a Glance ¿ The [Remote Live View window] appears. 6 Focus (p.31, p.33). 7 Click the [ ] button and begin shooting. ¿ At the bottom left of the [Remote Live View window], a [ ] icon and the recording time are displayed. Recording time 1 Downloading Images 2Camera Settings 3Remote Shooting 4 Preferences O Click the [ ] button again to end shooting. ¿ When the [Remote Live View window] closes, the following window appears if some image data remains to be downloaded to your computer. Reference Index O You cannot shoot movies when [Screen settings] is set to [Still display] or [Exposure simulation]. O If the camera firmware is Ver.2.0.0 or later, set the frame rate on the camera. Note that if the frame rate has been set to 24 fps on the camera, if you change the movie recording size with EU, the frame rate will be changed to another setting. 4 Click the [OK] button. ¿ The [Live View/Movie func. set.] window closes. O After you click the [Download] button, the file names of the image data shot in movie mode (movie/still image) appear in a list. 44
-
 1
1 -
2
-
3
-
4
-
5
-
6
-
7
-
8
-
9
-
10
-
11
-
12
-
13
-
14
-
15
-
16
-
17
-
18
-
19
-
20
-
21
-
22
-
23
-
24
-
25
-
26
-
27
-
28
-
29
-
30
-
31
-
32
-
33
-
34
-
35
-
36
-
37
-
38
-
39
-
 40
40 -
 41
41 -
 42
42 -
 43
43 -
 44
44 -
 45
45 -
 46
46 -
 47
47 -
 48
48 -
 49
49 -
 50
50 -
51
-
52
-
53
-
54
-
55
-
56
-
57
-
58
-
59
-
60
-
61
-
62
-
63
-
64
-
65
-
66
-
67
-
68
-
69
-
70
-
71
-
72
-
73
-
74
-
75
-
76
-
77
-
78
-
79
-
80
-
81
-
82
 |
 |