Canon MultiPASS C530 User Manual
Canon MultiPASS C530 Manual
 |
View all Canon MultiPASS C530 manuals
Add to My Manuals
Save this manual to your list of manuals |
Canon MultiPASS C530 manual content summary:
- Canon MultiPASS C530 | User Manual - Page 1
COLOR BUBBLE JET™ PRINTER FAX • SCANNER • COPIER C530/C560 Stand-alone Fax Manual - Canon MultiPASS C530 | User Manual - Page 2
Canon Computer Systems, Inc. Disclaimer Canon Computer Systems, Inc. has reviewed this manual thoroughly in order to make it an easy to use guide for your Canon MultiPASS products. All software is licensed AS IS, as described in the license agreement enclosed with the software media. Further, - Canon MultiPASS C530 | User Manual - Page 3
BCI, BJ, Bubble Jet, MultiPASS, ScanGear, and UHQ are trademarks and SelectExchange is a service mark of Canon Inc. All other product and brand names are trademarks or service marks of their respective owners. ENERGY STAR® COMPLIANT As an ENERGY STAR® Partner, Canon U.S.A., Inc. has determined that - Canon MultiPASS C530 | User Manual - Page 4
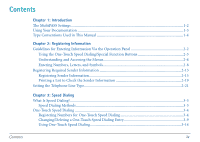
Contents Chapter 1: Introduction The MultiPASS Settings ...1-2 Using Your Documentation ...1-3 Type Conventions Used in This Manual 1-4 Chapter 2: Registering Information Guidelines for Entering Information Via the Operation Panel 2-2 Using the One-Touch Speed Dialing/Special Function Buttons 2-3 - Canon MultiPASS C530 | User Manual - Page 5
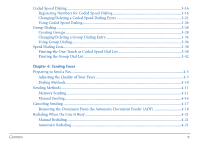
Touch or Coded Speed Dial List 3-38 Printing the Group Dial List ...3-42 Chapter 4: Sending Faxes Preparing to Send a Fax...4-3 Adjusting the Quality of Your Faxes 4-3 Dialing Methods...4-10 Sending Methods ...4-11 Memory Sending...4-11 Manual Sending ...4-14 Canceling Sending ...4-17 Removing the - Canon MultiPASS C530 | User Manual - Page 6
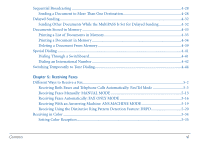
Different Ways to Receive a Fax ...5-2 Receiving Both Faxes and Telephone Calls Automatically: Fax/Tel Mode 5-3 Receiving Faxes Manually: MANUAL MODE 5-13 Receiving Faxes Automatically: FAX ONLY MODE 5-16 Receiving With an Answering Machine: ANS.MACHINE MODE 5-19 Receiving Using the Distinctive - Canon MultiPASS C530 | User Manual - Page 7
Receiving While Registering, Copying, or Printing 5-37 Receiving Faxes in Memory When a Problem Occurs 5-37 Canceling Receiving...5-41 Chapter 6: Reports and Lists Summary of Lists and Reports...6-2 Abbreviations Used in Transaction Reports 6-4 Activity Report ...6-5 Transmission (TX) Reports - Canon MultiPASS C530 | User Manual - Page 8
Settings...7-5 Accessing the User Settings Menu 7-5 User Settings Menu...7-7 Report Settings...7-8 Accessing the Report Settings Menu 7-14 RX Settings Menu ...7-16 Printer Settings...7-17 Accessing the Printer Settings Menu 7-17 Printer Settings Menu...7-19 System Settings...7-20 Accessing the - Canon MultiPASS C530 | User Manual - Page 9
operation panel to control your MultiPASS. For paper handling, printing, document handling, maintenance, troubleshooting, specifications, and other information regarding the MultiPASS, see the MultiPASS C530/C560 User's Manual. ❏ The MultiPASS Settings ...1-2 ❏ Using Your Documentation...1-3 ❏ Type - Canon MultiPASS C530 | User Manual - Page 10
connected to a PC. Method 2: Using the MultiPASS Desktop Manager You can adjust settings using the MultiPASS Desktop Manager software included with your MultiPASS. For detailed instructions refer to the online MultiPASS Desktop Manager Software Guide (in Adobe® Acrobat® format). Before adjusting - Canon MultiPASS C530 | User Manual - Page 11
Manager for Windows®, ScanGear™ for MultiPASS, and the MultiPASS Printer Driver. This software enables you to use all the features of the MultiPASS - color printing, color copying, color faxing, PC faxing, and color scanning. I MultiPASS C530/C560 User's Manual - This online manual offers detailed - Canon MultiPASS C530 | User Manual - Page 12
I MultiPASS C530/C560 Stand-alone Fax Manual - This online manual describes how you use the operation panel on the MultiPASS to control all your faxing and receiving functions. If you decide not to install the MultiPASS Desktop Manager, you can still use many of the features of the MultiPASS. In - Canon MultiPASS C530 | User Manual - Page 13
abbreviation used for transaction number. Denotes receiving. Denotes sending. In addition, this manual uses distinctive typefaces to identify the buttons you press, the lights on the operation For a complete glossary of terms, see the MultiPASS C530/C560 User's Manual. Chapter 1 Introduction 1-5 - Canon MultiPASS C530 | User Manual - Page 14
instructions for entering your sender information, which is required before using your unit. n If you are using the MultiPASS Desktop Manager, you will not need this information. This information is provided for those using the MultiPASS as a stand-alone fax machine 2-15 G Printing a List to - Canon MultiPASS C530 | User Manual - Page 15
find information on entering numbers, letters, and symbols to register fax/telephone numbers and names. When entering information, always keep the MultiPASS is set for manual receiving and the unit rings while you are entering information, press the Stop button and lift the telephone. The MultiPASS - Canon MultiPASS C530 | User Manual - Page 16
. I One-Touch Speed Dialing Buttons Use the buttons marked 01 to 12 to dial fax/telephone numbers registered under these buttons. I Special Function Buttons To access the special functions + 09 Report 10 11 12 Cleaning Clear Function Set Resume Chapter 2 Registering Information 2-3 - Canon MultiPASS C530 | User Manual - Page 17
you to register important information and set up different features of your MultiPASS. This section describes the general procedure for displaying and accessing the menus Registration. Data Registration DATA REGSTRATION Set 3. Press Set. USER SETTINGS Chapter 2 Registering Information 2-4 - Canon MultiPASS C530 | User Manual - Page 18
You can select from the following menus: G USER SETTINGS menu Contains important settings such as date and time setup, and registration of the sender information that should See page 7-14.) G PRINTER SETTINGS menu Use these settings to customize how the unit prints. (See page 7-17.) Registering Information - Canon MultiPASS C530 | User Manual - Page 19
G SYSTEM SETTINGS menu Use these settings to set up system defaults such as the date format, the language for the LCD display, and the transaction speeds. (See page 7-20.) Set 5. Press Set to access the settings under the menu you selected. Ex: ECM RX 08 02 6. Use d or u to select the setting - Canon MultiPASS C530 | User Manual - Page 20
Set 9. Press Set to register the setting or entry. I If you access additional settings, repeat the above procedure from step 6. Stop 10. When you have finished changing settings, press Stop to return to standby mode. Ex: 12/27 FaxTel Returning to a Previous Level To return to a previous level - Canon MultiPASS C530 | User Manual - Page 21
Entering Numbers, Letters, and Symbols Each numeric button has a number and a group of uppercase and lowercase letters assigned to it. Use the chart below to determine which numeric button to press for each character. Button 1 ABC 2 DEF 3 GHI 4 JKL 5 MNO 6 PRS 7 TUV 8 WXY 9 OPER 0 SYMBOLS # - Canon MultiPASS C530 | User Manual - Page 22
Changing Between Number Mode and Letter Mode Use the T button to change between number mode and letter mode. When you are in number mode, "1" appears on the right of the LCD display. Tone _ :1 When you are in letter mode, "A" appears on the right of the LCD display. _ :A Entering Letters 1. - Canon MultiPASS C530 | User Manual - Page 23
ABC 12 GHI 4 JKL 5 PRS 7 TUV 8 OPER 0 Tone DEF 3 MNO 6 WXY 9 SYMBOLS # 2. Press the appropriate numeric button to enter the letter. I Keep pressing the button until the letter you want appears. If you go past the letter you want, you will have to keep on pressing the button until it - Canon MultiPASS C530 | User Manual - Page 24
7 TUV 8 OPER 0 Tone DEF 3 MNO 6 WXY 9 SYMBOLS # 2. Press the appropriate numeric button to enter the number. I To enter a space, press Space. Ex: CANON 1_ :1 ABC 12 GHI 4 JKL 5 PRS 7 TUV 8 OPER 0 Tone DEF 3 MNO 6 WXY 9 SYMBOLS # 3. Use the numeric buttons to enter other numbers. Ex - Canon MultiPASS C530 | User Manual - Page 25
OPER 0 Tone DEF 3 MNO 6 WXY 9 SYMBOLS # Set 2. Use the numeric buttons to enter the correct character over the incorrect character. Ex: CANON :A 3. When you have finished making corrections, press Set to register your new entry. n Alternatively, you can press the Clear button to delete the - Canon MultiPASS C530 | User Manual - Page 26
I Your personal name or company name I The time and date of transmission Your MultiPASS has been designed to print this information at the top of every fax you send. You must, therefore, register your unit's telephone/fax number, your personal name or company name, and the current date and time - Canon MultiPASS C530 | User Manual - Page 27
printed on a received fax. 12/27/2000 10:12 FAX 123 4567 CANON CANON CANADA 001 DATE AND TIME Date and time of transmission. FAX/TELEPHONE NUMBER Your fax/telephone number. You can select FAX fax. THE SLEREXE COMPANY LIMITED SAPORS LANE•BOOLE•DORSET•BH25 8ER TELEPHONE BOOLE (945 13) 51617 - FAX - Canon MultiPASS C530 | User Manual - Page 28
set the current date and time, register the fax/telephone number of your MultiPASS, and register your name or company name. Function 1. Press Function. 01 2. Press Data Registration. Data Registration DATA REGSTRATION Set 3. Press Set. USER SETTINGS Set 4. Press Set. DATE & TIME Chapter - Canon MultiPASS C530 | User Manual - Page 29
Set 5. Press Set. I The date and time currently set for the unit are displayed. Ex: 12/20/2000 13:30 ABC 12 GHI 4 JKL 5 PRS 7 TUV 8 OPER 0 Tone DEF 3 MNO 6 WXY 9 SYMBOLS # 6. Use the numeric buttons to enter the correct month, day, year, and time. Ex: 12/27/2000 15:00 I Enter the new date - Canon MultiPASS C530 | User Manual - Page 30
. UNIT TELEPHONE # I If you only need to adjust the date and time, press Stop after this step to return to standby mode. To register your fax/telephone number and name, continue with the steps that follow. Set 8. Press Set again. TEL= ABC 12 GHI 4 JKL 5 PRS 7 TUV 8 OPER 0 Tone DEF 3 MNO - Canon MultiPASS C530 | User Manual - Page 31
UNIT NAME I If you only need to change the fax/telephone number, press Stop after this step to return name or company name. Ex: CANON :A I Your name can be up to 24 characters long (including spaces). I To enter letters, numbers, and symbols, refer to the instructions on page 2-8. I To switch - Canon MultiPASS C530 | User Manual - Page 32
a List to Check the Sender Information To check the sender information you have registered in the MultiPASS and to check the current settings of your unit, you can print the User's Data List. Function Follow this procedure: 1. Press Function. 07 Report 2. Press Report. ACTIVITY REPORT Chapter - Canon MultiPASS C530 | User Manual - Page 33
4. Press Set. PRINTING REPORT I The MultiPASS begins printing the User's Data List. I You can find the sender information registered in the MultiPASS at the beginning of the list. The current settings of your unit are listed after this. 12/27/2000 17:23 FAX 123 4567 CANON 001 USER'S DATA LIST - Canon MultiPASS C530 | User Manual - Page 34
Setting the Telephone Line Type In order to operate your MultiPASS, you must know if your unit is connected to a tone 2. Press Data Registration. Data Registration DATA REGSTRATION Set 3. Press Set. USER SETTINGS Set 4. Press Set again. DATE & TIME Chapter 2 Registering Information 2-21 - Canon MultiPASS C530 | User Manual - Page 35
08 02 Set 08 02 Set Stop 5. Use d or u to select TEL LINE TYPE. TEL LINE TYPE 6. Press Set. I The current line type setting is displayed. TOUCH TONE 7. Use d or u to select ROTARY PULSE. ROTARY PULSE 8. Press Set to register the new line type. REPORT SETTINGS 9. Press Stop to return to - Canon MultiPASS C530 | User Manual - Page 36
n This chapter describes how to register and use the speed dialing features of your MultiPASS when you are using the unit as a stand-alone fax. If you are using the MultiPASS Desktop Manager software, you can set and control all the speed dialing features through the Desktop Manager. ❏ What - Canon MultiPASS C530 | User Manual - Page 37
❏ Group Dialing ...3-28 G Creating Groups ...3-28 G Changing/Deleting a Group Dialing Entry 3-34 G Using Group Dialing...3-36 ❏ Speed Dialing Lists...3-38 G Printing the One-Touch or Coded Speed Dial List 3-38 G Printing the Group Dial List 3-42 Chapter 3 Speed Dialing 3-2 - Canon MultiPASS C530 | User Manual - Page 38
and customize dialing procedures by registering a fax/ telephone number and name under a button or code. You can then dial that number by pressing only one or a few buttons. Speed Dialing Methods The three speed dialing methods available with your MultiPASS are as follows. One-Touch Speed Dialing - Canon MultiPASS C530 | User Manual - Page 39
Speed Dialing Registering Numbers for One-Touch Speed Dialing One-touch speed dialing allows you to dial a fax/telephone number at the press of one button. You can register up to 12 fax/telephone numbers; one for every one-touch speed dialing button on the operation panel. Function Follow this - Canon MultiPASS C530 | User Manual - Page 40
08 02 Set Set 08 02 3. Use d or u to select TEL REGISTRATION. TEL REGISTRATION 4. Press Set. 1-TOUCH SPD DIAL 5. Press Set again. 01= 6. Use d or u to select a one-touch speed dialing button from 01 to 12. Ex: 04= I If a one-touch speed dialing button has already been registered, the number - Canon MultiPASS C530 | User Manual - Page 41
ABC 12 GHI 4 JKL 5 PRS 7 TUV 8 OPER 0 Tone DEF 3 MNO 6 WXY 9 SYMBOLS # 9. Use the numeric buttons to enter the fax/telephone number you want to register. Ex: TEL=20 545 8545_ I The fax/telephone number can be up to 120 digits long (including spaces and pauses). I To enter a space, press Space - Canon MultiPASS C530 | User Manual - Page 42
DEF 3 MNO 6 WXY 9 SYMBOLS # 12. Use the numeric buttons to enter the name that goes with the number. Ex: Canon EUROPA :A I The name can be up to 16 characters long (including spaces). I To enter letters, numbers, and symbols, refer to the instructions on page 2-8. Chapter 3 Speed Dialing 3-7 - Canon MultiPASS C530 | User Manual - Page 43
from step 6. -or- Stop To finish registering one-touch speed dialing entries, press Stop to return to standby mode. Ex: 12/27 FaxTel n You can print the one-touch speed dial list showing all the numbers and names registered for one-touch speed dialing (see page 3-38). Keep this list near - Canon MultiPASS C530 | User Manual - Page 44
Changing/Deleting a One-Touch Speed Dialing Entry Function Follow this procedure to change a one-touch speed dialing entry or to delete all information registered under a button: 1. Press Function. 01 2. Press Data Registration. Data Registration DATA REGSTRATION 08 02 3. Use d or u to - Canon MultiPASS C530 | User Manual - Page 45
Set 08 02 Set Set 5. Press Set again. Ex: 01=905 795 1111 6. Use d or u to select the one-touch speed dialing button you want to change. Ex: 04= 20 545 8545 I If a group is already registered under the one-touch speed dialing button you select, GROUP DIAL appears. 7. Press Set. TELEPHONE NUMBER - Canon MultiPASS C530 | User Manual - Page 46
11 Clear To delete a number: 9. Press Clear. TEL= Set 10. Press Set. ERASING END NAME I The fax/telephone number and name registered under that button are deleted. Stop 11. Press Stop to return to standby mode. Ex: 12/27 FaxTel 11 Clear - Canon MultiPASS C530 | User Manual - Page 47
the name, ignore this step and go to the next step. Ex: TEL=2 50921_ I The fax/telephone number can be up to 120 digits long (including spaces and pauses). I To enter a entry, press Clear. Set 11. Press Set to register the fax/telephone number. DATA ENTRY OK NAME Set 12. Press Set again. Ex - Canon MultiPASS C530 | User Manual - Page 48
to keep the same name, ignore this step and go to the next step. Ex: Canon ITALIA :A I The name can be up to 16 characters long (including spaces). I To enter letters, numbers, and symbols, refer to the instructions on page 2-8. Set 14. Press Set to register the name. DATA ENTRY OK Ex - Canon MultiPASS C530 | User Manual - Page 49
I The LCD display shows the following: Currently used memory: MEMORY USED 0% Standby to scan: DOCUMENT READY I If you are sending in color to a fax machine with color capability, press Color/B&W to turn on its light (see page 4-3). I If necessary, you can adjust the resolution and contrast for your - Canon MultiPASS C530 | User Manual - Page 50
10 11 12 Cleaning Clear Function Set Resume 3. Press the one-touch speed dialing button assigned to the number to which you wish to fax. Ex: Scan to begin scanning for sending, or wait a few seconds for the MultiPASS to begin scanning automatically. I You will see a series of brief messages - Canon MultiPASS C530 | User Manual - Page 51
you press the Coded Dial button and then you enter a two-digit code under which you have registered a fax/telephone number. You can register up to 100 fax/telephone numbers for coded speed dialing. Function 1. Press Function. 01 2. Press Data Registration. Data Registration DATA REGSTRATION 08 - Canon MultiPASS C530 | User Manual - Page 52
Set 08 02 Set 08 02 4. Press Set. 1-TOUCH SPD DIAL 5. Use d or u to select CODED SPEED DIAL. CODED SPEED DIAL 6. Press Set. A00= 7. Use d or u to select a coded speed dialing code from 00 to 99. Ex: A01= I If a coded speed dialing code has already been registered, the number registered under - Canon MultiPASS C530 | User Manual - Page 53
12 GHI 4 JKL 5 PRS 7 TUV 8 OPER 0 Tone DEF 3 MNO 6 WXY 9 SYMBOLS # 10. Use the numeric buttons to enter the fax/telephone number you want to register. Ex: TEL=3 3758 2110_ I The fax/telephone number can be up to 120 digits long (including spaces and pauses). I To enter a space, press Space - Canon MultiPASS C530 | User Manual - Page 54
Tone DEF 3 MNO 6 WXY 9 SYMBOLS # 13. Use the numeric buttons to enter the name that goes with the number. Ex: Canon Inc. :A I The name can be up to 16 characters long (including spaces). I To enter letters, numbers, and symbols, refer to the instructions on page 2-8. Chapter 3 Speed Dialing 3-19 - Canon MultiPASS C530 | User Manual - Page 55
procedure from step 7. -or- Stop To finish registering coded speed dialing entries, press Stop to return to standby mode. Ex: 12/27 FaxTel n You can print the coded speed dial list showing all the numbers and names registered for coded speed dialing (see page 3-38). Keep this list near your - Canon MultiPASS C530 | User Manual - Page 56
Changing/Deleting a Coded Speed Dialing Entry Function 1. Press Function. 01 2. Press Data Registration. Data Registration DATA REGSTRATION 08 02 3. Use d or u to select TEL REGISTRATION. TEL REGISTRATION Set 4. Press Set. 1-TOUCH SPD DIAL 08 02 5. Use d or u to select CODED SPEED DIAL. - Canon MultiPASS C530 | User Manual - Page 57
Set 08 02 Set Set 6. Press Set. Ex: A00= 2131 1250 7. Use d or u to select the coded speed dialing code you want to change. Ex: A01=03 3758 2110 I If a group is already registered under the coded speed dialing code you select, GROUP DIAL appears. 8. Press Set. TELEPHONE NUMBER 9. Press Set again - Canon MultiPASS C530 | User Manual - Page 58
11 Clear To delete a number: 10. Press Clear. TEL= Set 11. Press Set. ERASING END NAME I The fax/telephone number and name registered under that code are deleted. Stop 12. Press Stop to return to standby mode. Ex: 12/27 FaxTel 11 Clear - Canon MultiPASS C530 | User Manual - Page 59
the name, ignore this step and go to the next step. Ex: TEL=3 3758 2111_ I The fax/telephone number can be up to 120 digits long (including spaces and pauses). I To enter a , press Clear. Set 12. Press Set to register the fax/telephone number. DATA ENTRY OK NAME Set 13. Press Set again. Ex - Canon MultiPASS C530 | User Manual - Page 60
to keep the same name, ignore this step and go to the next step. Ex: Canon TOKYO :A I The name can be up to 16 characters long (including spaces). I To enter letters, numbers, and symbols, refer to the instructions on page 2-8. Set 15. Press Set to register the name. DATA ENTRY OK A02 - Canon MultiPASS C530 | User Manual - Page 61
I The LCD display shows the following: Currently used memory: MEMORY USED 0% Standby to scan: DOCUMENT READY I If you are sending in color to a fax machine with color capability, press Color/B&W to turn on its light (see page 4-3). I If necessary, you can adjust the resolution and contrast for your - Canon MultiPASS C530 | User Manual - Page 62
buttons to enter the two-digit code assigned to the number to which you wish to fax. Ex: A01 Ex: TEL=03 3758 2111 I The number registered under that coded speed to begin scanning for sending, or wait a few seconds for the MultiPASS to begin scanning automatically. I You will see a series of brief - Canon MultiPASS C530 | User Manual - Page 63
Group Dialing Creating Groups If you frequently send the same document to several destinations, you can create a group of these destinations and register them under a speed dialing button or code. This enables you to press a single one-touch speed dialing button, or press the Coded Dial button and - Canon MultiPASS C530 | User Manual - Page 64
08 02 3. Use d or u to select TEL REGISTRATION. TEL REGISTRATION Set 4. Press Set. 1-TOUCH SPD DIAL 08 02 5. Use d or u to select GROUP DIAL. GROUP DIAL Set 6. Press Set. Ex: 01=1-TOUCH SPD 7. Select a one-touch speed dialing button or coded speed dialing code under which you want to - Canon MultiPASS C530 | User Manual - Page 65
08 02 To register a group under a one-touch speed dialing button: Use d or u to select the button under which you want to register the group (01 to 12). Ex: 03= I If a one-touch speed dialing button has already been registered, 1-TOUCH SPD or GROUP DIAL is displayed. -or- Coded Dial ABC 12 GHI - Canon MultiPASS C530 | User Manual - Page 66
press Function again. Function ➔ 01 02 03 Data Registration 04 05 06 Memory Reference Space + 07 08 09 Report 10 11 12 Cleaning Clear Function Set Resume ➔ Function I You cannot enter numbers not registered for one-touch speed dialing (i.e., with the numeric buttons). I You - Canon MultiPASS C530 | User Manual - Page 67
To enter a destination registered for coded speed dialing: Press Coded Dial, then enter the two-digit code assigned to the number you want to register in the group. Coded Dial ➔ ABC 12 GHI 4 JKL 5 PRS 7 TUV 8 OPER 0 Tone DEF 3 MNO 6 WXY 9 SYMBOLS # I You cannot enter numbers not registered - Canon MultiPASS C530 | User Manual - Page 68
SYMBOLS # 13. Use the numeric buttons to enter a name for the group. Ex: Canon GROUP 2_:1 I The name can be up to 16 characters long (including spaces). I To enter letters, numbers, and symbols, refer to the instructions on page 2-8. Set 14. Press Set to register the name. DATA ENTRY OK Ex: 04 - Canon MultiPASS C530 | User Manual - Page 69
for group dialing (see page 3-43). Keep this list near your MultiPASS so you can refer to it when dialing. Changing/Deleting a Group Dialing Entry If you want to change the entries in a group or delete a group, follow the instructions in Creating Groups (see page 3-28) but note the following: I To - Canon MultiPASS C530 | User Manual - Page 70
I To delete an entry from a group: G In step 7, select the group you want to make changes to. G In step 10, use the d button or u button to select the entry you want to delete, then press the Clear button. Press the Set button to register your changes, then the Stop button to return to standby mode. - Canon MultiPASS C530 | User Manual - Page 71
I The LCD display shows the following: Currently used memory: MEMORY USED 0% Standby to scan: DOCUMENT READY I If you are sending in color to fax machines with color capability, press Color/B&W to turn on its light (see page 4-3). I If necessary, you can adjust the resolution and contrast for your - Canon MultiPASS C530 | User Manual - Page 72
Memory Reference Space + 07 08 09 Report 10 11 12 Cleaning Clear Function Set Resume To enter a group registered under a Start/Scan to begin scanning for sending, or wait a few seconds for the MultiPASS to begin scanning automatically. I You will see a series of brief messages showing - Canon MultiPASS C530 | User Manual - Page 73
lists of numbers registered for one-touch and coded speed dialing, and of numbers registered for group dialing. Printing the One-Touch or Coded Speed Dial List Function 1. Press Function. 07 Report 2. Press Report. ACTIVITY REPORT 08 02 3. Use d or u to select SPEED DIAL - Canon MultiPASS C530 | User Manual - Page 74
SYMBOLS # 7. Select whether you want the list to be printed with the destinations sorted. Press T to print the list with the names of the destinations in alphabetical order. -orPress # to print the list in code or button order. I The unit begins printing the list. Samples of the lists are shown on - Canon MultiPASS C530 | User Manual - Page 75
[ 01] 905 795 1111 [ 03] GROUP DIAL [ 04] 2 50921 [ 05] 1 432 2060 CONNECTION ID Canon AUSTRALIA Canon CANADA Canon EUROPA Canon ITALIA Canon OPTICS Unsorted 12/27/2000 17:23 FAX 123 4567 CANON 001 CODED SPEED DIAL LIST *** NO. CONNECTION TEL [A 00] [A 01] [A 02] [A 03] [A 21] [A 32 - Canon MultiPASS C530 | User Manual - Page 76
49 39 25 25 GROUP DIAL 03 3758 2111 516p488 6700 81 773 3173 CONNECTION ID Canon DEUTSCH. Canon FRANCE Canon GROUP 1 Canon TOKYO Canon U.S.A. Canon UK Unsorted 12/27/2000 17:23 FAX 123 4567 CANON 001 CODED SPEED DIAL LIST *** NO. CONNECTION TEL [A 00] [A 01] [A 02] [A 03] [A 21] [A 32 - Canon MultiPASS C530 | User Manual - Page 77
Printing the Group Dial List Function 1. Press Function. 07 Report 2. Press Report. ACTIVITY REPORT 08 02 3. Use d or u to select SPEED DIAL LIST. SPEED DIAL LIST Set 4. Press Set. 1-TOUCH LIST 08 02 5. Use d or u to select GROUP DIAL LIST. GROUP DIAL LIST Chapter 3 Speed Dialing 3-42 - Canon MultiPASS C530 | User Manual - Page 78
printing the list. Group Dial List 12/27/2000 17:23 FAX 123 4567 [A 21] Canon GROUP 1 [ 03] Canon GROUP 2 CANON GROUP DIAL LIST [ 01] 905 795 1111 [A 03] 516p488 6700 [A 00] 2131 1250 [A 02] 1 49 39 25 25 [A 04] 2 50921 [A 32] 81 773 3173 001 Canon CANADA Canon U.S.A. Canon DEUTSCH Canon - Canon MultiPASS C530 | User Manual - Page 79
This chapter describes how to use your MultiPASS to send faxes. ❏ Preparing to Send a Fax...4-3 G Adjusting the Quality of Your Faxes 4-3 G Dialing Methods ...4-10 ❏ Sending Methods...4-11 G Memory Sending ...4-11 G Manual Sending...4-14 ❏ Canceling Sending...4-17 G Removing the Document From - Canon MultiPASS C530 | User Manual - Page 80
G Printing a List of Documents in Memory 4-33 G Printing a Document in Memory 4-34 G Deleting a Document From Memory 4-39 ❏ Special Dialing...4-41 G Dialing Through a Switchboard 4-41 G Dialing an International Number 4-42 ❏ Switching Temporarily to Tone Dialing 4-44 Chapter 4 Sending Faxes - Canon MultiPASS C530 | User Manual - Page 81
Chapter 4, Document Handling, in your MultiPASS C530/C560 User's Manual. Adjusting the Quality of Your Faxes Canon's Ultra High Quality (UHQ™) imaging & White Transmission Your MultiPASS can send faxes in black & white. It can also send faxes in color to fax machines with color capability. Before - Canon MultiPASS C530 | User Manual - Page 82
) Color / B&W Press the Color/B&W button to turn on the Color/B&W light. n If you send a color document to a fax machine that does not support color faxing, the document will not be sent, and the LCD display will show this message: TRY AGAIN IN B/W. Try sending again in black & white. Setting - Canon MultiPASS C530 | User Manual - Page 83
3. Press Resolution to select the resolution setting you want. I You can select from the following: FAX STANDARD 203 × 98 dpi - Suitable for most text-only documents. FAX FINE 203 × 196 dpi - Suitable for documents with fine print (smaller than the print in this sentence). Chapter 4 Sending - Canon MultiPASS C530 | User Manual - Page 84
color sending Color / B&W 1. Press the Color/B&W button to turn on its light. Resolution 2. Press Resolution. I The current color resolution setting is displayed. Ex: FAX STANDARD Resolution 3. Press Resolution to select the color resolution setting you want. I You can select from the following - Canon MultiPASS C530 | User Manual - Page 85
. Setting the Scanning Contrast Contrast is the difference in brightness between the lightest and darkest parts of a printed document. You can adjust the contrast the MultiPASS uses to send faxes. Adjust according to how light or dark your document is. Function 1. Press Function. 01 2. Press Data - Canon MultiPASS C530 | User Manual - Page 86
Set Set 08 02 Set 3. Press Set. USER SETTINGS 4. Press Set again. DATE & TIME 5. Use d or u to select SCAN CONTRAST. SCAN CONTRAST 6. Press Set. Ex: STANDARD Chapter 4 Sending Faxes 4-8 - Canon MultiPASS C530 | User Manual - Page 87
for light documents. LIGHTER Suitable for dark documents. 8. Press Set. OFFHOOK ALARM 9. Press Stop to return to standby mode. Ex: 12/27 FaxTel Chapter 4 Sending Faxes 4-9 - Canon MultiPASS C530 | User Manual - Page 88
speed dialing, refer to Chapter 3, Speed Dialing. I Coded Speed Dialing Dial a fax number by pressing the Coded Dial button followed by the two-digit code (00 Dialing. I Group Dialing Send a document to a predefined group of fax numbers. (The numbers must already be registered under one-touch speed - Canon MultiPASS C530 | User Manual - Page 89
pages are being scanned. Because the MultiPASS is multitasking, you can even scan a document into memory while sending another document, receiving a document, or printing a report. The unit has enough memory the document feed lever before loading your document. Chapter 4 Sending Faxes 4-11 - Canon MultiPASS C530 | User Manual - Page 90
to scan: DOCUMENT READY I If you are sending in color to a fax machine with color capability, press Color/B&W to turn on its light (see page is close to 100%. In this case, use manual sending to send your document. 3. Dial the other party's fax number. I Use one of the dialing methods described - Canon MultiPASS C530 | User Manual - Page 91
MultiPASS will print out an error report. If this happens, try sending the document again. G When an error occurs during sending, the document is automatically deleted from memory, even if it is not sent completely. G If you send a color document to a fax machine that does not support color faxing - Canon MultiPASS C530 | User Manual - Page 92
you send the document. This method is useful if the other party must manually set their fax machine to receive before they can receive a fax. n To use this mode, you need to connect a telephone to your MultiPASS. 1. Open the document tray. 2. Prepare the document and load it, facedown, in the - Canon MultiPASS C530 | User Manual - Page 93
connected to your unit instead of pressing Hook. I You can adjust the volume of the speaker (see page 7-7). 4. Dial the other party's telephone/fax number. Ex: TEL= 7654321 I Use one of the dialing methods described earlier in this chapter. I If you make a mistake during dialing, press Hook - Canon MultiPASS C530 | User Manual - Page 94
G If the offhook alarm starts beeping, make sure the handset is resting properly in its cradle. G If you send a color document to a fax machine that does not support color faxing, the document will not be sent, and the LCD display will show this message: TRY AGAIN IN B/W. Try sending again in black - Canon MultiPASS C530 | User Manual - Page 95
a document before transmission is completed: Stop 1. Press Stop. I For manual sending, the transmission is canceled. I For memory sending, the MultiPASS asks you to confirm that you want to cancel. CANCEL? AYES #NO (ADF). For details, refer to the next page. Chapter 4 Sending Faxes 4-17 - Canon MultiPASS C530 | User Manual - Page 96
Removing the Document From the Automatic Document Feeder (ADF) n Do not try to pull the document out without opening the operation panel, or you might tear or smudge the document. 1. Open the operation panel by gently pulling it toward you. Chapter 4 Sending Faxes 4-18 - Canon MultiPASS C530 | User Manual - Page 97
2. Remove the document by pulling it out from the top or bottom. n If the paper does not pull out easily, do not force it. Chapter 4 Sending Faxes 4-19 - Canon MultiPASS C530 | User Manual - Page 98
3. When you are finished, close the operation panel by pressing it down from the center. n Be sure to close the operation panel until it locks into place. Otherwise, the unit will not function properly. Chapter 4 Sending Faxes 4-20 - Canon MultiPASS C530 | User Manual - Page 99
Manual Redialing To cancel manual redialing, press the Stop button. Automatic Redialing When you are sending using memory sending and the other party's line is busy, the unit waits a specified time and then dials the same number again. You can set the MultiPASS (Even if the MultiPASS is set to - Canon MultiPASS C530 | User Manual - Page 100
redialing, the LCD display shows details on the transmission. If the receiving fax machine is still busy on the last attempt, the LCD display shows BUSY/NO SIGNAL, the transaction number (TX/RX NO.), and prints the Error TX report (if set to print one). BUSY/NO SIGNAL Ex: TX/RX NO. 0013 Chapter - Canon MultiPASS C530 | User Manual - Page 101
Stop. I The MultiPASS asks you to confirm that you want to cancel. CANCEL? AYES #NO YES=(A) NO=(#) 3. Press T to cancel redialing. I Redialing is not canceled until you press T. Tone I If you change your mind and want to continue redialing, press #. I The unit then prints an error report - Canon MultiPASS C530 | User Manual - Page 102
TX Report will not be printed (see page 6-7). G If I The number of times the MultiPASS attempts to redial. I The are as follows: G The MultiPASS redials twice. (Even if the MultiPASS is set to redial several during the first attempt.) G The MultiPASS waits two minutes before redialing. Function - Canon MultiPASS C530 | User Manual - Page 103
01 2. Press Data Registration. Data Registration DATA REGSTRATION Set 3. Press Set. USER SETTINGS 08 02 4. Use d or u to select TX SETTINGS. TX SETTINGS Set 5. Press Set. ECM TX 08 02 6. Use d or u to select AUTO REDIAL. AUTO REDIAL Chapter 4 Sending Faxes 4-25 - Canon MultiPASS C530 | User Manual - Page 104
number of times you want the unit to redial. Ex: 05TIMES I You can select from 1 to 10 times. I The default setting is twice. Chapter 4 Sending Faxes 4-26 - Canon MultiPASS C530 | User Manual - Page 105
14. Press Set to register your new setting. TIME OUT Stop Chapter 4 15. Press Stop to return to standby mode. Ex: 12/27 FaxTel Sending Faxes 4-27 - Canon MultiPASS C530 | User Manual - Page 106
you frequently send the same document to the same group of recipients, use group dialing. Group dialing is described in Chapter 3, Speed Dialing. Chapter 4 Sending Faxes 4-28 - Canon MultiPASS C530 | User Manual - Page 107
to scan: DOCUMENT READY I If you are sending in color to a fax machine with color capability, press Color/B&W to turn on its light (see page resolution and contrast (see pages 4-4 and 4-7). 3. Enter up to 113 fax numbers using any of the following methods. I One-touch speed dialing Press the - Canon MultiPASS C530 | User Manual - Page 108
MNO 6 PRS 7 TUV 8 WXY 9 OPER 0 Tone SYMBOLS # I Regular dialing Use the numeric buttons to enter the fax number, then press Set to add the number to the broadcast list. G You can only enter one fax number this way. ABC 12 GHI 4 JKL 5 PRS 7 TUV 8 OPER 0 Tone DEF 3 MNO 6 WXY 9 SYMBOLS - Canon MultiPASS C530 | User Manual - Page 109
interval using the Menu system (see page 7-13). G If you want to review the numbers you entered, press Function and use d or u to scroll through , or wait a few seconds for the MultiPASS to begin scanning automatically. I The MultiPASS then scans the document into memory, and Sending Faxes 4-31 - Canon MultiPASS C530 | User Manual - Page 110
copy other documents even when you have set the MultiPASS for delayed sending. To print, copy, or send other documents after setting the MultiPASS for delayed sending, simply follow the procedures described in this manual or in your MultiPASS C530/C560 User's Manual. Chapter 4 Sending Faxes 4-32 - Canon MultiPASS C530 | User Manual - Page 111
transaction number of a document in memory, you can print it or delete it. Function 1. Press Function. 04 2. Press Memory Reference. Memory Reference DOC. MEMORY LIST Set 3. Press Set. PRINTING REPORT I The MultiPASS begins printing a list of documents stored in memory. Chapter 4 Sending - Canon MultiPASS C530 | User Manual - Page 112
[A 01] Canon TOKYO [ 04] Canon ITALIA [ 01] Canon CANADA [A 02] Canon FRANCE [ 03] Canon GROUP 2 001 PGS. SET TIME 3 12/27 23:24 2 12/27 23:24 1 12/27 23:38 1 12/27 23:39 Printing a Document in Memory Before printing a document, make sure you have the correct BJ cartridge installed. BC-21e - Canon MultiPASS C530 | User Manual - Page 113
Function 1. Press Function. 04 2. Press Memory Reference. Memory Reference DOC. MEMORY LIST 08 02 3. Use d or u to select PRINT DOCUMENT. PRINT DOCUMENT Set 4. Press Set. Ex: TX/RX NO. 0001 Chapter 4 Sending Faxes 4-35 - Canon MultiPASS C530 | User Manual - Page 114
/RX NO.) of the document you want to print. Ex: TX/RX NO. A0003 I The and is being sent or printed automatically. &: The document is in color and is being sent or printed automatically. I If you RX NO.) of the document you want to print, you can print the list of documents stored in memory (see - Canon MultiPASS C530 | User Manual - Page 115
. If you have the BC-21e Color BJ Cartridge installed, the MultiPASS starts printing the document. If you are printing a black & white document and have the BC-20 Black BJ Cartridge installed, the MultiPASS starts printing the document. If you are printing a color document and have the BC-20 Black - Canon MultiPASS C530 | User Manual - Page 116
, press the Stop button, install the BC-21e Color or BC-20 Black BJ Cartridge and start again from the beginning. 8. To continue printing other documents in memory, repeat the procedure from step 5. -or- Stop Press Stop to return to standby mode. Ex: 12/27 FaxTel Chapter 4 Sending Faxes 4-38 - Canon MultiPASS C530 | User Manual - Page 117
Deleting a Document From Memory Function 1. Press Function. 04 2. Press Memory Reference. Memory Reference DOC. MEMORY LIST 08 02 3. Use d or u to select DELETE DOCUMENT. DELETE DOCUMENT Set 4. Press Set. Ex: TX/RX NO. 0001 Chapter 4 Sending Faxes 4-39 - Canon MultiPASS C530 | User Manual - Page 118
is being sent or printed automatically. &: The document is in color and is being sent or printed automatically. I If you print the list of documents stored in memory (see page 4-33). I Use l or r to display the details of the transaction (destination, for example). 6. Press Set. I The MultiPASS - Canon MultiPASS C530 | User Manual - Page 119
document. I If you change your mind and want to keep the document in memory, press #. Tone I The MultiPASS deletes the document. 8. To continue deleting other documents in memory, repeat the procedure from step 5. -or- the number of the party you are calling. Chapter 4 Sending Faxes 4-41 - Canon MultiPASS C530 | User Manual - Page 120
LCD display shows the following: Currently used memory: MEMORY USED 0% Standby to scan: DOCUMENT READY I If you are sending in color to a fax machine with color capability, press Color/B&W to turn on its light (see page 4-3). I If necessary, you can adjust the resolution and contrast (see pages - Canon MultiPASS C530 | User Manual - Page 121
GHI 4 JKL 5 PRS 7 TUV 8 OPER 0 Tone DEF 3 MNO 6 WXY 9 SYMBOLS # 4. Use the numeric buttons to dial the country code, the area code, and the fax/telephone number of the other party. Ex: TEL=011p8112345P I If you make a mistake during dialing, press Stop and start again from step 3. I You may - Canon MultiPASS C530 | User Manual - Page 122
, hotel reservations, etc., require tone dialing for their services. If your unit is connected to a rotary pulse # 2. Use the numeric buttons to dial the telephone number of the information service. Ex: TEL= 7654321 I The unit connects using the pulses required by your phone line. - Canon MultiPASS C530 | User Manual - Page 123
3 MNO 6 WXY 9 SYMBOLS # 4. Use the numeric buttons to enter the numbers requested by the information service. Ex: TEL=7654321TA34 I Numbers entered after pressing T will be dialed using tone dialing. Hook 5. When dialing is canceled when you disconnect the call. Chapter 4 Sending Faxes 4-45 - Canon MultiPASS C530 | User Manual - Page 124
. You will also find instructions on setting the MultiPASS to receive color faxes. ❏ Different Ways to Receive a Fax 5-2 G Receiving Both Faxes and Telephone Calls Automatically: Fax/Tel Mode 5-3 G Receiving Faxes Manually: MANUAL MODE 5-13 G Receiving Faxes Automatically: FAX ONLY MODE 5-16 - Canon MultiPASS C530 | User Manual - Page 125
incoming calls. To adjust these via the operation panel refer to the instructions later in this chapter (see page 5-7). You can also adjust these settings from the MultiPASS Desktop Manager (see MultiPASS Desktop Manager Software Guide). I MANUAL MODE Use this mode if you will frequently use the - Canon MultiPASS C530 | User Manual - Page 126
plan to connect an answering machine to the MultiPASS to receive faxes and phone messages. The answering machine will answer all calls and the MultiPASS will monitor for incoming faxes. I DRPD Use this mode if you have subscribed to a Distinctive Ring Pattern Detection (DRPD) service offered by some - Canon MultiPASS C530 | User Manual - Page 127
Tel Mode Your MultiPASS is factory-set to Fax/Tel Mode. If you have not changed the receive mode to FAX ONLY MODE or DRPD, simply follow this procedure: Receive Mode 1. Press Receive Mode to select Fax/Tel Mode. Fax/Tel Mode I After a few seconds, the LCD display changes to the following display: Ex - Canon MultiPASS C530 | User Manual - Page 128
Set 08 02 Set 08 02 Set 3. Press Set. USER SETTINGS 4. Use d or u to select RX SETTINGS. RX SETTINGS 5. Press Set. ECM RX 6. Use d or u to select RX MODE. RX MODE 7. Press Set. Ex: FAX ONLY MODE Chapter 5 Receiving Faxes 5-5 - Canon MultiPASS C530 | User Manual - Page 129
08 02 Set Stop 8. Use d or u to select FAX/TEL AUTO SW. FAX/TEL AUTO SW 9. Press Set. RING START TIME 10. Press LCD display. I If FaxTel is not displayed, press Receive Mode to select Fax/Tel Mode. After a few seconds, the LCD display returns to standby mode. Ex: 12/27 FaxTel Chapter 5 - Canon MultiPASS C530 | User Manual - Page 130
/Tel Mode Options You can control precisely how your MultiPASS handles incoming calls by adjusting the settings described below. I RING START TIME When a call comes in, the unit checks to see if it is a person's voice or a fax machine trying to send a document. If your unit does not have enough time - Canon MultiPASS C530 | User Manual - Page 131
ACTION Not all fax machines are capable of sending a fax tone (the CNG tone that warns the receiving fax machine that a fax is coming). In you set the DEFAULT ACTION setting to RECEIVE, the unit will switch to fax receive mode automatically at that point and start to receive the document. If - Canon MultiPASS C530 | User Manual - Page 132
The document is received automatically. (The fax tone is detected and the MultiPASS switches to receive mode.) Pick up the handset to talk. DISCONNECT The MultiPASS disconnects the call. RECEIVE (Factory default setting) Not all fax machines are capable of sending a fax tone. For those cases if you - Canon MultiPASS C530 | User Manual - Page 133
Setting Fax/Tel Mode Options 1. Follow steps 1 to 9 starting on page 5-4. RING START TIME Set 2. Press Set. Ex: 08SEC ABC DEF 123 GHI 4 JKL ❏ The factory default setting is eight seconds. Ex: 09SEC Set 4. Press Set to register your setting. F/T RING TIME Chapter 5 Receiving Faxes 5-10 - Canon MultiPASS C530 | User Manual - Page 134
factory default setting is 15 seconds. Ex: 23SEC Set 7. Press Set to register your setting. DEFAULT ACTION Set 8. Press Set again. Ex: RECEIVE Chapter 5 Receiving Faxes 5-11 - Canon MultiPASS C530 | User Manual - Page 135
is RECEIVE. 10. Press Set to register your setting. INCOMING RING 11. Press Stop to return to standby mode. Ex: 12/27 FaxTel Chapter 5 Receiving Faxes 5-12 - Canon MultiPASS C530 | User Manual - Page 136
Receiving Faxes Manually: MANUAL MODE In MANUAL MODE, if you connect a telephone to your unit, you can use the telephone to receive normal telephone calls and also to activate your MultiPASS to start receiving a document. If you place the phone away from the MultiPASS (on your desk, for example) and - Canon MultiPASS C530 | User Manual - Page 137
Manual is displayed in the LCD display. Ex: 12/27 Manual 2. Make sure you have connected a telephone to the MultiPASS. Follow the procedure below to receive a fax manually button on their fax machine. When you hear a slow beep, press Start/Scan on the MultiPASS to begin receiving the fax. Hang up the - Canon MultiPASS C530 | User Manual - Page 138
(the remote receiving ID) on your telephone and hang up. I The MultiPASS begins receiving the fax. n G You can change the number for the remote receiving ID ( an answering machine connected to your MultiPASS that can carry out remotecontrol operations (controlling your answering machine from a - Canon MultiPASS C530 | User Manual - Page 139
When the MultiPASS is set up for a dedicated line, set FAX ONLY MODE to automatically receive documents whenever a call comes over the fax line. Setting FAX ONLY MODE Function 1. Press Function. 01 2. Press Data Registration. Data Registration DATA REGSTRATION Set 3. Press Set. USER SETTINGS - Canon MultiPASS C530 | User Manual - Page 140
Set 08 02 Set 08 02 Set 5. Press Set. ECM RX 6. Use d or u to select RX MODE. RX MODE 7. Press Set. Ex: FAX/TEL AUTO SW 8. Use d or u to select FAX ONLY MODE. FAX ONLY MODE 9. Press Set. INCOMING RING Chapter 5 Receiving Faxes 5-17 - Canon MultiPASS C530 | User Manual - Page 141
If FaxOnly is not displayed, press Receive Mode to select FAX ONLY MODE. After a few seconds, the LCD display returns to standby mode. Ex: 12/27 FaxOnly I The MultiPASS assumes all incoming calls are from fax machines sending faxes. It receives the documents automatically and disconnects all voice - Canon MultiPASS C530 | User Manual - Page 142
messages while you are out of the office. In ANS.MACHINE MODE, the MultiPASS allows the answering machine to answer incoming calls, then listens for the fax tone and automatically receives the fax if it detects this tone. Setting ANS.MACHINE MODE n For this mode, you need to connect an answering - Canon MultiPASS C530 | User Manual - Page 143
determine if the call is from a fax machine trying to send a document or from a telephone trying to make a voice call. Use the information in this section to set up the MultiPASS for use with a DRP service. For more details on the DRP service, contact your local telephone company. (Your telephone - Canon MultiPASS C530 | User Manual - Page 144
company will assign a distinctive ring pattern to each number when you order the DRP service. The setting you make in the MultiPASS must match the setting assigned by the telephone company. You can set the MultiPASS for the following ring patterns: I NORMAL RING Ring type of normal telephone line - Canon MultiPASS C530 | User Manual - Page 145
Function Setting DRPD 1. Press Function. 01 2. Press Data Registration. Data Registration DATA REGSTRATION Set 3. Press Set. USER SETTINGS 08 02 4. Use d or u to select RX SETTINGS. RX SETTINGS Set 5. Press Set. ECM RX Chapter 5 Receiving Faxes 5-22 - Canon MultiPASS C530 | User Manual - Page 146
08 02 Set 08 02 Set 6. Use d or u to select RX MODE. RX MODE 7. Press Set. Ex: FAX ONLY MODE 8. Use d or u to select DRPD. DRPD 9. Press Set. NORMAL RING Chapter 5 Receiving Faxes 5-23 - Canon MultiPASS C530 | User Manual - Page 147
following: G NORMAL RING G DOUBLE RING G SHORT-SHORT-LONG G SHORT-LONG-SHORT G OTHER RING TYPE G FAX/TEL AUTO SW I If you select FAX/TEL AUTO SW, go to step 11 on page 5-28. If you selected a setting other than FAX/TEL AUTO SW in step 10: 11. Press Set to register your selection. UNIT - Canon MultiPASS C530 | User Manual - Page 148
call for the ring pattern you selected in step 10. I This number is transmitted to the caller's fax machine and displayed in the caller's LCD display as verification. Ex: TEL= 123 4567 I The fax/telephone number can be up to 20 digits long (including spaces). I To enter a space, press Space. Spaces - Canon MultiPASS C530 | User Manual - Page 149
This name is transmitted to another Canon fax machine and displayed in that fax machine's LCD display as verification. Ex: CANON :A I The name can be up to 24 characters long (including spaces). I To enter letters, numbers, and symbols, refer to the instructions on page 2-8. I To switch between - Canon MultiPASS C530 | User Manual - Page 150
displayed. Ex: TEL 19. Use d or u to select the type of call to be received for the ring pattern you selected in step 10. Ex: FAX I You can select from the following: G TEL G FAX G FAX/TEL AUTO SW Chapter 5 Receiving - Canon MultiPASS C530 | User Manual - Page 151
MODE setting is set to DRPD, only DRPD will be displayed in the LCD display when the Receive Mode button is pressed. If you selected FAX/TEL AUTO SW in step 10 (on page 5-24): Set 11. Press Set to register your selection. RING START TIME Chapter 5 Receiving - Canon MultiPASS C530 | User Manual - Page 152
setting is eight seconds. Ex: 09SEC Set 14. Press Set to register your setting. F/T RING TIME Set 15. Press Set again. Ex: 15SEC Chapter 5 Receiving Faxes 5-29 - Canon MultiPASS C530 | User Manual - Page 153
setting is 15 seconds. Ex: 23SEC Set 17. Press Set to register your setting. DEFAULT ACTION Set 18. Press Set again. Ex: RECEIVE Chapter 5 Receiving Faxes 5-30 - Canon MultiPASS C530 | User Manual - Page 154
RX MODE setting is set to DRPD, only DRPD will be displayed in the LCD display when the Receive Mode button is pressed. Chapter 5 Receiving Faxes 5-31 - Canon MultiPASS C530 | User Manual - Page 155
/Scan to receive the fax (MANUAL MODE). Receives the fax without ringing. Switches to receive mode for fax transmission signals and does not ring. Incoming Call From Telephone Rings to alert you to pick up the handset of the telephone and take the call. Answers as a fax machine. Rings to alert you - Canon MultiPASS C530 | User Manual - Page 156
Detection (DRPD) Feature Using the MultiPASS with a DRP service is almost the same as using MultiPASS and talk. If you do not pick up the telephone, the MultiPASS continues to ring until the other party hangs up. When someone sends a fax using the number assigned for fax communication, the MultiPASS - Canon MultiPASS C530 | User Manual - Page 157
faxes in color from fax machines with color capability. When receiving a fax, your MultiPASS detects if the incoming fax is a color or black & white transaction, and prints the fax accordingly. For automatic printing of received color faxes, you need to have the BC-21e Color BJ Cartridge installed - Canon MultiPASS C530 | User Manual - Page 158
Function Your MultiPASS is factory-set to receive in color when you receive faxes from other color fax machines. Follow this procedure to disable or enable this setting: 1. Press Function. 01 2. Press Data Registration. Data Registration DATA REGSTRATION Set 3. Press Set. USER SETTINGS 08 - Canon MultiPASS C530 | User Manual - Page 159
08 02 6. Use d or u to select COLOR RX. COLOR RX Set 7. Press Set. Ex: ON 08 02 8. Use d or u to select OFF or ON. Ex: OFF Set 9. Press Set. PRINTER SETTINGS Stop 10. Press Stop to return to standby mode. Ex: 12/27 FaxTel Chapter 5 Receiving Faxes 5-36 - Canon MultiPASS C530 | User Manual - Page 160
making copies or printing, the MultiPASS automatically prints the fax. If you are entering registration information, the fax is printed as soon as it is received, and does not go into memory. Receiving Faxes in Memory When a Problem Occurs If the MultiPASS encounters a problem when it is receiving - Canon MultiPASS C530 | User Manual - Page 161
the pages stored in memory. BJ cartridge has run out of ink The BJ cartridge installed in the MultiPASS has run out of ink while printing. CHANGE CARTRIDGE Chapter 5 Change the BJ cartridge (see your User's Manual for details). The unit automatically prints the pages stored in memory. Receiving - Canon MultiPASS C530 | User Manual - Page 162
BJ cartridge installed in the MultiPASS. PUT IN CARTRIDGE Install a BJ cartridge (see your User's Manual for details). The unit automatically prints the pages stored in memory. Incorrect BJ cartridge installed The MultiPASS has received a fax, but the incorrect BJ cartridge is installed. INSTALL BC - Canon MultiPASS C530 | User Manual - Page 163
your User's Manual for details). Then press the Resume button to print the pages stored in memory. n G The MultiPASS memory can store up to approximately 42 pages (based on ITU-T/CCITT No. 1 Chart, Standard Mode). G You can set the MultiPASS not to store faxes in memory if a problem occurs during - Canon MultiPASS C530 | User Manual - Page 164
Canceling Receiving Follow this procedure if you want to stop receiving a fax before reception is completed: Stop 1. Press Stop. I The MultiPASS asks you to confirm that you want to cancel. CANCEL? AYES #NO YES=(A) NO=(#) 2. Press T to cancel receiving. Tone TX/RX CANCELLED Ex: TX/RX - Canon MultiPASS C530 | User Manual - Page 165
Chapter 6 Reports and Lists This chapter shows you how to print lists and reports. ❏ Summary of Lists and Reports...6-2 ❏ Abbreviations Used in Transaction Reports 6-4 ❏ Activity Report ...6-5 ❏ Transmission (TX) Reports...6-7 G Error TX Report ...6-7 G TX Report ...6-8 G TX Report - Canon MultiPASS C530 | User Manual - Page 166
Summary of Lists and Reports You can print the following lists and reports from your MultiPASS. Most of the lists and reports can be found in this section. However, you may also need to refer to other chapters for details on some of them. Activity Report This report prints a list of the previous 20 - Canon MultiPASS C530 | User Manual - Page 167
prints every time an error occurs during fax reception. I RX Report This report can be printed every time a fax is received. Memory Lists/Reports I Document Memory List This list prints one-touch speed dialing buttons and coded speed dialing codes. User's Data List This list is used to check if the - Canon MultiPASS C530 | User Manual - Page 168
the amount of time it took to transmit. The usage time is also printed in the Result column of the Activity Report along with any error codes. retry. The default, which is two retries, can be changed. (Even if the MultiPASS is set to redial several times, it will redial only once if there is - Canon MultiPASS C530 | User Manual - Page 169
Activity Report Function Follow this procedure to print a list of the previous 20 transactions. 1. Press Function. 07 Report 2. Press Report. ACTIVITY REPORT Set 3. Press Set. PRINTING REPORT Chapter 6 Reports and Lists 6-5 - Canon MultiPASS C530 | User Manual - Page 170
The unit starts printing an Activity Report in the standard format with all transactions listed chronologically. 12/27/2000 15:00 FAX 123 4567 CANON 001 ACTIVITY REPORT ST. TIME CONNECTION TEL CONNECTION ID A 12/27 13:43 A 12/27 13:45 A 12/27 13:51 A 12/27 14:05 A - Canon MultiPASS C530 | User Manual - Page 171
SETTINGS menu (see page 7-8). Error TX Report The MultiPASS is set to print a report if an error occurs during sending. This is the default setting for the TX REPORT setting (see TX REPORT on page 7-10). 12/27/2000 14:59 FAX 123 4567 CANON 001 ERROR TX REPORT TX FUNCTION WAS NOT COMPLETED - Canon MultiPASS C530 | User Manual - Page 172
TX Report You can change the TX REPORT setting to print a transmission report for every document you send (see TX REPORT on page 7-10). 12/27/2000 14:59 FAX 123 4567 CANON 001 TX REPORT TRANSMISSION OK TX/RX NO CONNECTION TEL CONNECTION ID ST. TIME USAGE T PGS. SENT R E S U LT 0003* 1 432 - Canon MultiPASS C530 | User Manual - Page 173
OK TX/RX NO CONNECTION TEL CONNECTION ID ST. TIME USAGE T PGS. SENT R E S U LT 0004 20 545 8545 Canon EUROPA 12/27 14:59 00'18 1 OK WHEN YOU SET THE FAX TO PRINT THE FIRST PAGE OF THE DOCUMENT THE SLEREXE COMPANY LIMITED SAPORS LANE•BOOLE•DORSET•BH25 8ER TELEPHONE BOOLE (945 - Canon MultiPASS C530 | User Manual - Page 174
. Multi-Transaction (TX/RX) Report If the transmission was a sequential broadcast or group dial, then a Multi-Transaction Report is printed. 12/27/2000 17:23 FAX 123 4567 CANON MULTI TX/RX REPORT TX/RX NO PGS. TX/RX INCOMPLETE TRANSACTION OK ERROR INFORMATION 0054* 1 ----- [ 01]905 795 - Canon MultiPASS C530 | User Manual - Page 175
Reception (RX) Reports Error RX Report You can set the MultiPASS to print a reception (RX) report when an error occurs during reception (see RX REPORT on page 7-10). 12/27/2000 14:59 FAX 123 4567 CANON 001 RX REPORT INCOMPLETE RECEPTION TX/RX NO CONNECTION TEL CONNECTION ID ST. TIME USAGE - Canon MultiPASS C530 | User Manual - Page 176
You can set the MultiPASS to print a reception (RX) report every time you receive a fax (see RX REPORT on page 7-10). 12/27/2000 14:59 FAX 123 4567 CANON 001 RX REPORT RECEPTION OK TX/RX NO CONNECTION TEL CONNECTION ID ST. TIME USAGE T PGS. R E S U LT 5004* 905 795 1111 Canon CANADA 12/27 - Canon MultiPASS C530 | User Manual - Page 177
will be deleted. When power is restored to the MultiPASS, the Memory Clear Report will automatically be printed out listing the documents that were deleted from memory as a result of the power failure. 12/27/2000 17:23 FAX 123 4567 CANON 001 TX/RX NO 0023 0024 MEMORY CLEAR REPORT MEMORY - Canon MultiPASS C530 | User Manual - Page 178
settings you can perform from the operation panel of your MultiPASS. ❏ Understanding the Menu System 7-3 G Summary of Menus...7-3 ❏ User Settings ...7-5 G Accessing the User Settings Menu 7-5 G User Settings Menu ...7-7 ❏ Report Settings ...7-8 G Accessing the Report Settings Menu 7-8 G Report - Canon MultiPASS C530 | User Manual - Page 179
❏ Printer Settings...7-17 G Accessing the Printer Settings Menu 7-17 G Printer Settings Menu ...7-19 ❏ System Settings ...7-20 G Accessing the System Settings Menu 7-20 G System Settings Menu ...7-22 Chapter 7 Summary of Settings 7-2 - Canon MultiPASS C530 | User Manual - Page 180
and set up different features. I USER SETTINGS The settings in this menu include date and time setup, registration for the sender information printed at the top of every page you send, and other important settings that control the operating environment of your MultiPASS. Adjust the settings in this - Canon MultiPASS C530 | User Manual - Page 181
documents. These settings are important because they determine how the unit operates when it receives a document. I PRINTER SETTINGS Use these settings to set how the MultiPASS prints documents. These features include specifying a paper size for the multi-purpose tray, reducing the size of received - Canon MultiPASS C530 | User Manual - Page 182
User Settings Accessing the User Settings Menu Function 1. Press Function. 01 2. Press Data Registration. Data Registration DATA REGSTRATION Set 3. Press Set. USER SETTINGS Set 4. Press Set again. DATE & TIME Chapter 7 Summary of Settings 7-5 - Canon MultiPASS C530 | User Manual - Page 183
5. Refer to the table on the following page and follow these guidelines to select and register settings: I Use d or u to move through the settings. I To register a setting or access sub-settings, press Set. I To return to a previous level, press Data Registration. n In order for your settings to - Canon MultiPASS C530 | User Manual - Page 184
User Settings Menu Name Description Settings DATE & TIME UNIT TELEPHONE # UNIT NAME TX For no sound, select "0". Select the dialing method the MultiPASS uses to match the telephone line type you have. - - - - OUTSIDE IMAGE/ INSIDE IMAGE FAX/TEL STANDARD/ DARKER/ LIGHTER ON/OFF - 1/2/3 0/1/2/3 - Canon MultiPASS C530 | User Manual - Page 185
Report Settings Accessing the Report Settings Menu Function 1. Press Function. 01 2. Press Data Registration. Data Registration DATA REGSTRATION Set 3. Press Set. USER SETTINGS 08 02 4. Use d or u to select REPORT SETTINGS. REPORT SETTINGS Chapter 7 Summary of Settings 7-8 - Canon MultiPASS C530 | User Manual - Page 186
Set 5. Press Set. TX REPORT 6. Refer to the table on the following page and follow these guidelines to select and register settings: I Use d or u to move through the settings. I To register a setting or access sub-settings, press Set. I To return to a previous level, press Data Registration. n - Canon MultiPASS C530 | User Manual - Page 187
report. (The TX Report cannot be printed with the first page of a color fax. The message "The color fax image is not printed on this report." will print instead.) Enable/disable automatic printing of the reception report. PRINT ERROR ONLY: Prints the reception report only when a reception - Canon MultiPASS C530 | User Manual - Page 188
) Settings Accessing the TX Settings Menu Function 1. Press Function. 01 2. Press Data Registration. Data Registration DATA REGSTRATION Set 3. Press Set. USER SETTINGS 08 02 Set 4. Use d or u to select TX SETTINGS. TX SETTINGS 5. Press Set. ECM TX Chapter 7 Summary of Settings - Canon MultiPASS C530 | User Manual - Page 189
6. Refer to the table on the following page and follow these guidelines to select and register settings: I Use d or u to move through the settings. I To register a setting or access sub-settings, press Set. I To return to a previous level, press Data Registration. n In order for your settings to - Canon MultiPASS C530 | User Manual - Page 190
entered between numbers with the Redial/Pause button. Select whether the MultiPASS redials if the other party's line is busy on the first attempt : After entering the last number, press the Start/Scan button, or else the MultiPASS will return to standby mode after 60 seconds. Settings ON/OFF 02 SEC (01 - Canon MultiPASS C530 | User Manual - Page 191
(Reception) Settings Accessing the RX Settings Menu Function 1. Press Function. 01 2. Press Data Registration. Data Registration DATA REGSTRATION Set 3. Press Set. USER SETTINGS 08 02 Set 4. Use d or u to select RX SETTINGS. RX SETTINGS 5. Press Set. ECM RX Chapter 7 Summary of Settings - Canon MultiPASS C530 | User Manual - Page 192
6. Refer to the table on the following page and follow these guidelines to select and register settings: I Use d or u to move through the settings. I To register a setting or access sub-settings, press Set. I To return to a previous level, press Data Registration. n In order for your settings to - Canon MultiPASS C530 | User Manual - Page 193
to ON, only the telephone connected to the MultiPASS will ring.) Select the number of incoming rings before the MultiPASS answers. Determine if the MultiPASS switches to fax receive mode after the MultiPASS rings for a specified time when the MultiPASS is in MANUAL MODE. If you select ON, select the - Canon MultiPASS C530 | User Manual - Page 194
Settings Accessing the Printer Settings Menu Function 1. Press Function. 01 2. Press Data Registration. Data Registration DATA REGSTRATION Set 3. Press Set. USER SETTINGS 08 02 Set 4. Use d or u to select PRINTER SETTINGS. PRINTER SETTINGS 5. Press Set. RX REDUCTION Chapter 7 Summary - Canon MultiPASS C530 | User Manual - Page 195
6. Refer to the table on the following page and follow these guidelines to select and register settings: I Use d or u to move through the settings. I To register a setting or access sub-settings, press Set. I To return to a previous level, press Data Registration. n In order for your settings to - Canon MultiPASS C530 | User Manual - Page 196
enabling this setting, ink consumption can be decreased, resulting in a longer effective cartridge life. Select the paper type when printing or copying in color. BOTTOM MARGIN Select the length of the lower margin for color printing, color copying, and printing of received color faxes. NORMAL: The - Canon MultiPASS C530 | User Manual - Page 197
Accessing the System Settings Menu Function 1. Press Function. 01 2. Press Data Registration. Data Registration DATA REGSTRATION Set 3. Press Set. USER SETTINGS 08 02 Set 4. Use d or u to select SYSTEM SETTINGS. SYSTEM SETTINGS 5. Press Set. DATE SETUP Chapter 7 Summary of Settings 7-20 - Canon MultiPASS C530 | User Manual - Page 198
6. Refer to the table on the following page and follow these guidelines to select and register settings: I Use d or u to move through the settings. I To register a setting or access sub-settings, press Set. I To return to a previous level, press Data Registration. n In order for your settings to - Canon MultiPASS C530 | User Manual - Page 199
SETUP DISPLAY LANGUAGE TX START SPEED RX START SPEED Select the date format displayed in the LCD display and printed on faxes you send. MM/DD/YYYY DD/MM YYYY YYYY MM/DD Select the language of the LCD display messages. ENGLISH/ FRENCH/ SPANISH Select the speed at which the MultiPASS MultiPASS
-
 1
1 -
 2
2 -
 3
3 -
 4
4 -
 5
5 -
 6
6 -
 7
7 -
8
-
9
-
10
-
11
-
12
-
13
-
14
-
15
-
16
-
17
-
18
-
19
-
20
-
21
-
22
-
23
-
24
-
25
-
26
-
27
-
28
-
29
-
30
-
31
-
32
-
33
-
34
-
35
-
36
-
37
-
38
-
39
-
40
-
41
-
42
-
43
-
44
-
45
-
46
-
47
-
48
-
49
-
50
-
51
-
52
-
53
-
54
-
55
-
56
-
57
-
58
-
59
-
60
-
61
-
62
-
63
-
64
-
65
-
66
-
67
-
68
-
69
-
70
-
71
-
72
-
73
-
74
-
75
-
76
-
77
-
78
-
79
-
80
-
81
-
82
-
83
-
84
-
85
-
86
-
87
-
88
-
89
-
90
-
91
-
92
-
93
-
94
-
95
-
96
-
97
-
98
-
99
-
100
-
101
-
102
-
103
-
104
-
105
-
106
-
107
-
108
-
109
-
110
-
111
-
112
-
113
-
114
-
115
-
116
-
117
-
118
-
119
-
120
-
121
-
122
-
123
-
124
-
125
-
126
-
127
-
128
-
129
-
130
-
131
-
132
-
133
-
134
-
135
-
136
-
137
-
138
-
139
-
140
-
141
-
142
-
143
-
144
-
145
-
146
-
147
-
148
-
149
-
150
-
151
-
152
-
153
-
154
-
155
-
156
-
157
-
158
-
159
-
160
-
161
-
162
-
163
-
164
-
165
-
166
-
167
-
168
-
169
-
170
-
171
-
172
-
173
-
174
-
175
-
176
-
177
-
178
-
179
-
180
-
181
-
182
-
183
-
184
-
185
-
186
-
187
-
188
-
189
-
190
-
191
-
192
-
193
-
194
-
195
-
196
-
197
-
198
-
199
 |
 |
Stand-alone Fax
Manual
C530/C560
C
OLOR
B
UBBLE
J
ET
™
P
RINTER
F
AX
• S
CANNER
• C
OPIER