Cisco WET200 User Guide
Cisco WET200 - Small Business Wireless-G EN Bridge Manual
 |
UPC - 745883578320
View all Cisco WET200 manuals
Add to My Manuals
Save this manual to your list of manuals |
Cisco WET200 manual content summary:
- Cisco WET200 | User Guide - Page 1
Wireless-G Business Ethernet Bridge Model: WET200 USER GUIDE BUSINESS SERIES - Cisco WET200 | User Guide - Page 2
of Cisco Systems, Inc. and/or its affiliates in the U.S. and certain other countries. Copyright © 2008 Cisco Systems, Inc. All rights reserved. Other brands and product names are trademarks or registered trademarks of their respective holders. Wireless-G Business Ethernet Bridge About This Guide ii - Cisco WET200 | User Guide - Page 3
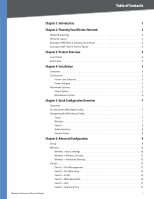
5 Overview 5 Connection 5 Power over Ethernet 5 Power Adapter 5 Placement Options 5 Stand Option 5 Wall-Mount Option 6 Chapter 5: Quick Configuration Overview 7 Overview 7 Accessing the Web-Based Utility 7 Navigating the Web-Based Utility 7 Setup 7 Wireless 7 Switch 8 Administration - Cisco WET200 | User Guide - Page 4
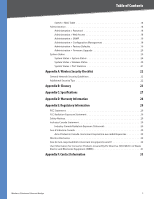
18 Administration > Password 18 Administration > Web Access 18 Administration > SNMP 19 Administration > Configuration Management 19 Administration > Factory Defaults 19 Administration > Firmware Upgrade 20 System Status 20 System Status > System Status 20 System Status > Wireless Status 20 - Cisco WET200 | User Guide - Page 5
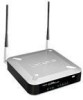
-G Business Ethernet Bridge. The Linksys WET200 Wireless Bridge seamlessly bridges separate Ethernet networks together wirelessly and is ideal for small businesses with offices and resources that are in different office suites of a building or a closely adjacent building. The WET200 is a Power over - Cisco WET200 | User Guide - Page 6
wireless transmission range for two wireless adapter PCs. Since an access point is able to forward data within a network, the effective transmission range in an infrastructure network may be doubled (depending on antenna characteristics). Network Layout The Wireless-G Business Ethernet Bridge - Cisco WET200 | User Guide - Page 7
Bridge in Office One is connected to a Linksys switch that provides power to the Bridge. In this example, a DHCP server is set up to assign IP addresses automatically, since the WET200 does not have a built-in DHCP server. Alternatively, static IP addresses can be used. Wireless-G Business Ethernet - Cisco WET200 | User Guide - Page 8
adaptor. To connect a device to a port, you need to use Category 5 (or better) network cable. POWER The Power port is where you connect the AC power. This port is not used if you are using Power over Ethernet (PoE) to supply power through the Ethernet cable. Wireless-G Business Ethernet Bridge 4 - Cisco WET200 | User Guide - Page 9
cable to port 5 on the Bridge. Connect the PoE Cable 3. The Power LED on the front panel lights up green as soon as the power is connected properly." Proceed to the section, "Placement Options." Wireless-G Business Ethernet Bridge Connect the Power Adapter 3. The Power LED on the front panel lights - Cisco WET200 | User Guide - Page 10
line up with the two screws. 4. Place the wall-mount slots over the screws and slide the Bridge down until the screws fit snugly into the wall-mount slots. Proceed to "Chapter 6: Advanced Configuration," for directions on how to set up the Bridge.. Wireless-G Business Ethernet Bridge Installation 6 - Cisco WET200 | User Guide - Page 11
secret), The wireless bridge will now be connected to the access point. Accessing the Web-Based Utility To access the web-based utility, perform these steps: 1. Configure your PC with a static IP address in the same subnet as the Bridge's default IP address, 192.168.1.226. If a DHCP server is to - Cisco WET200 | User Guide - Page 12
(SNMP) settings. Config Management Use this screen to save the Bridge's configuration to a file, and to restore the configuration from a file. Factory Default Use this screen to reset the Bridge to its factory default settings. Firmware Upgrade Upgrade the Bridge's firmware on this screen - Cisco WET200 | User Guide - Page 13
its IP address, either Static IP Address (default) or Automatic Configuration-DHCP. •• Automatic Configuration-DHCP The WET200 will obtain its IP address automatically from a DHCP server. NOTE: If the DHCP server is not connected to the Bridge ports but will be accessed via the wireless interface - Cisco WET200 | User Guide - Page 14
match your Access Point's channel number. If you are using Ad-Hoc mode, this should match your peer device's channel number. If you use the Site Survey feature to connect to your wireless network, the channel setting is configured automatically. Wireless-G Business Ethernet Bridge Wireless > Basic - Cisco WET200 | User Guide - Page 15
Mode Enter the security configuration to match the wireless Access Point that this bridge will connect to. To disable security, keep the default setting, Disabled. To enable security, select the desired type of security: WEP, WPA-Personal, WPA2-Personal, WPA-Enterprise, WPA2-Enterprise. Then fill - Cisco WET200 | User Guide - Page 16
to save the configuration for wireless authentication while being associated with an Access Point. PEAP EAP-PEAP uses the Login Name and Password to perform authentication with the RADIUS server. Encryption Select either TKIP (default) or AES encryption. Login Name Enter your login name for the - Cisco WET200 | User Guide - Page 17
it. Click Import to load and decode the certificate file. Click Apply to save the configuration for wireless authentication while being associated with an Access Point. PEAP EAP-PEAP uses the Login Name and Password to perform authentication with the RADIUS server. Encryption This is set to AES and - Cisco WET200 | User Guide - Page 18
configure Port Mirroring, which lets you mirror traffic to/from any port (including wireless) to Port 1 for real-time analysis. This can be helpful for troubleshooting purposes. Switch > Port Mirroring Wireless-G Business Ethernet Bridge If this feature the VLAN feature, keep the default setting, - Cisco WET200 | User Guide - Page 19
VLAN ID range is 1-4095. A VLAN with ID 1 has been preconfigured by default and cannot be deleted. 802.1Q VLAN Port Setting Each row of the table corresponds to one port. For each port, configure the and click Delete VLAN Entry to remove those entries. Wireless-G Business Ethernet Bridge 15 - Cisco WET200 | User Guide - Page 20
Settings to save and activate your VLAN configuration. Wireless-G Business Ethernet Bridge Switch > MAC Based ACL Switch > MAC Based ACL An Access List (ACL) is a list of source MAC addresses that is used to grant or deny access. If a packet passes from the wireless port to a LAN port or vice versa - Cisco WET200 | User Guide - Page 21
allowed for the port. For ports 1-5, the range is 128 kbps to 64 Mbps and for the wireless port the range is 128 kbps to 16 Mbps. The default is No Limit. Wireless-G Business Ethernet Bridge Switch > Spanning Tree This screen allows you to configure the Spanning Tree Protocol (STP) settings for - Cisco WET200 | User Guide - Page 22
tasks, such as to change the login password, configure SNMP, save and restore system configuration, restore the factory default settings, and upgrade the firmware. Administration > Password This screen allows you to change the username and/or password for the Bridge. It is recommended that you - Cisco WET200 | User Guide - Page 23
have the Access Point respond to SNMP messages from every host in your LAN, enter 0.0.0.0. SNMP Trap-Destination Enter the destination IP address for traps. To prevent traps from being sent to any of your LAN hosts, enter 0.0.0.0. Wireless-G Business Ethernet Bridge Administration > Configuration - Cisco WET200 | User Guide - Page 24
's default screen. It displays basic status information for the Bridge. Administration > Firmware Upgrade This screen allows you to upgrade the Bridge's firmware after you have downloaded a new firmware file from the Linksys website. Firmware should only be upgraded if you experience problems with - Cisco WET200 | User Guide - Page 25
> Port Statistics Advanced Configuration System Status > Port Statistics This screen displays status information for the Bridge's ports. Port 1-5, Wireless Displays the following settings packets sent. Click Refresh to display the most current information. Wireless-G Business Ethernet Bridge 21 - Cisco WET200 | User Guide - Page 26
by the factory. The Linksys default password is admin. Hackers know these defaults and may try to use them to access your wireless device and change your network settings. To thwart any unauthorized changes, customize the device's password so it will be hard to guess. 3. Enable MAC address filtering - Cisco WET200 | User Guide - Page 27
at www.linksys.com/glossary Access Mode Specifies the method by which user access is granted to the system. Access Point A device that allows wireless-equipped computers and other devices to communicate with a wired network. Also used to expand the range of a wireless network. Access Profiles - Cisco WET200 | User Guide - Page 28
and a dynamic IP address. Default Gateway A device that forwards Internet traffic from your local area network. DHCP (Dynamic Host Configuration Protocol) A networking protocol that allows administrators to assign temporary IP addresses to network computers by"leasing" an IP address to a user for - Cisco WET200 | User Guide - Page 29
application types, and source and destination addresses. Wireless-G Business Ethernet Bridge RADIUS (Remote Authentication Dial-In User Service) A protocol that uses an authentication server to control network access. RJ-45 (Registered Jack-45) An Ethernet connector that holds up to eight wires - Cisco WET200 | User Guide - Page 30
. A wildcard of 0.0.0.0 indicates that all the bits are important. For example, if the destination IP address is 149.36.184.198 and the wildcard mask is 255.36.184.00, the first two bits of the IP address are used, while the last two bits are ignored. Wireless-G Business Ethernet Bridge Glossary 26 - Cisco WET200 | User Guide - Page 31
Transmit Power Transmit Power (Adjustable) @ Normal Temperature Range: 11b: 12 ± 1 dBm, 11g: 16 ± 1 dBm Antenna Gain 2 dBi Receiver Sensitivity 11g: 54 Mbps @ -69 dBm, 11b: 11 Mbps @ -82 dBm Wireless-G Business Ethernet Bridge Security WEP/WPA/WPA2 Access Control 802.1X Quality of Service QoS - Cisco WET200 | User Guide - Page 32
the exclusion or limitation of incidental or consequential damages, so the above limitation or exclusion may not apply to You. Please direct all inquiries to: Linksys, P.O. Box 18558, Irvine, CA 92623. Wireless-G Business Ethernet Bridge 28 - Cisco WET200 | User Guide - Page 33
and used according to the instructions, may cause harmful interference compliance could void the user's authority to operate other antenna or transmitter. IEEE 802.11b or 802.11g operation of this product in the USA is firmware-limited antenna or transmitter. Wireless-G Business Ethernet Bridge 29 - Cisco WET200 | User Guide - Page 34
rapport au point d'accès, du volume du trafic réseau, des matériaux utilisés dans le bâtiment et du type de construction, du système d'exploitation et de la combinaison de produits sans fil utilisés, des interférences et de toute autre condition défavorable. Wireless-G Business Ethernet Bridge 30 - Cisco WET200 | User Guide - Page 35
important information for users with regards to the proper disposal and recycling of Linksys products. Consumers your old equipment, please contact your local authorities, waste disposal service, or the shop where you purchased the product. Bulgarian 2002 Wireless-G Business Ethernet Bridge 31 - Cisco WET200 | User Guide - Page 36
limination de votre ancien équipement, veuillez prendre contact avec les pouvoirs publics locaux, le service de traitement des déchets, ou l'endroit où vous avez acheté le produit. Italiano savākšanas dienestā, kā arī veikalā, kur iegādājāties šo izstrādājumu. Wireless-G Business Ethernet Bridge 32 - Cisco WET200 | User Guide - Page 37
. W celu uzyskania szczegółowych informacji o usuwaniu starego sprzętu, prosimy zwrócić się do lokalnych władz, służb oczyszczania miasta lub sklepu, w którym produkt został nabyty. Wireless-G Business Ethernet Bridge 33 - Cisco WET200 | User Guide - Page 38
information om kassering av din gamla utrustning kontaktar du dina lokala myndigheter, avfallshanteringen eller butiken där du köpte produkten. WEB: For additional information, please visit www.linksys.com Wireless-G Business Ethernet Bridge 34 - Cisco WET200 | User Guide - Page 39
Advice Line 800-546-5797 (LINKSYS) Support 800-326-7114 RMA (Return Merchandise Authorization) http://www.linksys.com/warranty NOTE: Details on warranty and RMA issues can be found in the Warranty section of this Guide. Contact Information Wireless-G Business Ethernet Bridge 8070310B-RC 35
-
 1
1 -
 2
2 -
 3
3 -
 4
4 -
 5
5 -
 6
6 -
 7
7 -
8
-
9
-
10
-
11
-
12
-
13
-
14
-
15
-
16
-
17
-
18
-
19
-
20
-
21
-
22
-
23
-
24
-
25
-
26
-
27
-
28
-
29
-
30
-
31
-
32
-
33
-
34
-
35
-
36
-
37
-
38
-
39
 |
 |
USER GUIDE
BUSINESS SERIES
Wireless-G Business
Ethernet Bridge
Model:
WET200