Cisco WVC210 Administration Guide - Page 18
Getting to Know the Cisco WVC210 Internet Camera, Jack, or, Button, Description - internet setup
 |
UPC - 745883584703
View all Cisco WVC210 manuals
Add to My Manuals
Save this manual to your list of manuals |
Page 18 highlights
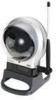
Getting to Know the Cisco WVC210 Internet Camera Bottom Panel 3 The following features are found on the bottom of the camera. Port, Jack, or Button POWER SPKR OUT MIC IN LAN RESET Description The Power port is where you connect the 5V power adapter. Use the SPKR OUT input to connect with the 3.5 mm input jack of your optional external speaker. The speaker needs to be a PC, or a powered speaker. Use the MIC IN input to connect with the 3.5 mm input jack of your optional external microphone. The LAN port is where you connect your Ethernet cable. Use a Cat5E (or better) network cable. The reset button can be accessed with a straightened paper clip or similar object. The reset button has two functions: • Restore Factory Defaults-To restore the factory default settings, press the Reset button for more than 3 seconds. When you let go of the button, the LEDs on the front of the camera will flash and then return to a normal state when the camera is ready. • Set Static IP Address-By default the camera is set to receive an IP address from a DHCP server. If you do not have a DHCP server on your network, you can set a static IP address by pressing the Reset button on the camera for less than 3 seconds. A default IP address of 192.168.1.99 will be assigned to the camera. This information also can set in the Setup Wizard and in the web-based configuration utility for the camera. Tips when using the default IP address: • If the camera is connected directly to your computer, then your computer needs to be on the same subnet as the default IP address in order to access the configuration utility. • If you are using a router, you may be on a different subnet such as 192.168.2.1. WVC210 Wireless-G PTZ Internet Video Camera With 2-Way Audio Administration Guide 12
-
 1
1 -
2
-
3
-
4
-
5
-
6
-
7
-
8
-
9
-
10
-
11
-
12
-
 13
13 -
 14
14 -
 15
15 -
 16
16 -
 17
17 -
 18
18 -
 19
19 -
 20
20 -
 21
21 -
 22
22 -
 23
23 -
24
-
25
-
26
-
27
-
28
-
29
-
30
-
31
-
32
-
33
-
34
-
35
-
36
-
37
-
38
-
39
-
40
-
41
-
42
-
43
-
44
-
45
-
46
-
47
-
48
-
49
-
50
-
51
-
52
-
53
-
54
-
55
-
56
-
57
-
58
-
59
-
60
-
61
-
62
-
63
-
64
-
65
-
66
-
67
-
68
-
69
-
70
-
71
-
72
-
73
-
74
-
75
-
76
-
77
-
78
-
79
-
80
-
81
-
82
-
83
-
84
-
85
 |
 |
