D-Link DES-3010GA Product Manual - Page 33
Configuring the Terminal, Installation Procedure, Device Port Default Settings
 |
UPC - 790069280689
View all D-Link DES-3010GA manuals
Add to My Manuals
Save this manual to your list of manuals |
Page 33 highlights
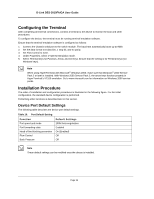
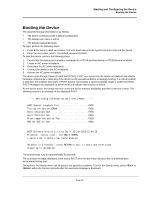
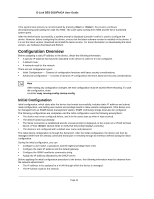
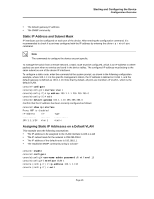
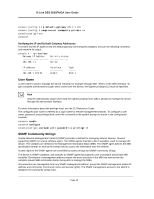
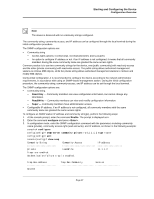
D-Link DES-3010FA/GA User Guide Configuring the Terminal After completing all external connections, connect a terminal to the device to monitor the boot and other procedures. To configure the device, the terminal must be running terminal emulation software. Ensure that the terminal emulation software is configured as follows: 1. Connect the Chassis serial port to the switch module. The baud rate automatically boots up at 9600. 2. Set the data format to 8 data bits, 1 stop bit, and no parity. 3. Set Flow Control to none. 4. Under Properties, select VT100 for Emulation mode. 5. Select Terminal keys for Function, Arrow, and Ctrl keys. Ensure that the setting is for Terminal keys (not Windows keys). Note When using HyperTerminal with Microsoft® Windows 2000, make sure that Windows® 2000 Service Pack 2 or later is installed. With Windows 2000 Service Pack 2, the arrow keys function properly in HyperTerminal's VT100 emulation. Go to www.microsoft.com for information on Windows 2000 service packs. Installation Procedure The order of installation and configuration procedures is illustrated in the following figure. For the initial configuration, the standard device configuration is performed. Performing other functions is described later in this section. Device Port Default Settings The following table describes the device port default settings. Table 10: Port Default Setting Function Port speed and mode Port forwarding state Head of line blocking prevention Flow Control Back Pressure Default Settings 100M Auto-negotiation Enabled On (Enabled) Off Off Note These default settings can be modified once the device is installed. Page 32
-
 1
1 -
2
-
3
-
4
-
5
-
6
-
7
-
8
-
9
-
10
-
11
-
12
-
13
-
14
-
15
-
16
-
17
-
18
-
19
-
20
-
21
-
22
-
23
-
24
-
25
-
26
-
27
-
 28
28 -
 29
29 -
 30
30 -
 31
31 -
 32
32 -
 33
33 -
 34
34 -
 35
35 -
 36
36 -
 37
37 -
 38
38 -
39
-
40
-
41
-
42
-
43
-
44
-
45
-
46
-
47
-
48
-
49
-
50
-
51
-
52
-
53
-
54
-
55
-
56
-
57
-
58
-
59
-
60
-
61
-
62
-
63
-
64
-
65
-
66
-
67
-
68
-
69
-
70
-
71
-
72
-
73
-
74
-
75
-
76
-
77
-
78
-
79
-
80
-
81
-
82
-
83
-
84
-
85
-
86
-
87
-
88
-
89
-
90
-
91
-
92
-
93
-
94
-
95
-
96
-
97
-
98
-
99
-
100
-
101
-
102
-
103
-
104
-
105
-
106
-
107
-
108
-
109
-
110
-
111
-
112
-
113
-
114
-
115
-
116
-
117
-
118
-
119
-
120
-
121
-
122
-
123
-
124
-
125
-
126
-
127
-
128
-
129
-
130
-
131
-
132
-
133
-
134
-
135
-
136
-
137
-
138
-
139
-
140
-
141
-
142
-
143
-
144
-
145
-
146
-
147
-
148
-
149
-
150
-
151
-
152
-
153
-
154
-
155
-
156
-
157
-
158
-
159
-
160
-
161
-
162
-
163
-
164
-
165
-
166
-
167
-
168
-
169
-
170
-
171
-
172
-
173
-
174
-
175
-
176
-
177
-
178
-
179
-
180
-
181
-
182
-
183
-
184
-
185
-
186
-
187
-
188
-
189
-
190
-
191
-
192
-
193
-
194
-
195
-
196
-
197
-
198
-
199
-
200
-
201
-
202
-
203
-
204
-
205
-
206
-
207
-
208
-
209
-
210
-
211
-
212
-
213
-
214
-
215
-
216
-
217
-
218
-
219
-
220
-
221
-
222
-
223
-
224
-
225
-
226
-
227
-
228
-
229
-
230
-
231
-
232
-
233
-
234
-
235
-
236
-
237
-
238
-
239
-
240
-
241
-
242
-
243
-
244
-
245
-
246
-
247
-
248
-
249
-
250
-
251
-
252
-
253
-
254
-
255
-
256
-
257
-
258
-
259
-
260
-
261
-
262
-
263
-
264
-
265
-
266
-
267
-
268
-
269
-
270
-
271
-
272
-
273
-
274
-
275
-
276
-
277
-
278
-
279
-
280
-
281
 |
 |
