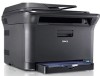
Dell 1235cn User's Guide
Dell 1235cn Manual
 |
View all Dell 1235cn manuals
Add to My Manuals
Save this manual to your list of manuals |
Dell 1235cn manual content summary:
- Dell 1235cn | User's Guide - Page 1
Dell 1235cn Multi Functional Printer User's Guide www.dell.com | support.dell.com - Dell 1235cn | User's Guide - Page 2
sided printing). See Software section. Print in various environments • You can print with Windows 2000/XP/2003/Vista as well as Macintosh systems. • Your printer is equipped with a USB interface and a network interface. Copy originals in several formats • Your printer can print multiple image copies - Dell 1235cn | User's Guide - Page 3
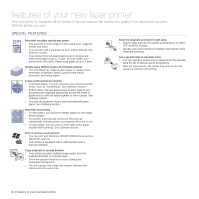
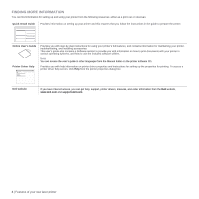
the green underside of the toner cartridge. Used to provide more detailed information on certain words or a phrase. a. pages per minute Used to guide users to the reference page for the additional detailed information. (See page 1 for more information) Features of your new laser printer | 3 - Dell 1235cn | User's Guide - Page 4
guide to prepare the printer. Online User's Guide Printer Driver Help Provides you with step-by-step instructions for using your printer's full features, and contains information for maintaining your printer, troubleshooting, and installing accessories. This user's guide also contains a Software - Dell 1235cn | User's Guide - Page 5
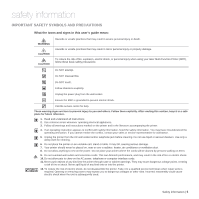
safety information. You may have misunderstood the operating instruction. If you cannot resolve the conflict, contact your sales or service representative for assistance. 5. Unplug the printer from the AC wall socket and/or telephone jack before cleaning. Do not use liquid or aerosol cleaners. Use - Dell 1235cn | User's Guide - Page 6
service personnel under the following conditions: • When any part of the power cord, plug or connecting cable is damaged or frayed. • If liquid has been spilled into the printer. • If the printer has been exposed to rain or water. • If the printer does not operate properly after instructions - Dell 1235cn | User's Guide - Page 7
the status of the toner cartridge 14 Menu overview 15 Supplied software 15 Printer driver features 15 Printer driver GETTING STARTED 16 Setting up the hardware 16 17 System requirements 17 Microsoft® Windows® 17 Macintosh 18 Setting up the network 18 Supported operation environments 18 - Dell 1235cn | User's Guide - Page 8
copying 32 Erasing background images 32 Gray enhance copying 32 Setting copy timeout SCANNING 33 Scanning basics 33 33 Scanning from the control panel 33 Setting scan information in Dell Scan Manager. 33 Scanning to application programs 34 Scanning by a network connection 34 Scanning to Email 35 - Dell 1235cn | User's Guide - Page 9
your printer 50 Cleaning the outside 50 Cleaning the inside 52 Cleaning the scan unit 53 Maintaining the cartridge 53 Toner cartridge storage 53 Expected cartridge life 53 Redistributing toner 53 Replacing the toner cartridge 55 Replacing the imaging unit 56 Replacing the waste toner container 57 - Dell 1235cn | User's Guide - Page 10
contents 70 Common Macintosh problems ORDERING SUPPLIES 71 Supplies 71 71 How to purchase SPECIFICATIONS 72 General specifications 72 73 Printer specifications 73 Scanner specifications 73 Copier specifications 74 Facsimile specifications GLOSSARY 75 INDEX 79 10 | Contents - Dell 1235cn | User's Guide - Page 11
Supplied software • Printer driver features Rear view 1 Document width guides 2 ADF 3 Control panel 4 Output support 5 Front cover 6 Front cover handle 7 Tray 1 8 Document input tray 9 Document output tray 10 USB connector 11 Toner cartridge 12 Imaging unit 13 Waste toner container 14 Scanner lid - Dell 1235cn | User's Guide - Page 12
of the toner cartridge" on page 13. 5 Status Shows the status of your printer. See "Understanding the Status LED" on page 13. 6 Fax Activates Fax mode. 7 Copy Activates Copy mode. 8 Scan/Email Activates Scan mode. 9 Menu Enters Menu mode and scrolls through the available menus. 10 OK - Dell 1235cn | User's Guide - Page 13
the display to solve the problem. The instruction in the Troubleshooting section will guide you to operate the printer properly. See "Understanding display messages" on page 62 for more information. ACKNOWLEDGING THE STATUS OF THE TONER CARTRIDGE The status of toner cartridges is indicated by the - Dell 1235cn | User's Guide - Page 14
JunkFax Report Network Info. User Auth List Maintenance CLR Empty Msg Supplies Life Color Serial Number System Setup Machine Setup Machine ID Machine Fax No. Date & Time Clock Mode Language Default Mode Power Save Timeout Altitude Adj. Auto Continue Import Setting Export Setting Paper Setup Paper - Dell 1235cn | User's Guide - Page 15
advantage of your printer's features. • Scanner driver: TWAIN and Windows Image Acquisition (WIA) drivers are available for scanning documents on your printer. • SmarThrua: This is the accompanying Windows-based software for your multifunctional printer. • Dell Toner Management System™: Displays the - Dell 1235cn | User's Guide - Page 16
getting started This chapter gives you step-by-step instructions for setting up the printer. This chapter includes: • Setting up the hardware • System requirements • Setting up the network • Printer's basic settings SETTING UP THE HARDWARE This section shows the steps to set up the hardware - Dell 1235cn | User's Guide - Page 17
Software installation can be only be performed by users with Administrator rights. • Windows Terminal Service is compatable with this printer. Macintosh OPERATING SYSTEM REQUIREMENT (RECOMMENDED) CPU RAM FREE HDD SPACE Mac OS X 10.3 ~ 10.4 • Intel Processor • 128 MB for a 1 GB • Power PC G4 - Dell 1235cn | User's Guide - Page 18
the installation. Setting network values 1. Print the printer's network configuration report to find your printer's MAC address. See "Printing reports" on page 49. 2. From the Windows Start menu, select All Programs → Dell → Dell printers → Dell 1235cn Color Laser MFP → SetIP. 3. Click to open the - Dell 1235cn | User's Guide - Page 19
to reinstall the printer driver. See Software section for more information. • During the printer driver installation process, the driver installer detects the location information for your operating system and sets the default paper size for your printer. If you use a different Windows location, you - Dell 1235cn | User's Guide - Page 20
guide you on how to set your printer for the best print quality or best quality of print. Before you set the altitude value, find the altitude where you are using the printer. 1 Normal 2 High 1 3 High 2 4 High 3 0 1. Click Start → All Programs → Dell → Dell Printers → Dell 1235cn Color Laser MFP - Dell 1235cn | User's Guide - Page 21
With this option set to On, an alarm tone sounds when an error occurs or fax communication ends. • Speaker: Turns on or off the length of time for which the printer waits after a job is printed before it switches to a reduced power state. 1. Press Menu until System Setup appears on the bottom line - Dell 1235cn | User's Guide - Page 22
mismatches the tray paper size. • Off: Waits until you press Black Start or Color Start on the control panel, when the paper size mismatches the tray paper size. 5. Press OK to save your selection. 6. Press Stop/Clear to return to ready mode. 22 | Getting started - Dell 1235cn | User's Guide - Page 23
the printer gives it priority over the original on the scanner glass. To get the best scan quality, especially for colored or gray-scaled images, use the scanner glass. 1. Lift and open the scanner lid. 2. Place the original face down on the scanner glass and align it with the registration guide at - Dell 1235cn | User's Guide - Page 24
specified in this user's guide. Using print media that does not meet these specifications may cause problems, requiring repairs. Such repairs are not covered by Dell's warranty or service agreements. Ensure that you do not use the inkjet photo paper with this printer. It could cause damage - Dell 1235cn | User's Guide - Page 25
mm (3.62 x 6.5 inches) 75 to 90 g/m2 (20 to 24 lb bond) 5 sheet for manual feeding in the tray Envelope No. 10 105 x 241 mm (4.12 x 9.5 inches) Envelope No. 9 98 x 225 mm (3.87 x media: Transparency for a Color Laser Printers by 3M such as PP2500. Loading originals and print media | 25 - Dell 1235cn | User's Guide - Page 26
even damage the fuser. • For the best print quality, position margins no closer than 15 mm from the edges of the envelope. • Avoid printing over the area where the envelope's seams meet. Labels • To avoid damaging the printer, use only labels designed for use in laser printers. - When selecting - Dell 1235cn | User's Guide - Page 27
the paper is dry. During the fusing process, wet ink can come off preprinted paper, reducing print quality. Using photographic paper or coated paper may cause problems, requiring repairs. Such repairs are not covered by Dell's warranty or service agreements. CHANGING THE SIZE OF THE PAPER IN THE - Dell 1235cn | User's Guide - Page 28
experience problems with paper feed, turn the paper around. Note that print quality is not guaranteed. The tray is preset to Letter or A4 size, depending on your country. To change the size to A4 or Letter, you must adjust the lever and paper width guide properly. 1 Pull the tray out of the printer - Dell 1235cn | User's Guide - Page 29
set the paper type to Label. 5. Select Manual Feeder in paper source, then press OK. 6. Start printing in the application. 7. Press the Color Start or Black Start button on the printer to start feeding, then the printer starts printing. • If you are printing multiple pages, load the next sheet after - Dell 1235cn | User's Guide - Page 30
such as 2-up or 4-up copying. 5. Press Color Start to begin color copying. Or, press Black Start to begin black and white copying. You can cancel the copy job status after the printer completes the copy in progress. Darkness If you have an original containing faint markings and dark images, you can - Dell 1235cn | User's Guide - Page 31
a 2- or 4-up copy. Poster copying Your printer can print an image onto 9 sheets of paper (3x3). You can paste the printed pages together to make one poster-sized document. This copy feature is available only when you place originals on the scanner glass. 1. Press Copy. 2. Press Menu until Copy - Dell 1235cn | User's Guide - Page 32
Reduce/Enlarge menu while making a clone copy. Erasing background images You can set the printer to print an image without its background. This copy feature removes the background color and can be helpful when copying an original containing color in the background, such as a newspaper or a catalog - Dell 1235cn | User's Guide - Page 33
available disk space, memory, the size of the image being scanned, and bit depth settings. Thus, depending on your system and what you are scanning, you may not be able to scan at certain resolutions, especially using enhanced resolution. SCANNING BASICS You can scan the originals with your printer - Dell 1235cn | User's Guide - Page 34
Color Start or Black Start. 8. Scanning begins. • Scanned image is saved in computer's My Documents→ My Pictures→Dell folder. • You can use Twain driver to scan quickly in Dell Scan Manager program. • You can also scan by pressing Window's Start→Control Panel→ Dell Scan Manager→Quick Scan. SCANNING - Dell 1235cn | User's Guide - Page 35
SCAN JOB Your printer provides you with the following setting options to allow you to customize your scan jobs. • Scan Size: Sets the image size. • Original Type: Sets the original document's type. • Resolution: Sets the image resolution. • Scan Color: Sets the color mode. • Scan Web Service and - Dell 1235cn | User's Guide - Page 36
settings by printing a list. 1. Press Address Book until Print appears on the bottom line of the display. 2. Press OK. 3. Press the left/right arrow until the option you want appears and press OK. 4. Press OK when Yes appears to confirm printing. The selected information prints out. 36 | Scanning - Dell 1235cn | User's Guide - Page 37
job as follows: 1. Click the Windows Start menu. 2. For Windows 2000, select Settings and then Printers. For Windows XP/2003, select Printers and Faxes. For Windows Vista, select Control Panel → Hardware and Sound → Printers. 3. Double-click the Dell 1235cn Color Laser MFP icon. 4. From the Document - Dell 1235cn | User's Guide - Page 38
printer, contact your Internet Service printed using a dot-matrix printer. Originals containing extremely fine detail. Super Fine mode is enabled only if the printer with which you are communicating also supports the Super Fine resolution. • For memory transmission, Superfine mode is not available - Dell 1235cn | User's Guide - Page 39
Color Start or Black Start. If an original is placed on the scanner manually 1. Press Fax. 2. Load originals face up into the ADF, or place a single original face down on the scanner error message, press Stop/Clear to clear the message and try to send the fax again. You can set your printer to print - Dell 1235cn | User's Guide - Page 40
scanned into memory before transmission. The display shows memory capacity and the number of pages being stored in memory. 10. If an original is placed on the scanner You can set your printer to send a fax at a later time when you will not be present. You cannot send a color fax using this feature. - Dell 1235cn | User's Guide - Page 41
On Hook Dial and then pressing Black Start or Color Start when you hear a fax tone from the remote printer. The printer begins receiving a fax and returns to ready mode when the reception is completed. Receiving manually using an extension telephone This features works best when you are using an - Dell 1235cn | User's Guide - Page 42
its memory. Then, as soon as you finish copying or printing, the printer automatically prints the fax. Also, your printer receives faxes and stores them in its memory when there is no paper in the tray or no toner in the installed toner cartridge. 42 | Faxing Forwarding faxes You can forward your - Dell 1235cn | User's Guide - Page 43
Send Report You can set your printer to print a confirmation report showing whether a transmission was successful, how many pages were sent, and more. The available options are On, Off, and OnError, which prints only when a transmission is not successful. Image TCR This function allows users to - Dell 1235cn | User's Guide - Page 44
contains pages larger than the paper in your printer, and Auto Reduction has been turned on, the printer will reduce the fax to fit on the existing paper, and nothing will be discarded. Junk Fax Setup This setting may not be available depending on your country. Using this feature, the system to 10 - Dell 1235cn | User's Guide - Page 45
to include other speed dial numbers into the group. 10. When you have finished, press the left/right All to search for an entry by scanning through all entries in Address Book. Printing Address Book 1. You can check your Address Book settings by printing a list. 1. Press Address Book until Print - Dell 1235cn | User's Guide - Page 46
device: • Scan documents and save them on a USB memory device. • Print data stored on a USB memory device. • Back up Address Book/ Phone Book entries and the system settings of your printer. • Restore backup files to the printer's memory. • Format the USB memory device. • Check the available memory - Dell 1235cn | User's Guide - Page 47
select No and press OK. After scanning is complete, you can remove the USB memory device from the printer. Customizing Scan to USB You can specify image size, file format, or color mode for each scanning to USB job. 1. Press Scan/Email. 2. Press Menu until Scan Feature appears on the bottom line of - Dell 1235cn | User's Guide - Page 48
until Check Space appears and press OK. The available memory space appears on the display. 4. Press Stop/Clear to return to the ready mode. PRINTING DIRECTLY FROM A DIGITAL CAMERA This printer supports the PictBridge feature. You can print images directly from any PictBridge-compatible device, such - Dell 1235cn | User's Guide - Page 49
• Replacing the imaging unit • Replacing the waste toner container • Maintenance parts • Managing your printer from the website • Checking the printer's serial number PRINTING REPORTS Your printer can provide various reports with useful information you will need. The following reports are available - Dell 1235cn | User's Guide - Page 50
to ready mode. CLEANING YOUR PRINTER To maintain print and scan quality, follow the cleaning procedures below each time the toner cartridge is replaced or if print and scan quality problems occur. • Cleaning the cabinet of the printer with cleaning materials containing large amounts of alcohol - Dell 1235cn | User's Guide - Page 51
using its handle. 7. Holding the groove on the front of the imaging unit, push the imaging unit in to the printer. 5. Pull the imaging unit out of the printer using the groove on the front of the imaging unit. 8. Insert the waste toner container into position and then push it to ensure that it is - Dell 1235cn | User's Guide - Page 52
that you clean the scan unit at the start of each day and during the day, as needed. 1. Slightly dampen a soft lint-free cloth or paper towel with water. 2. Open the scanner lid. 3. Wipe the surface of the scanner glass until it is clean and dry. 7. Push the ADF sheet back into the printer smoothly - Dell 1235cn | User's Guide - Page 53
Incoming faxes are saved in memory. Also, the Dell Toner Management System™ program window appears on the computer indicating you to replace the cartridge. At this stage, the toner cartridge needs to be replaced. Check the type of toner cartridge for your printer. (See "Ordering supplies" on page 71 - Dell 1235cn | User's Guide - Page 54
the handles on the toner cartridge and pull to remove the cartridge from the printer. 7. Ensure that the color of the toner cartridge matches the color slot and then grasp the handles on the toner cartridge. Insert the cartridge until it clicks into place. 4. Take a new toner cartridge out of its - Dell 1235cn | User's Guide - Page 55
When the life span of the imaging unit has expired, the Dell Toner Management System™ program window appears on the computer, indicating the imaging unit needs to be replaced. If the imaging unit is not replaced, your printer fails to print. 1. Turn the printer off, then wait a few minutes for the - Dell 1235cn | User's Guide - Page 56
life span of the waste toner container has expired, the Dell Toner Management System™ program window appears on the computer, indicating the waste toner container needs to be replaced. If the waste toner container is not replaced, your printer fails to print. 1. Turn the printer off, then wait a few - Dell 1235cn | User's Guide - Page 57
scanned using the scanner glass. • Imaging Unit, Transfer Belt, Fuser, TransferRoller, Tray1 Roller: displays the number of pages printed each item. 5. If you selected to print a supply information page, press OK to confirm. 6. Press Stop/Clear to return to ready mode. MANAGING YOUR PRINTER FROM - Dell 1235cn | User's Guide - Page 58
the tray. Ensure that the paper level is below the paper capacity mark on the inside of the tray. • Do not remove paper from the tray while your printer is printing. • Flex, fan, and straighten paper before loading. • Do not use creased, damp, or highly curled paper. • Do not mix paper types - Dell 1235cn | User's Guide - Page 59
the printer. 3. Close the scanner lid. Then load the removed pages printer until it snaps into place. Printing automatically resumes. In the fuser unit area If paper is jammed in the fuser unit area, perform the following steps to release the jammed paper. 1. Open the scan unit. Troubleshooting - Dell 1235cn | User's Guide - Page 60
! The fuser's operating temperature is 180°C (356°F). Take care when removing paper from the printer. 4. Close the inner cover. 5. Lower down the scan unit gently and Pull up the fuser lever. If the scan unit is not completely closed, the printer will not operate. 60 | Troubleshooting 1 fuser lever - Dell 1235cn | User's Guide - Page 61
the fuser lever. 7. Carefully take the jammed paper out of the printer. 10. Close the rear cover. Printing automatically resumes. 8. Lower down the scan unit gently and slowly until it is completely closed. Ensure that it is securely latched. Be careful not to pinch your fingers! Troubleshooting - Dell 1235cn | User's Guide - Page 62
Check USB Mem. Storing to the USB memory failed. Check the available USB memory space. Deve Home Sensor Error There is a problem in the fuser unit. Turn the power switch off and on. If the problem persists, call for service. [Document Jam] The loaded original has jammed in the ADF. Clear - Dell 1235cn | User's Guide - Page 63
fuser unit. Turn the power switch off and on. If the problem persists, call for service. MESSAGE Paper Jam 0 Open/Close Door Paper Jam 1 Check Inside Paper Jam 2 Check Inside Refilled Toner T Replace Toner T Replace [xxx] Replace [xxx] Soon Replace/Install Toner Waste Bin Retry Redial? Scan Unit - Dell 1235cn | User's Guide - Page 64
out the toner cartridge and thoroughly shake it. By doing this, you can temporarily reestablish printing operations. MESSAGE Transfer Belt Error Tray Paper Empty Tray Paper Mismatch MEANING SUGGESTED SOLUTIONS A problem has occurred in the transfer belt in the printer. Turn the power switch off - Dell 1235cn | User's Guide - Page 65
The printer does The printer is not not print receiving power. Check the power cord connections. Check the power switch and the power source. The printer is not selected as the default printer. Select Dell 1235cn Color Laser MFP as your default printer in Windows. Check the printer for - Dell 1235cn | User's Guide - Page 66
system is malfunctioning. Exit Windows and reboot the computer. Turn the printer off and then back on again. Pages print, but are blank The toner cartridge is defective or out of toner. Redistribute the toner, if necessary. See "Redistributing toner" on page 53. If necessary, replace the toner - Dell 1235cn | User's Guide - Page 67
printer. Contact a service representative. • The paper path may need cleaning. Contact a service representative. Vertical lines Color or Black background Toner smear If black vertical streaks appear on the page: • The drum inside the toner cartridge has probably been scratched. Remove the toner - Dell 1235cn | User's Guide - Page 68
type and quality. See "Selecting print media" on page 24. • Remove the toner cartridge and install a new one. See "Replacing the toner cartridge" on page 53. • If the problem persists, the printer may require repair. Contact a service representative. 68 | Troubleshooting CONDITION Character Voids - Dell 1235cn | User's Guide - Page 69
the power may be off. job is completed, try again." • "Invalid handle." • "Scanning has failed." Dell Scan Manager problems CONDITION I cannot use the Dell Scan Manager SUGGESTED SOLUTIONS Check your operating system. Supporting operating systems are Windows 2000/XP/ Vista. Troubleshooting - Dell 1235cn | User's Guide - Page 70
as an image may solve this problem. Turn on Print As Image from the Acrobat printing options. It will take longer to print when you print a PDF file as an image. The document has printed, but the print job has not disappeared from the spooler in Mac OS 10.3.2 Update your Mac OS to OS 10.3.3. or - Dell 1235cn | User's Guide - Page 71
continuous black cartridge yield: 1,500 standard pages (Black) • Average continuous colored cartridge yield: 1,000 standard pages (Yellow/Magenta/Cyan) Y924J (Black) C815K (Cyan) D593K (Magenta) F479K (Yellow) Imaging unit Approx. 24,000 imagesb C920K Waste toner container Approx. 10,000 - Dell 1235cn | User's Guide - Page 72
black cartridge yield: 1,500 standard pages (Shipped with 1,000 pages Starter toner cartridge.) Color (Yellow/ Magenta/ Cyan) Average continuous colored cartridge yield: 1,000 standard pages (Shipped with 700 pages Starter toner cartridge.) Imaging unit yieldc.d Approx. 24,000 images Waste - Dell 1235cn | User's Guide - Page 73
57 seconds Print resolution Max. 2,400 x 600 dpi class Printer language GDI OS compatibilityb • Windows: 2000/XP/2003/Vista • Macintosh: Mac OS X 10.3~10.5, Universal Mac Interface • High speed USB 2.0 • Ethernet 10/100 Base TX (embedded type) a. It will be affected by operating system used - Dell 1235cn | User's Guide - Page 74
SPECIFICATIONS The fax feature may not be supported depending on printers. ITEM DESCRIPTION Compatibility ITU-T G3 Applicable : 203 x 98 dpi Fine: 203 x 196 dpi Super Fineb: 300 x 300 dpi Color 200 x 200 dpi only Memory 2MB Halftone 256 levels Auto dialer Speed dialing (up to 240 - Dell 1235cn | User's Guide - Page 75
instruments are displayed. They are typically found in front of the printer. Coverage It is the printing term used for a toner usage measurement on printing. For example, 5% coverage means that an A4 sided paper has about 5% image or text on it. So, if the paper or original has complicated - Dell 1235cn | User's Guide - Page 76
pay-for-print service on your printer. FTP A File Transfer Protocol (FTP) is a commonly used protocol for exchanging files over any network that supports the TCP/IP protocol (such as the Internet or an intranet). Fuser Unit The part of a laser printer that melts the toner onto the print media. It - Dell 1235cn | User's Guide - Page 77
a mechanism that makes a virtual image for print using a laser beam emitted from a laser printer, and it is usually green or gray colored and a cylinder shaped. An exposing unit of a drum is slowly worn away by its usage of the printer, and it should be replaced appropriately since it gets scratches - Dell 1235cn | User's Guide - Page 78
like printer which contains toner. Toner is a powder used in laser printers and photocopiers, which forms the text and images on the printed paper. Toner can be melted by the heat of the fuser, causing it to bind to the fibers in the paper. TWAIN An industry standard for scanners and software. By - Dell 1235cn | User's Guide - Page 79
maintenance parts 57 toner cartridge 53 memory, clear 50 Multiple Send faxes 39 N network setting up 18 O originals jam, clear 58 loading 23 P paper changing the size 27, 59 paper jam, clear tray 1 59 paper type setting 29 power save mode 21 print quality problems, solve 66 printing reports - Dell 1235cn | User's Guide - Page 80
receiving modes 41 redialing automatically 39 manually 39 replacing components toner cartridge 53 reports, print 49 ringer 21 S scanner glass cleaning 52 loading documents 23 scanning default setting, change 35 to email 34 USB flash memory 46 secure receiving mode 42 sending a fax automatically 39 - Dell 1235cn | User's Guide - Page 81
the DELL logo, and Dell Toner Management System are trademarks of Dell Inc.; Microsoft, Windows, and Windows Vista are either trademarks or registered trademarks of Microsoft Corporation in the United States and/or other countries; UFST and MicroType are registered trademarks of Monotype Imaging Inc - Dell 1235cn | User's Guide - Page 82
Software section - Dell 1235cn | User's Guide - Page 83
1: INSTALLING PRINTER SOFTWARE IN WINDOWS Installing Printer Software ...4 Installing Software for Local Printing 4 Installing Software for Network Printing 7 Reinstalling Printer Software ...9 Removing Printer Software ...10 Chapter 2: BASIC PRINTING Printing a Document ...11 Printing to a file - Dell 1235cn | User's Guide - Page 84
SmarThru Office 22 Scanning Process with TWAIN-enabled Software 24 Scanning Using the WIA Driver 24 Windows XP ...24 Windows Vista ...24 Chapter 6: USING OTHER SOFTWARE Printer Status Monitor ...25 Printer Settings Utility ...25 Dell Toner Re-order application 26 Firmware Update Utility ...26 - Dell 1235cn | User's Guide - Page 85
Installing Software ...27 Uninstalling software ...27 Setting Up the Printer ...28 For a Network-connected 28 For a USB-connected ...28 Printing ...29 Printing a Document ...29 Changing Printer Settings 29 Printing Multiple Pages on One Sheet of Paper 30 Scanning ...31 Scanning with USB ...31 3 - Dell 1235cn | User's Guide - Page 86
includes: • Installing Printer Software • Reinstalling Printer Software • Removing Printer Software NOTE: The following procedure is based on Microsoft® Windows® XP, for other operating systems, refer to the corresponding Windows user's guide or online help. 2 Insert the Drivers and Utilities CD - Dell 1235cn | User's Guide - Page 87
: After setup is complete, if your printer driver does not work properly, reinstall the printer driver. See "Reinstalling Printer Software" on page 9. • If necessary, select a language from the drop-down list. • View User's Guide: Allows you to view the User's Guide. If your computer does not have - Dell 1235cn | User's Guide - Page 88
on the following screen. Then the installation will start and a test page will not be printed at the end of the installation. • The installation window that appears in this User's Guide may differ depending on the printer and interface in use. NOTE: You can change the desired installation folder by - Dell 1235cn | User's Guide - Page 89
cannot find your machine in the network, turn off the firewall and click Update. For Windows operating system, click Start → Control Panel and start windows firewall, and set this option unactivated. For other operating system, refer to its on-line guide. 7 Installing Printer Software in Windows - Dell 1235cn | User's Guide - Page 90
cannot find your machine in network, please turn off the firewall and click Update. For Windows operating system, click Start → Control Panel and start windows firewall, and set this option unactivated. For other operating system, refer to its on-line guide. 8 Installing Printer Software in Windows - Dell 1235cn | User's Guide - Page 91
not work properly, reinstall the printer driver. See "Reinstalling Printer Software" on page 9. Reinstalling Printer Software You can reinstall the software if installation fails. 1 Start Windows. 2 From the Start menu select Programs or All Programs → Dell → Dell Printers → your printer driver name - Dell 1235cn | User's Guide - Page 92
to reprint it. 6 When the reinstallation is done, click Finish. Removing Printer Software 1 Start Windows. 2 From the Start menu select Programs or All Programs → Dell → Dell Printers → your printer driver name → Maintenance. 3 Select Remove and click Next. You will see a component list so that you - Dell 1235cn | User's Guide - Page 93
: • Your printer driver Properties window that appears in this User's Guide may differ depending on the printer in use. However the composition of the printer properties window is similar. • Check the Operating System(s) that are compatible with your printer. Please refer to the OS Compatibility - Dell 1235cn | User's Guide - Page 94
needed for your print job. Your printer properties window may differ, depending on your operating system. This Software User's Guide shows the Properties window for Windows XP. Your printer driver Properties window that appears in this User's Guide may differ depending on the printer in use. NOTES - Dell 1235cn | User's Guide - Page 95
window appears, set the paper size and click OK. The setting appears in the list so that you can select it. Source Ensure that Source is set to the corresponding paper tray. Use Manual Feeder when printing . Select this type if your printer is monochrome and printing on the 16 lb (60 g/m2) cotton - Dell 1235cn | User's Guide - Page 96
of images by changing the settings in the Settings option. Advanced Options You can set advanced settings by clicking the Advanced Options button. • Print All Text To Black: When the Print All Text To Black option is checked, all text in your document prints solid black, regardless of the color it - Dell 1235cn | User's Guide - Page 97
box. Watermark You can create a background text image to be printed on each page of your document. For printer properties window. These help screens give detailed information about the printer features provided by the printer driver. You can also click from the upper right corner of the window - Dell 1235cn | User's Guide - Page 98
options and advanced printing tasks. NOTE: • Your printer driver Properties window that appears in this User's Guide may differ depending on the printer in use. However the composition of the printer properties window is similar. • If you need to know the exact name of your printer, you can check - Dell 1235cn | User's Guide - Page 99
booklet. 1 To change the print settings from your software application, access the printer properties. See "Printing a Document" on page 11. 2 From the Layout tab, choose Booklet Printing from the Layout Type drop-down list. NOTE: The Booklet Printing option is not available for all paper sizes. In - Dell 1235cn | User's Guide - Page 100
not have a duplex unit, you should complete the printing job manually. The printer prints every other page of the document first. After printing the first side of your job, the Printing Tip window appears. Follow the onscreen instructions to complete the printing job. Printing a Reduced or Enlarged - Dell 1235cn | User's Guide - Page 101
and change the watermark message and options. 4 Click Update to save the changes. 5 Click OK until you exit the Print window. Deleting a Watermark 1 To change the print settings from your software application, access printer properties. See "Printing a Document" on page 11. 2 From the Other Options - Dell 1235cn | User's Guide - Page 102
letterhead paper in the printer. You can use your printer to print the letterhead overlay on your document. Creating a New Page Overlay To use a page overlay, you must create a new page overlay containing your logo or image. 1 Create or open a document containing text or an image for use in a new - Dell 1235cn | User's Guide - Page 103
procedure is for Microsoft® Windows® XP. For other Windows operating systems, see the corresponding Windows User's Guide or online help. NOTES: • Check the operating system(s) that are compatible with your printer. Please refer to the OS Compatibility section of Printer Specifications in the Getting - Dell 1235cn | User's Guide - Page 104
check your printer name in the supplied Drivers and Utilities CD. • The maximum resolution that can be achieved depends upon various factors, including computer speed, available disk space, memory, the size of the image being scanned, and bit depth settings. Thus, depending on your system and what - Dell 1235cn | User's Guide - Page 105
2 Scan Setting window opens. 1 Select Allows you to select between the Local or Scanner Network scanner. 2 Select Profile Allows you to save settings frequently used for future use. Click New Profile to save the setting. 3 Scan Allows you to customize settings for Scan Settings Size and - Dell 1235cn | User's Guide - Page 106
the program's instructions for acquiring an image. See the user's guide of the application. Scanning Using the WIA Driver Your machine also supports the Windows Image Acquisition (WIA) driver for scanning images. WIA is one of the standard components provided by Microsoft® Windows® XP and works with - Dell 1235cn | User's Guide - Page 107
displays the current status of the printer. • Toner Level: You can view the level of toner remaining in the toner cartridge(s). • Order Supplies: Click to order replacement toner cartridges online. • User's Guide: Allows you to view the Dell 1235cn Color Laser MFP User's Guide. 25 Using other - Dell 1235cn | User's Guide - Page 108
cartridges or supplies from Dell: 1 Double-click the Dell Toner Reorder Program icon on your desktop. or Click Start → Programs or All Programs → Dell → Dell Printers → Dell 1235cn Color Laser MFP → Dell 1235cn MFP Toner Reoder. 2 The Dell 1235cn MFP Toner Reorder window opens. Firmware Update - Dell 1235cn | User's Guide - Page 109
the Printer • Printing • Scanning Installing Software The Drivers and Utilities CD that came with your printer provides you with the PPD file that allows you to use the CUPS driver or Apple LaserWriter driver (only available when you use a printer which supports the PostScript driver), for printing - Dell 1235cn | User's Guide - Page 110
supports a network interface by referring to Printer Specifications in the Specifications chapter. 1 Follow the instructions on "Installing Software" on page 27 to install the PPD and Filter files on your computer. 2 Open the Applications folder → Utilities, and Print Setup Utility. • For MAC OS 10 - Dell 1235cn | User's Guide - Page 111
Page Setup (Document Setup in some applications). 3 Choose your paper size, orientation, scaling, and other options and click OK. Make sure that your printer is selected. ▲ Mac OS 10.5 4 Open the File menu and click Print. 5 Choose the number of copies you want and indicate which pages you want to - Dell 1235cn | User's Guide - Page 112
page order from the Layout Direction option. To print a border around each page on the sheet, select the option you want from the Border drop-down list. 5 Click Print, and the printer prints the selected number of pages on one side of each page. ▲ Mac OS 10.5 30 Using Your Printer with a Macintosh - Dell 1235cn | User's Guide - Page 113
to TWAIN-compliant softwares. Please refer to the user's guide of the software. • If scanning does not operate in Image Capture, update Mac OS to the latest version. Image Capture operates propery in Mac OS X 10.3.9 or higher and Mac OS X 10.4.7 or higher. 31 Using Your Printer with a Macintosh - Dell 1235cn | User's Guide - Page 114
Windows 12 printer resolution, set Windows 14 printer software install Macintosh 27 Windows 4 uninstall Macintosh 27 Windows 10 printing booklets 17 double-sided 18 S scanning TWAIN 24 WIA driver 24 scanning from Macintosh 31 setting darkness 14 favorites 15 image mode 14 resolution Windows 14 toner - Dell 1235cn | User's Guide - Page 115
TWAIN, scan 24 U uninstall, software Macintosh 27 Windows 10 W watermark create 19 delete 19 edit 19 print 19 WIA, scan 24 33 - Dell 1235cn | User's Guide - Page 116
REV 1.01
-
 1
1 -
 2
2 -
 3
3 -
 4
4 -
 5
5 -
 6
6 -
 7
7 -
8
-
9
-
10
-
11
-
12
-
13
-
14
-
15
-
16
-
17
-
18
-
19
-
20
-
21
-
22
-
23
-
24
-
25
-
26
-
27
-
28
-
29
-
30
-
31
-
32
-
33
-
34
-
35
-
36
-
37
-
38
-
39
-
40
-
41
-
42
-
43
-
44
-
45
-
46
-
47
-
48
-
49
-
50
-
51
-
52
-
53
-
54
-
55
-
56
-
57
-
58
-
59
-
60
-
61
-
62
-
63
-
64
-
65
-
66
-
67
-
68
-
69
-
70
-
71
-
72
-
73
-
74
-
75
-
76
-
77
-
78
-
79
-
80
-
81
-
82
-
83
-
84
-
85
-
86
-
87
-
88
-
89
-
90
-
91
-
92
-
93
-
94
-
95
-
96
-
97
-
98
-
99
-
100
-
101
-
102
-
103
-
104
-
105
-
106
-
107
-
108
-
109
-
110
-
111
-
112
-
113
-
114
-
115
-
116
 |
 |

Dell 1235cn
Multi Functional Printer
User’s Guide
www.dell.com | support.dell.com