Dell 1815dn Multifunction Mono Laser Printer User's Guide - Page 1
Dell 1815dn Multifunction Mono Laser Printer Manual
 |
View all Dell 1815dn Multifunction Mono Laser Printer manuals
Add to My Manuals
Save this manual to your list of manuals |
Page 1 highlights
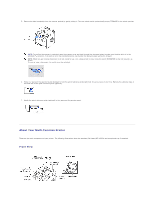
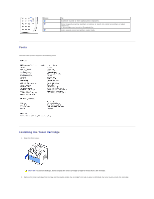
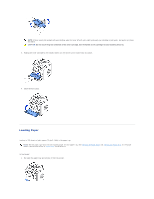
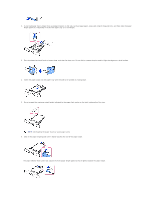
Unpacking Your Multi-Function Printer 1. Select a location for your printer. CAUTION: The printer requires at least two people to lift it safely. l Leave enough room to open the printer tray, covers, doors, and options. It is also important to allow enough space around the printer for proper ventilation. l Provide a proper environment: l A firm, level surface l Away from the direct airflow of air conditioners, heaters, or ventilators l Away from sunlight, extreme humidity, or high fluctuations in temperature l A clean, dry, and dust free location NOTE: Leave the printer in the box until you are ready to install it. 2. In addition to the Dell™ Laser Multi-Function Printer 1815dn, ensure that you have the following items in the box. If there is a missing item, contact Dell: toner cartridge owner's manual Drivers and Utilities CDb power corda telephone line cord terminatorc setup diagram quick reference guide (optional) a. The appearance of the power cord and the telephone line cord may differ according to your country's specifications. b. The Drivers and Utilities CD contains Dell printer drivers, Scan drivers, Printer Settings Utility, Set IP, Macintosh driver, Linux driver, Dell Toner Management System™, Dell ScanCenter™, PaperPort® and an HTML User's Guide. c. This item is only provided in some countries. NOTE: Use the telephone line cord supplied with your printer. If you choose to use a different cord, use an AWG #26 or lower gauge cord that is a maximum 250 cm in length. NOTE: The power cord must be plugged into a grounded power socket. 3. Save the carton and packing material in case the printer needs to be repacked. 4. Remove the packing tape from the front, back and sides of the printer.
-
 1
1 -
 2
2 -
 3
3 -
 4
4 -
 5
5 -
 6
6 -
 7
7 -
8
-
9
-
10
-
11
-
12
-
13
-
14
-
15
-
16
-
17
-
18
-
19
-
20
-
21
-
22
-
23
-
24
-
25
-
26
-
27
-
28
-
29
-
30
-
31
-
32
-
33
-
34
-
35
-
36
-
37
-
38
-
39
-
40
-
41
-
42
-
43
-
44
-
45
-
46
-
47
-
48
-
49
-
50
-
51
-
52
-
53
-
54
-
55
-
56
-
57
-
58
-
59
-
60
-
61
-
62
-
63
-
64
-
65
-
66
-
67
-
68
-
69
-
70
-
71
-
72
-
73
-
74
-
75
-
76
-
77
-
78
-
79
-
80
-
81
-
82
-
83
-
84
-
85
-
86
-
87
-
88
-
89
-
90
-
91
-
92
-
93
-
94
-
95
-
96
-
97
-
98
-
99
-
100
-
101
-
102
-
103
-
104
-
105
-
106
-
107
-
108
-
109
-
110
-
111
-
112
-
113
-
114
-
115
-
116
-
117
-
118
-
119
-
120
-
121
-
122
-
123
-
124
-
125
-
126
-
127
-
128
-
129
-
130
-
131
-
132
-
133
-
134
-
135
-
136
-
137
-
138
-
139
-
140
-
141
-
142
-
143
-
144
-
145
-
146
-
147
-
148
 |
 |
