Dell 1815dn Multifunction Mono Laser Printer User's Guide - Page 55
Installing Software for Macintosh, Setting Up the Printer
 |
View all Dell 1815dn Multifunction Mono Laser Printer manuals
Add to My Manuals
Save this manual to your list of manuals |
Page 55 highlights
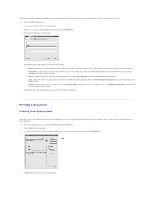
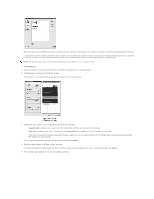
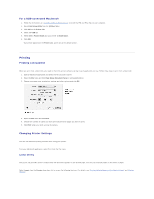
Macintosh Installing Software for Macintosh Setting Up the Printer Printing Scanning Your printer supports Macintosh systems with a built-in USB interface or 10/100 Base-TX network interface card. When you print a file from a Macintosh computer, you can use the PostScript driver by installing the PPD file. Installing Software for Macintosh The Drivers and Utilities CD that came with your printer has a PPD file that enables you to use the PostScript driver for printing on a Macintosh computer. Verify the following before you install the printer software: Item Operating System RAM Free Disk Space Requirements Mac OS 10.3.x or higher 128 MB 200 MB Installing the printer driver 1. Ensure that your printer is connected to the compute. Turn on your computer and printer. 2. Insert the Drivers and Utilities CD which came with your printer into the CD-ROM drive. 3. Double-click CD-ROM icon that appears on your Macintosh desktop. 4. Double-click the MAC_Installer folder. 5. Double-click the MAC_Printer folder. 6. Double-click the Dell Laser MFP Installer icon. 7. After the installation is finished, click Quit. Setting Up the Printer Set up for your printer will be different depending on which cable you use to connect the printer to your computer-the network cable or the USB cable. For a Network-connected Macintosh 1. Follow the instructions on "Installing Software for Macintosh" to install the PPD and Filter files on your computer. 2. Open Print Setup Utility from the Utilities folder. 3. Click Add on the Printer List. 4. Select the IP Printing tab. 5. Enter the printer's IP address in the Printer Address field. 6. Enter the queue name in the Queue Name field. If you cannot determine the queue name for your printer server, try using the default queue first. 7. Select Dell in Printer Model and your printer in Model Name. 8. Click Add. 9. Your printer's IP address appears on the Printer List, and is set as the default printer.
-
 1
1 -
2
-
3
-
4
-
5
-
6
-
7
-
8
-
9
-
10
-
11
-
12
-
13
-
14
-
15
-
16
-
17
-
18
-
19
-
20
-
21
-
22
-
23
-
24
-
25
-
26
-
27
-
28
-
29
-
30
-
31
-
32
-
33
-
34
-
35
-
36
-
37
-
38
-
39
-
40
-
41
-
42
-
43
-
44
-
45
-
46
-
47
-
48
-
49
-
 50
50 -
 51
51 -
 52
52 -
 53
53 -
 54
54 -
 55
55 -
 56
56 -
 57
57 -
 58
58 -
 59
59 -
 60
60 -
61
-
62
-
63
-
64
-
65
-
66
-
67
-
68
-
69
-
70
-
71
-
72
-
73
-
74
-
75
-
76
-
77
-
78
-
79
-
80
-
81
-
82
-
83
-
84
-
85
-
86
-
87
-
88
-
89
-
90
-
91
-
92
-
93
-
94
-
95
-
96
-
97
-
98
-
99
-
100
-
101
-
102
-
103
-
104
-
105
-
106
-
107
-
108
-
109
-
110
-
111
-
112
-
113
-
114
-
115
-
116
-
117
-
118
-
119
-
120
-
121
-
122
-
123
-
124
-
125
-
126
-
127
-
128
-
129
-
130
-
131
-
132
-
133
-
134
-
135
-
136
-
137
-
138
-
139
-
140
-
141
-
142
-
143
-
144
-
145
-
146
-
147
-
148
 |
 |
