Dell 1815dn Multifunction Mono Laser Printer User's Guide - Page 122
Installing Dell Software for Network Printing
 |
View all Dell 1815dn Multifunction Mono Laser Printer manuals
Add to My Manuals
Save this manual to your list of manuals |
Page 122 highlights
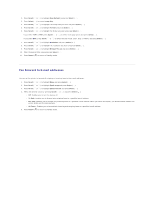
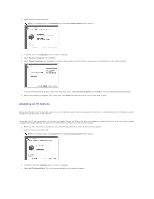
5. Select the printer you want to assign an IP to. The printer's default IP address is on the Configuration page. 6. After you assign the IP address for the printer, exit the program. Installing Dell Software for Network Printing When you connect your printer to the network, configure the TCP/IP settings for the printer before you install the Dell software on each network printer. You can install the Dell software on the network computers locally or remotely. NOTE: The system administrator should install printer drivers on the network computers. 1. Make sure that the printer is connected to your network and powered on. Close all unnecessary programs. For details about connecting to the network, see "Connecting the printer to the Network". 2. Insert the Drivers and Utilities CD. NOTE: For Windows Vista, click Continue when the User Account Control screen appears. 3. If required, press the Language button to select a language. 4. Select Network Installation and click Next. 5. If you want to install the drivers on this computer for network operation, select Local Installation, and click Next. If you want to install the Dell software on remote computers or network servers on the same network, select Remote Installation. The domain administrator's ID and password are required. Select the client computer(s) in the same domain on a network and click Next. NOTE: Both the server and client computer should have one of the following OS: Windows XP, Windows 2000, Windows Server 2003, Windows NT4.0, Windows Vista NOTE: The server should be able to resolve the client computer name into an IP address. 6. The list of printers available on the network appears. Select the printer you want to install and click Next.
-
 1
1 -
2
-
3
-
4
-
5
-
6
-
7
-
8
-
9
-
10
-
11
-
12
-
13
-
14
-
15
-
16
-
17
-
18
-
19
-
20
-
21
-
22
-
23
-
24
-
25
-
26
-
27
-
28
-
29
-
30
-
31
-
32
-
33
-
34
-
35
-
36
-
37
-
38
-
39
-
40
-
41
-
42
-
43
-
44
-
45
-
46
-
47
-
48
-
49
-
50
-
51
-
52
-
53
-
54
-
55
-
56
-
57
-
58
-
59
-
60
-
61
-
62
-
63
-
64
-
65
-
66
-
67
-
68
-
69
-
70
-
71
-
72
-
73
-
74
-
75
-
76
-
77
-
78
-
79
-
80
-
81
-
82
-
83
-
84
-
85
-
86
-
87
-
88
-
89
-
90
-
91
-
92
-
93
-
94
-
95
-
96
-
97
-
98
-
99
-
100
-
101
-
102
-
103
-
104
-
105
-
106
-
107
-
108
-
109
-
110
-
111
-
112
-
113
-
114
-
115
-
116
-
 117
117 -
 118
118 -
 119
119 -
 120
120 -
 121
121 -
 122
122 -
 123
123 -
 124
124 -
 125
125 -
 126
126 -
 127
127 -
128
-
129
-
130
-
131
-
132
-
133
-
134
-
135
-
136
-
137
-
138
-
139
-
140
-
141
-
142
-
143
-
144
-
145
-
146
-
147
-
148
 |
 |
