Dell 928 User Guide - Page 59
Aligning Ink Cartridges - printer ink black
 |
View all Dell 928 manuals
Add to My Manuals
Save this manual to your list of manuals |
Page 59 highlights
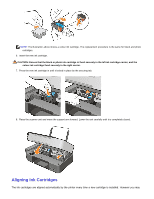
NOTE: The illustration above shows a colour ink cartridge. The replacement procedure is the same for black and photo cartridges. 6. Insert the new ink cartridge. CAUTION: Ensure that the black or photo ink cartridge is fixed securely in the left ink cartridge carrier, and the colour ink cartridge fixed securely in the right carrier. 7. Press the new ink cartridge in until it locked in place by the securing tab. 8. Raise the scanner unit and move the support arm forward. Lower the unit carefully until it is completely closed. Aligning Ink Cartridges The ink cartridges are aligned automatically by the printer every time a new cartridge is installed. However you may
-
 1
1 -
2
-
3
-
4
-
5
-
6
-
7
-
8
-
9
-
10
-
11
-
12
-
13
-
14
-
15
-
16
-
17
-
18
-
19
-
20
-
21
-
22
-
23
-
24
-
25
-
26
-
27
-
28
-
29
-
30
-
31
-
32
-
33
-
34
-
35
-
36
-
37
-
38
-
39
-
40
-
41
-
42
-
43
-
44
-
45
-
46
-
47
-
48
-
49
-
50
-
51
-
52
-
53
-
 54
54 -
 55
55 -
 56
56 -
 57
57 -
 58
58 -
 59
59 -
 60
60 -
 61
61 -
 62
62 -
 63
63 -
 64
64 -
65
-
66
-
67
-
68
-
69
-
70
-
71
 |
 |

NOTE:
The illustration above shows a colour ink cartridge. The replacement procedure is the same for black and photo
cartridges.
6. Insert the new ink cartridge.
CAUTION: Ensure that the black or photo ink cartridge is fixed securely in the left ink cartridge carrier, and the
colour ink cartridge fixed securely in the right carrier.
7. Press the new ink cartridge in until it locked in place by the securing tab.
8. Raise the scanner unit and move the support arm forward. Lower the unit carefully until it is completely closed.
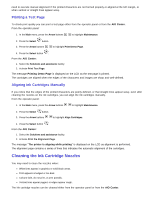
Aligning Ink Cartridges
The ink cartridges are aligned automatically by the printer every time a new cartridge is installed. However you may