Dell 966 User Guide - Page 12
Creating a Fax Cover
 |
View all Dell 966 manuals
Add to My Manuals
Save this manual to your list of manuals |
Page 12 highlights
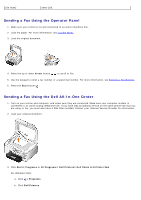
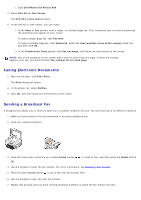
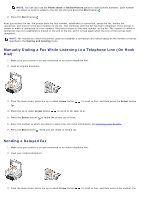
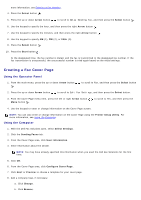
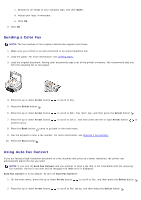
more information, see Entering a Fax Number. 4. Press the Select button . 5. Press the up or down Arrow button to scroll to Delay Sending Fax, and then press the Select button . 6. Use the keypad to specify the hour, and then press the right Arrow button . 7. Use the keypad to specify the minutes, and then press the right Arrow button . 8. Use the keypad to specify AM (1), PM (2), or 24Hr (3). 9. Press the Select button . 10. Press the Start button . At the designated time, the fax number is dialed, and the fax is transmitted to the designated fax number. If the fax transmission is unsuccessful, the unsuccessful number is tried again based on the redial settings. Creating a Fax Cover Page Using the Operator Panel 1. From the main menu, press the up or down Arrow button . to scroll to Fax, and then press the Select button 2. Press the up or down Arrow button to scroll to Edit Fax Settings, and then press the Select button. 3. From the Cover Page menu item, press the left or right Arrow button Menu button . to scroll to Yes, and then press the 4. Use the keypad to enter or change information on the Cover Page screen. NOTE: You can also enter or change information on the Cover Page using the Printer Setup Utility. For more information, see Using the Computer. Using the Computer 1. With the Dell Fax Solutions open, select Select Settings. 2. Click the Sending Faxes tab. 3. From the Cover Page area, click User Information. 4. Enter information about the sender. NOTE: You may have already specified this information when you used the Dell Fax Solutions for the first time. 5. Click OK. 6. From the Cover Page area, click Configure Cover Page. 7. Click Next or Preview to choose a template for your cover page. 8. Add a company logo, if necessary. a. Click Change. b. Click Browse.
-
 1
1 -
2
-
3
-
4
-
5
-
6
-
 7
7 -
 8
8 -
 9
9 -
 10
10 -
 11
11 -
 12
12 -
 13
13 -
 14
14 -
 15
15 -
 16
16 -
 17
17 -
18
-
19
-
20
-
21
-
22
-
23
-
24
-
25
-
26
-
27
-
28
-
29
-
30
-
31
-
32
-
33
-
34
-
35
-
36
-
37
-
38
-
39
-
40
-
41
-
42
-
43
-
44
-
45
-
46
-
47
-
48
-
49
-
50
-
51
-
52
-
53
-
54
-
55
-
56
-
57
-
58
-
59
-
60
-
61
-
62
-
63
-
64
-
65
-
66
-
67
-
68
-
69
-
70
-
71
-
72
-
73
-
74
-
75
-
76
-
77
-
78
-
79
-
80
-
81
-
82
-
83
-
84
-
85
-
86
-
87
-
88
-
89
-
90
-
91
-
92
-
93
-
94
-
95
-
96
-
97
-
98
-
99
-
100
-
101
-
102
-
103
-
104
-
105
-
106
-
107
-
108
-
109
-
110
-
111
-
112
-
113
-
114
-
115
-
116
-
117
-
118
-
119
-
120
-
121
-
122
-
123
-
124
-
125
-
126
-
127
-
128
-
129
-
130
-
131
-
132
-
133
-
134
-
135
 |
 |