Dell Dimension 8250 Dell Dimension 8250 Owner's Manual - Page 103
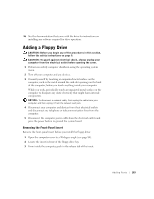
Adding a Floppy Drive
 |
View all Dell Dimension 8250 manuals
Add to My Manuals
Save this manual to your list of manuals |
Page 103 highlights
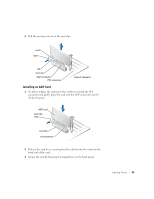
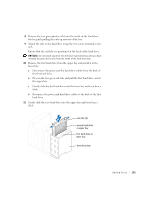
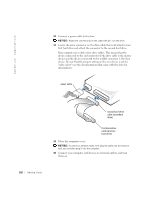
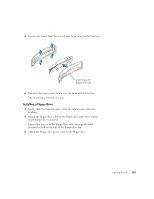
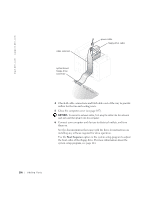
16 See the documentation that came with the drive for instructions on installing any software required for drive operation. Adding a Floppy Drive CAUTION: Before you begin any of the procedures in this section, follow the safety instructions on page 9. CAUTION: To guard against electrical shock, always unplug your computer from the electrical outlet before opening the cover. 1 Perform an orderly computer shutdown using the operating system menu. 2 Turn off your computer and any devices. 3 Ground yourself by touching an unpainted metal surface on the computer, such as the metal around the card-slot openings on the back of the computer, before you touch anything inside your computer. While you work, periodically touch an unpainted metal surface on the computer to dissipate any static electricity that might harm internal components. NOTICE: To disconnect a network cable, first unplug the cable from your computer and then unplug it from the network wall jack. 4 Disconnect your computer and devices from their electrical outlets and disconnect any telephone or telecommunication lines from the computer. 5 Disconnect the computer power cable from the electrical outlets and press the power button to ground the system board. Removing the Front-Panel Insert Remove the front-panel insert before you install the floppy drive: 1 Open the computer cover to a 90-degree angle (see page 84). 2 Locate the insert in front of the floppy-drive bay. 3 From inside the computer, push in the release tab of the insert. Adding Pa rts 103
-
 1
1 -
2
-
3
-
4
-
5
-
6
-
7
-
8
-
9
-
10
-
11
-
12
-
13
-
14
-
15
-
16
-
17
-
18
-
19
-
20
-
21
-
22
-
23
-
24
-
25
-
26
-
27
-
28
-
29
-
30
-
31
-
32
-
33
-
34
-
35
-
36
-
37
-
38
-
39
-
40
-
41
-
42
-
43
-
44
-
45
-
46
-
47
-
48
-
49
-
50
-
51
-
52
-
53
-
54
-
55
-
56
-
57
-
58
-
59
-
60
-
61
-
62
-
63
-
64
-
65
-
66
-
67
-
68
-
69
-
70
-
71
-
72
-
73
-
74
-
75
-
76
-
77
-
78
-
79
-
80
-
81
-
82
-
83
-
84
-
85
-
86
-
87
-
88
-
89
-
90
-
91
-
92
-
93
-
94
-
95
-
96
-
97
-
 98
98 -
 99
99 -
 100
100 -
 101
101 -
 102
102 -
 103
103 -
 104
104 -
 105
105 -
 106
106 -
 107
107 -
 108
108 -
109
-
110
-
111
-
112
-
113
-
114
-
115
-
116
-
117
-
118
-
119
-
120
-
121
-
122
-
123
-
124
-
125
-
126
-
127
-
128
-
129
-
130
-
131
-
132
-
133
-
134
-
135
-
136
-
137
-
138
-
139
-
140
-
141
-
142
-
143
-
144
-
145
-
146
-
147
-
148
-
149
-
150
-
151
-
152
-
153
-
154
-
155
-
156
 |
 |