Dell Force10 E600i E600i System Installation Guide - Page 15

Chassis, Install the Chassis, Unpack the System Components, Install the Equipment Rack Shelf Bar
Page 15 highlights

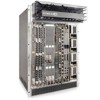
4 Chassis This chapter provides instructions to rack mount your chassis into a standard 19-inch or 23-inch equipment rack. • Unpack the System Components • Install the Equipment Rack Shelf Bar • Mount the Chassis in a Rack • Mount the Chassis in a Cabinet Install the Chassis Installing the chassis is a three-step process: 1 Unpack the System Components 2 Install the Equipment Rack Shelf Bar 3 Mount the Chassis in a Rack or Mount the Chassis in a Cabinet Unpack the System Components To prevent electrostatic discharge (ESD) wear an ESD-preventative wrist or foot-heal ground strap when handling system components. 1 Remove all contents from the shipping packaging. After you remove the original packaging, place RPMs, SFMs, and line cards on an antistatic surface. 2 Move the chassis to the rack. The packaging and contents weigh approximately 400 pounds. The unpacked chassis and floater pallet weigh approximately 100 pounds. Use a hand cart, pallet jack, or forklift to lift and move the chassis. CAUTION: Lift the chassis from the bottom only. Lifting by the chassis shelves or fan tray opening might damage the chassis. CAUTION: Do not remove the chassis front shipping cover until you have installed the chassis; this protective cover prevents damage to the internal framework and EMI seals. Install the Equipment Rack Shelf Bar The rack shelf bar (Figure 4-1) enables you to easily position the chassis into the rack and provides the unit additional support. Chassis | 15

  • 1
  • 2
  • 3
  • 4
  • 5
  • 6
  • 7
  • 8
  • 9
  • 10
  • 11
  • 12
  • 13
  • 14
  • 15
  • 16
  • 17
  • 18
  • 19
  • 20
  • 21
  • 22
  • 23
  • 24
  • 25
  • 26
  • 27
  • 28
  • 29
  • 30
  • 31
  • 32
  • 33
  • 34
  • 35
  • 36
  • 37
  • 38
  • 39
  • 40
  • 41
  • 42
  • 43
  • 44
  • 45
  • 46
  • 47
  • 48
  • 49
  • 50
  • 51
  • 52
  • 53
  • 54
  • 55
  • 56
  • 57
  • 58
  • 59
  • 60
  • 61
  • 62
  • 63
  • 64
  • 65
  • 66
  • 67
  • 68

Chassis
|
15
4
Chassis
This chapter provides instructions to rack mount your chassis into a standard 19-inch or 23-inch
equipment rack.
Unpack the System Components
Install the Equipment Rack Shelf Bar
Mount the Chassis in a Rack
Mount the Chassis in a Cabinet
Install the Chassis
Installing the chassis is a three-step process:
1
Unpack the System Components
2
Install the Equipment Rack Shelf Bar
3
Mount the Chassis in a Rack
or
Mount the Chassis in a Cabinet
Unpack the System Components
To prevent electrostatic discharge (ESD) wear an ESD-preventative wrist or foot-heal ground strap when
handling system components.
1
Remove all contents from the shipping packaging. After you remove the original packaging, place
RPMs, SFMs, and line cards on an antistatic surface.
2
Move the chassis to the rack. The packaging and contents weigh approximately 400 pounds. The
unpacked chassis and floater pallet weigh approximately 100 pounds. Use a hand cart, pallet jack, or
forklift to lift and move the chassis.
CAUTION:
Lift the chassis from the bottom only. Lifting by the chassis shelves or fan tray opening might
damage the chassis.
CAUTION:
Do not remove the chassis front shipping cover until you have installed the chassis; this protective
cover prevents damage to the internal framework and EMI seals.
Install the Equipment Rack Shelf Bar
The rack shelf bar (
Figure
4-
1
) enables you to easily position the chassis into the rack and provides the
unit additional support.