Dell XPS One 24 Service Manual - Page 28
Replacing the Graphics Card
 |
View all Dell XPS One 24 manuals
Add to My Manuals
Save this manual to your list of manuals |
Page 28 highlights
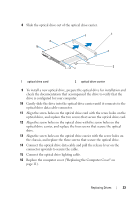
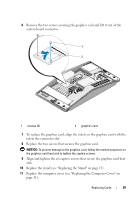
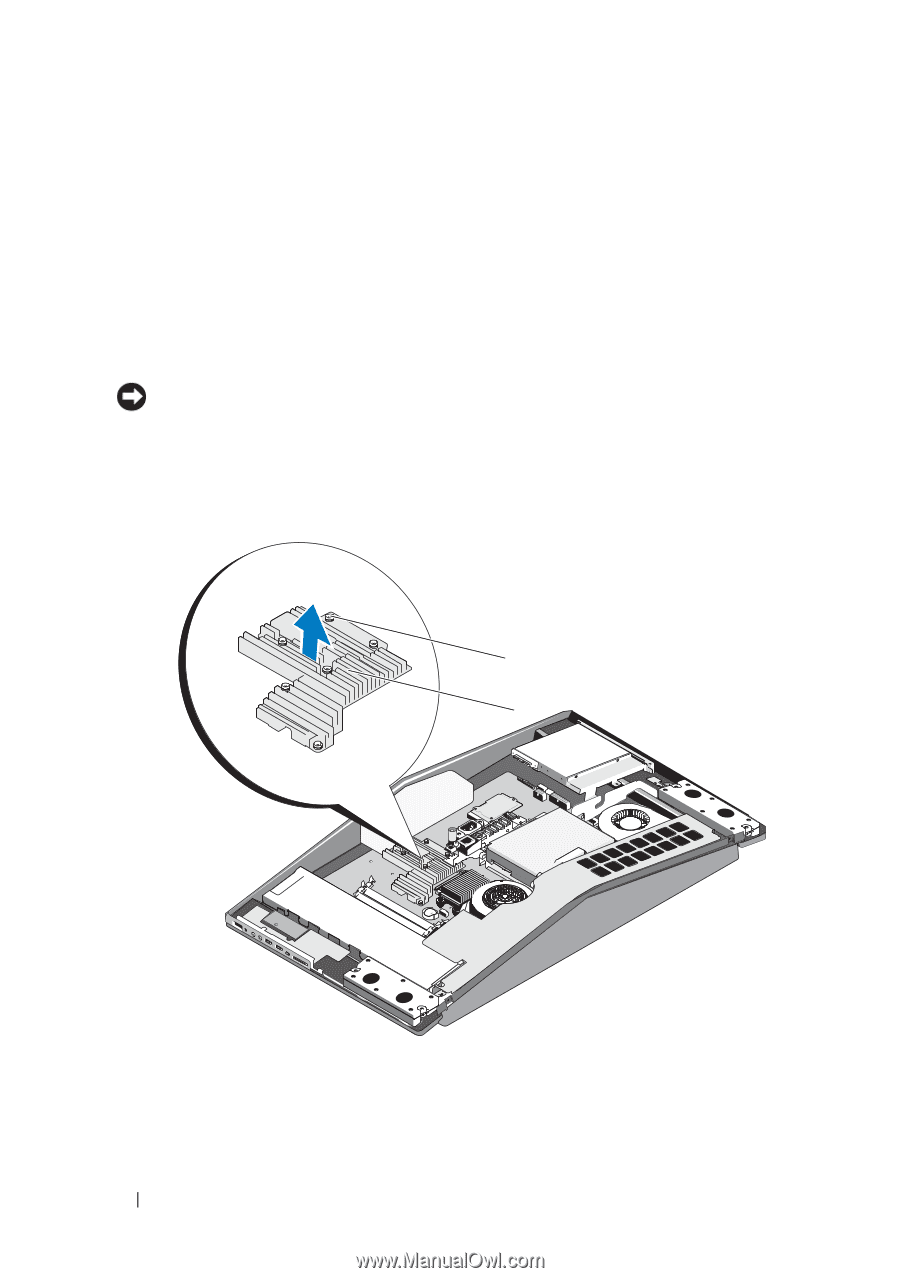
Replacing the Graphics Card 1 Follow the procedures in "Before You Begin" on page 9. 2 Remove the computer cover (see "Replacing the Computer Cover" on page 11). 3 Remove the stand (see "Replacing the Stand" on page 13). 4 Use the marked sequence on the graphics card heat sink, to loosen the six captive screws securing the graphics card heat sink. NOTICE: To ensure maximum cooling for the graphics card, do not touch the heat transfer areas on the graphics card heat sink. The oils in your skin can reduce the heat transfer capability of the thermal pads. 5 Lift the graphics card heat sink away from the computer. 1 2 1 captive screws (6) 28 Replacing Cards 2 graphics card heat sink
-
 1
1 -
2
-
3
-
4
-
5
-
6
-
7
-
8
-
9
-
10
-
11
-
12
-
13
-
14
-
15
-
16
-
17
-
18
-
19
-
20
-
21
-
22
-
 23
23 -
 24
24 -
 25
25 -
 26
26 -
 27
27 -
 28
28 -
 29
29 -
 30
30 -
 31
31 -
 32
32 -
 33
33 -
34
-
35
-
36
-
37
-
38
-
39
-
40
-
41
-
42
-
43
-
44
-
45
-
46
-
47
-
48
-
49
-
50
 |
 |
28
Replacing Cards
Replacing the Graphics Card
1
Follow the procedures in "Before You Begin" on page9.
2
Remove the computer cover (see "Replacing the Computer Cover" on
page 11).
3
Remove the stand (see "Replacing the Stand" on page 13).
4
Use the marked sequence on the graphics card heat sink, to loosen the six
captive screws securing the graphics card heat sink.
NOTICE:
To ensure maximum cooling for the graphics card, do not touch the heat
transfer areas on the graphics card heat sink. The oils in your skin can reduce the
heat transfer capability of the thermal pads.
5
Lift the graphics card heat sink away from the computer.
1
captive screws (6)
2
graphics card heat sink
1
2