Epson DS-30000 Users Guide - Page 86
the Document Capture Mac or Document Capture Pro Windows application. See the link below.
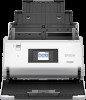 |
View all Epson DS-30000 manuals
Add to My Manuals
Save this manual to your list of manuals |
Page 86 highlights
2. Place your original on the product for scanning. 3. Press the home button, if necessary. 4. Select Scan. You see a list of available scanning jobs. Each job represents a pre-defined set of scan settings. 5. Select a job. Note: If you don't see an appropriate job, you will have to edit an existing job or add a new job using the Document Capture (Mac) or Document Capture Pro (Windows) application. See the link below. You see a screen like this: 6. If you want to change the job settings for the current job, select the job name. Any changes you make will only apply until you exit the Scan screen. If you select Scan again from the main menu, the job is reloaded from the computer and your changes are lost. To permanently modify a job, change the settings in Document Capture or Document Capture Pro. Note: If you cannot modify the settings, open Document Capture (Mac) or Document Capture Pro (Windows) and make sure the Disable job setting changes on control panel setting is not selected in the Confirm/Test tab in the job settings. 86
-
 1
1 -
2
-
3
-
4
-
5
-
6
-
7
-
8
-
9
-
10
-
11
-
12
-
13
-
14
-
15
-
16
-
17
-
18
-
19
-
20
-
21
-
22
-
23
-
24
-
25
-
26
-
27
-
28
-
29
-
30
-
31
-
32
-
33
-
34
-
35
-
36
-
37
-
38
-
39
-
40
-
41
-
42
-
43
-
44
-
45
-
46
-
47
-
48
-
49
-
50
-
51
-
52
-
53
-
54
-
55
-
56
-
57
-
58
-
59
-
60
-
61
-
62
-
63
-
64
-
65
-
66
-
67
-
68
-
69
-
70
-
71
-
72
-
73
-
74
-
75
-
76
-
77
-
78
-
79
-
80
-
 81
81 -
 82
82 -
 83
83 -
 84
84 -
 85
85 -
 86
86 -
 87
87 -
 88
88 -
 89
89 -
 90
90 -
 91
91 -
92
-
93
-
94
-
95
-
96
-
97
-
98
-
99
-
100
-
101
-
102
-
103
-
104
-
105
-
106
-
107
-
108
-
109
-
110
-
111
-
112
-
113
-
114
-
115
-
116
-
117
-
118
-
119
-
120
-
121
-
122
-
123
-
124
-
125
-
126
-
127
-
128
-
129
-
130
-
131
-
132
-
133
-
134
-
135
-
136
-
137
-
138
-
139
-
140
-
141
-
142
-
143
-
144
-
145
-
146
-
147
-
148
-
149
-
150
-
151
-
152
-
153
-
154
-
155
-
156
-
157
-
158
-
159
-
160
-
161
-
162
-
163
-
164
-
165
-
166
-
167
-
168
-
169
 |
 |
