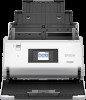
Epson DS-30000 Users Guide - Page 88
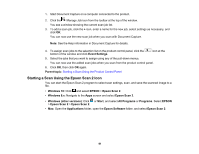
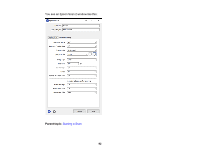
Adding and Assigning Scan Jobs with Document Capture Pro - Windows, Starting a Scan
 |
View all Epson DS-30000 manuals
Add to My Manuals
Save this manual to your list of manuals |
Page 88 highlights
• To adjust the time before the rollers stop moving when in Automatic Feeding Mode, select Roller Timeout and set a time. 10. Select the Start icon. Adding and Assigning Scan Jobs with Document Capture Pro - Windows Adding and Assigning Scan Jobs with Document Capture - Mac Parent topic: Starting a Scan Adding and Assigning Scan Jobs with Document Capture Pro - Windows You can view, change, or add scan jobs for use when you scan using your product control panel. You do this by accessing the scan jobs in the Document Capture Pro program. Note: The settings may vary, depending on the software version you are using. See the help information in Document Capture Pro for details. 1. Do one of the following to start Document Capture Pro: • Windows 10: Click and select Epson Software > Document Capture Pro. • Windows 8.x: Navigate to the Apps screen and select Document Capture Pro. • Windows (other versions): Click or Start, and select All Programs or Programs. Select Epson Software > Document Capture Pro. You see the Document Capture Pro window. 2. Select the Job Scan tab on the left. 88
-
 1
1 -
2
-
3
-
4
-
5
-
6
-
7
-
8
-
9
-
10
-
11
-
12
-
13
-
14
-
15
-
16
-
17
-
18
-
19
-
20
-
21
-
22
-
23
-
24
-
25
-
26
-
27
-
28
-
29
-
30
-
31
-
32
-
33
-
34
-
35
-
36
-
37
-
38
-
39
-
40
-
41
-
42
-
43
-
44
-
45
-
46
-
47
-
48
-
49
-
50
-
51
-
52
-
53
-
54
-
55
-
56
-
57
-
58
-
59
-
60
-
61
-
62
-
63
-
64
-
65
-
66
-
67
-
68
-
69
-
70
-
71
-
72
-
73
-
74
-
75
-
76
-
77
-
78
-
79
-
80
-
81
-
82
-
 83
83 -
 84
84 -
 85
85 -
 86
86 -
 87
87 -
 88
88 -
 89
89 -
 90
90 -
 91
91 -
 92
92 -
 93
93 -
94
-
95
-
96
-
97
-
98
-
99
-
100
-
101
-
102
-
103
-
104
-
105
-
106
-
107
-
108
-
109
-
110
-
111
-
112
-
113
-
114
-
115
-
116
-
117
-
118
-
119
-
120
-
121
-
122
-
123
-
124
-
125
-
126
-
127
-
128
-
129
-
130
-
131
-
132
-
133
-
134
-
135
-
136
-
137
-
138
-
139
-
140
-
141
-
142
-
143
-
144
-
145
-
146
-
147
-
148
-
149
-
150
-
151
-
152
-
153
-
154
-
155
-
156
-
157
-
158
-
159
-
160
-
161
-
162
-
163
-
164
-
165
-
166
-
167
-
168
-
169
 |
 |
