Epson DS-30000 Users Guide - Page 97
Scanning with Document Capture - Mac, Job Scan, Job Settings, Complete, Parent topic
 |
View all Epson DS-30000 manuals
Add to My Manuals
Save this manual to your list of manuals |
Page 97 highlights
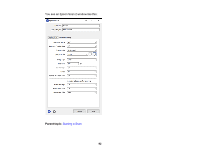
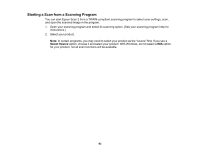
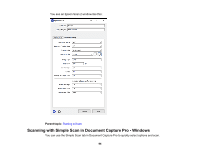
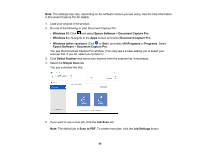
You see the Document Capture Pro window. (You may see a screen asking you to select your scanner first; if you do, select your product.) 3. Select the Job Scan tab. You see a window like this: 4. Select one of the scan jobs (or click Job Settings to create a new scan job). The scanner scans the loaded originals and saves them according to the job settings. 5. Depending on the job settings, you may be able to view and edit the pages before saving them. If so, click Complete when finished. The scanned images are saved according to the job settings. Parent topic: Scanning Scanning with Document Capture - Mac When you scan with Document Capture, the program automatically saves your scanned file on your computer in the folder you specify. You can select settings, preview, and change the scanned file settings as necessary. Note: The settings may vary, depending on the software version you are using. See the Help information in Document Capture for details. 1. Load your original in the product. 97
-
 1
1 -
2
-
3
-
4
-
5
-
6
-
7
-
8
-
9
-
10
-
11
-
12
-
13
-
14
-
15
-
16
-
17
-
18
-
19
-
20
-
21
-
22
-
23
-
24
-
25
-
26
-
27
-
28
-
29
-
30
-
31
-
32
-
33
-
34
-
35
-
36
-
37
-
38
-
39
-
40
-
41
-
42
-
43
-
44
-
45
-
46
-
47
-
48
-
49
-
50
-
51
-
52
-
53
-
54
-
55
-
56
-
57
-
58
-
59
-
60
-
61
-
62
-
63
-
64
-
65
-
66
-
67
-
68
-
69
-
70
-
71
-
72
-
73
-
74
-
75
-
76
-
77
-
78
-
79
-
80
-
81
-
82
-
83
-
84
-
85
-
86
-
87
-
88
-
89
-
90
-
91
-
 92
92 -
 93
93 -
 94
94 -
 95
95 -
 96
96 -
 97
97 -
 98
98 -
 99
99 -
 100
100 -
 101
101 -
 102
102 -
103
-
104
-
105
-
106
-
107
-
108
-
109
-
110
-
111
-
112
-
113
-
114
-
115
-
116
-
117
-
118
-
119
-
120
-
121
-
122
-
123
-
124
-
125
-
126
-
127
-
128
-
129
-
130
-
131
-
132
-
133
-
134
-
135
-
136
-
137
-
138
-
139
-
140
-
141
-
142
-
143
-
144
-
145
-
146
-
147
-
148
-
149
-
150
-
151
-
152
-
153
-
154
-
155
-
156
-
157
-
158
-
159
-
160
-
161
-
162
-
163
-
164
-
165
-
166
-
167
-
168
-
169
 |
 |
