Epson LQ-1500 User Manual
Epson LQ-1500 - Impact Printer Manual
 |
View all Epson LQ-1500 manuals
Add to My Manuals
Save this manual to your list of manuals |
Epson LQ-1500 manual content summary:
- Epson LQ-1500 | User Manual - Page 1
- Epson LQ-1500 | User Manual - Page 2
- Epson LQ-1500 | User Manual - Page 3
instructions, may cause interference to radio and television reception. It has been type tested and found to comply with the limits for a Class B computing device in accordance with the specifications in Subpart J of part LQ-1500 is a trademark of Epson America, Inc. Copyright © 1984 by Epson - Epson LQ-1500 | User Manual - Page 4
LQ-1500 Features 1 About This Manual 2 1 Setting Up Your LQ-1500 3 Finding a Suitable Location 3 Getting to Know Your Printer 5 Installing the paper feed knob 5 Removing the dust cover 7 Removing the front cover 7 Discovering what's inside 8 Installing the Ribbon - Epson LQ-1500 | User Manual - Page 5
guide 29 Pin-feed paper and tractor unit 29 More Printer Parts Printer-Communications 45 How Many Names Can One Code Have 46 Appendixes 49 A LQ-1500 Command Summary 49 Vertical Spacing Commands 50 Horizontal Spacing Commands 54 Print Style Commands 56 Character Set - Epson LQ-1500 | User Manual - Page 6
C The LQ-1500 Character Set 75 Regular Characters 75 International Character sets 78 D Widths of the Proportional Characters 79 E ASCII Code Conversion Chart 87 F Specifications of the LQ-1500 91 v - Epson LQ-1500 | User Manual - Page 7
Figures 1-1 Unpacking the LQ-1500 1-2 Paperplacement 1-3 The LQ-1500 printer 1-4 Paper feed knob 1-5 Removing the front cover 1-6 Printer parts 1-7 Ribbon cartridge 4 5 6 7 8 9 10 1-8 Ribbon installation 1-9 Ribbon operation 1-10 Sheet guide assembly 11 11 13 - Epson LQ-1500 | User Manual - Page 8
Tables 1-1 Settings for switch 1 22 1-2 Settings for switch 2 23 1-3 International character switch settings 23 ix - Epson LQ-1500 | User Manual - Page 9
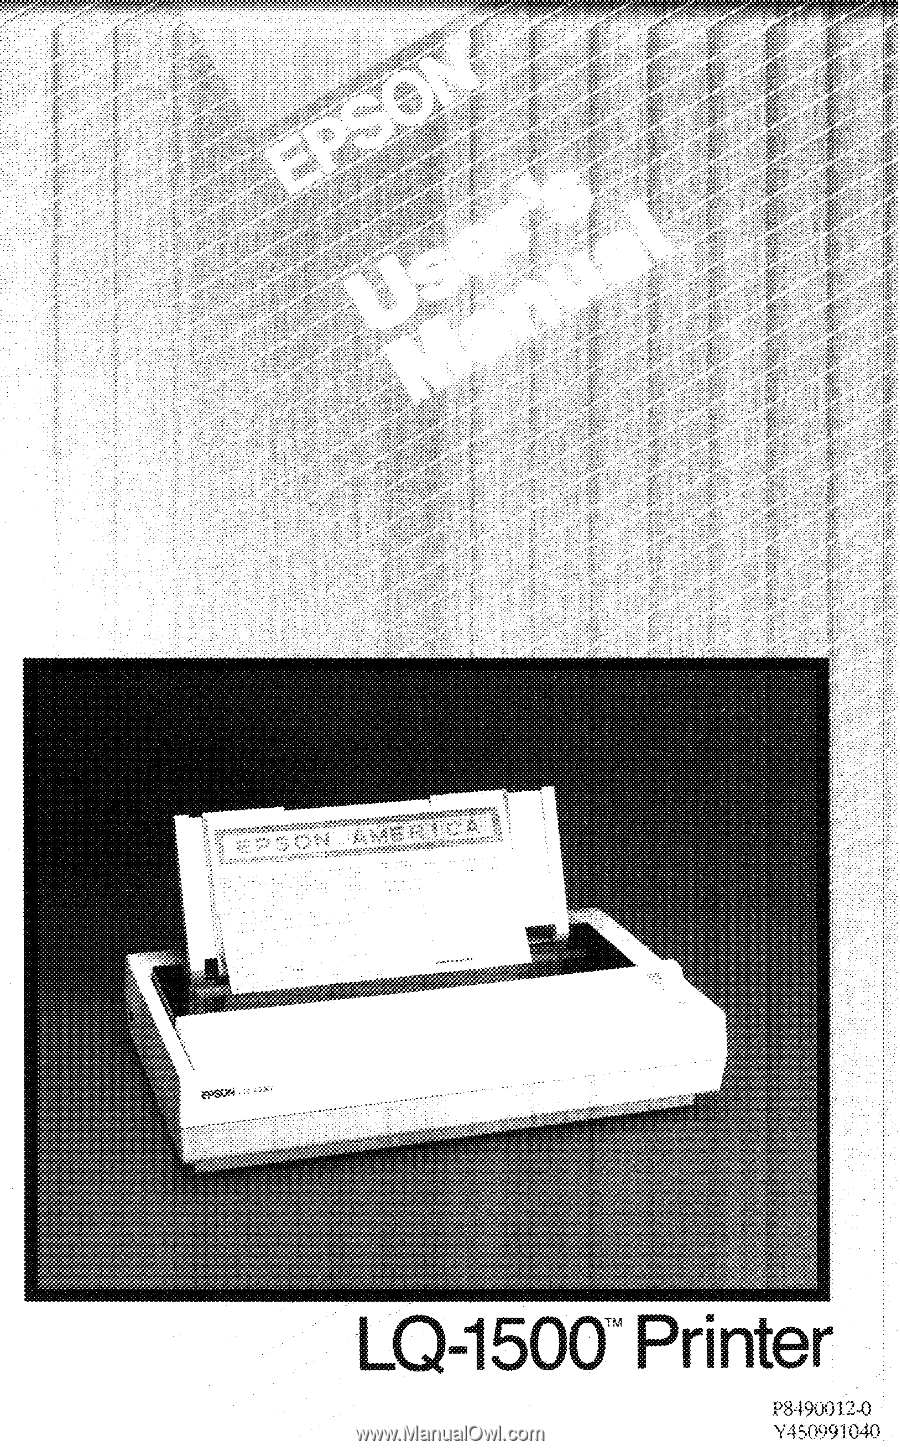
! You've purchased the Epson LQ-1500TM. This advanced, state-of-the-art printer combines the quality of typewriter print with the speed of a dot matrix printer. Of course, it has all the capabilities of the other Epson printers-and more too. LQ-1500 Features The LQ-1500 is designed to be used - Epson LQ-1500 | User Manual - Page 10
required to write programs for the LQ-1500. Epson also supplies Application Notes that tell you how to use the LQ-1500 with specific software programs. The first three chapters of this manual will help you set up, operate and maintain your printer. Chapter 4 contains information on how to - Epson LQ-1500 | User Manual - Page 11
make sure that you have all of the pieces shown in Figure 1-1: l LQ-1500 printer l Sheet guide (three pieces) l Dust cover l Front cover (installed on the printer) l Paper feed knob l Power cord l Ribbon cartridge l This User's Manual. Note: It's a good idea to save all of the packing materials in - Epson LQ-1500 | User Manual - Page 12
during operation. Here are some additional suggestions to follow: 1. Place the LQ-1500 on a flat, stable surface. The printer will make more noise if you place it on a table that moves or vibrates. 2. Connect the printer to a grounded electrical outlet (do not use an adapter plug). It's a good idea - Epson LQ-1500 | User Manual - Page 13
the main parts. WARNING: To avoid shock hazard and prevent damage to the LQ-1500, complete all of the installation procedures described here with the power to the printer turned OFF. Installing the paper feed knob The first piece to install is the paper feed knob, which you use to manually turn the - Epson LQ-1500 | User Manual - Page 14
Figure 1-3. The LQ-1500 printer 6 - Epson LQ-1500 | User Manual - Page 15
so removal is easy Set the dust cover aside if you will be needing it. Put it away in the printer box if you plan to use the optional tractor unit. Removing the front cover The next assembly step, installing the ribbon cartridge, first requires a bit of disassembly. You should remove the front - Epson LQ-1500 | User Manual - Page 16
about. Study Figure 1-6 until you can identify these parts: The print head is probably the easiest part to locate, so start with it. The print head is the large, black, finned object that moves back and forth on two silver rods across the printer. The ribbon guide is the silver shield on the side of - Epson LQ-1500 | User Manual - Page 17
Figure 1-6. Printer parts Once you identify these parts, you will know enough about the printer to get started. This manual will help you identify other parts as the need arises. Installing the Ribbon Cartridge The LQ-1500's ribbon cartridge is easy to install, and it won't get your hands dirty. - Epson LQ-1500 | User Manual - Page 18
both hands to position it over the print head (the hole in the ribbon cartridge fits over the finned part of the print head). The short piece of exposed ribbon must go between the print head and the ribbon guide so that the ribbon does not rest directly against the platen (see Figure 1-8). Lower the - Epson LQ-1500 | User Manual - Page 19
Figure 1-8. Ribbon installation Figure 1-9. Ribbon operation To replace the front cover, simply reverse the steps you took to remove it. Fit the right end into place first and then lower - Epson LQ-1500 | User Manual - Page 20
Installing the Sheet Guide The sheet guide serves a dual purpose on the LQ-1500. If you are using single sheets of paper, the guide ensures consistent margins and straight lines of print. If you are using pin-feed paper, the sheet guide is used as a paper separator to keep the incoming and outgoing - Epson LQ-1500 | User Manual - Page 21
Figure 1-10. Sheet guide assembly 13 - Epson LQ-1500 | User Manual - Page 22
you plan to use your LQ-1500 with single sheets of paper, lift up the sheet guide at the back and fold down the metal legs on the bottom of the sheet guide. As shown in Figure 1-13, the legs fit into slots in the top case of the LQ-1500. (This step is not necessary - Epson LQ-1500 | User Manual - Page 23
pre-mounted into a metal carrier (Figure 1-15). Locating the interface card Epson makes three types of interface cards for the LQ-1500: para1lel, serial, and IEEE 488. With the use of easily interchangeable interface cards, this powerful printer can be driven by nearly any computer or word processor - Epson LQ-1500 | User Manual - Page 24
Figure 1-14. The dust cover Figure 1-15. Interface card 16 - Epson LQ-1500 | User Manual - Page 25
and look at the back of the printer to tell if the interface card has been installed (see Figure 1-16). If there is a large cavity at the lower left, the interface card is missing and you must install it before you can use your LQ-1500. If, on the other hand, there is - Epson LQ-1500 | User Manual - Page 26
is a Phillips screwdriver. To install the interface card slide it into the cavity on the back of the LQ-1500 as shown in Figure 1-17. It should slide between the upper and lower plastic guide rails on either side of the opening. When you feel resistance on the right side of the card - Epson LQ-1500 | User Manual - Page 27
Figure 1-17. Interface card installation Setting the DIP Switches This is the last step in installing your printer. Because each computer installation is slightly different, Epson has placed a series of DIP switches on the back of theprinter interface, which you can change to best suit your printing - Epson LQ-1500 | User Manual - Page 28
the interface unit on the back of the printer. Do not change the settings of the DIP switches that are inside the printer. These settings have been determined by the manufacturer to be correct for this LQ-1500 printer. Special knowledge is required to set these switches. You can use a ballpoint pen - Epson LQ-1500 | User Manual - Page 29
according to whether the switch is pointing up (toward the top of the printer) or down (toward the bottom of the printer). Interface Switch 1 Switch 2 Figure 1-19. Switch settings Switch1 The functions of the four switches that make up switch 1 are summarized in Table 1-1. The right-hand - Epson LQ-1500 | User Manual - Page 30
Switch 1-1 1-2 1-3 1-4 Table 1-1. Settings for switch 1 Function 2K byte input software dealer if you have difficulty. Switch 1-3--Switch 1-3 controls whether or not the LQ-1500 does an automatic line feed each time it receives a carriage return. Some computers do not send line feeds to the printer - Epson LQ-1500 | User Manual - Page 31
International character set U.S.A. France Germany United Kingdom Denmark Sweden Italy Spain Switch 2-4.--Switch 2-4 is used to tell the LQ-1500 the size LQ-1500 automatically leaves a top and bottom margin of 1/2 inch on each page if switch 2-5 is in the up position. The switch tells the printer - Epson LQ-1500 | User Manual - Page 32
your interface user manual for instructions on the proper setting of these switches. Installing the Power Cord If you have been following along so far you should have one piece left: the power cord. Plug one end into the LQ-1500--the connection is on the rear of the printer near the right side - Epson LQ-1500 | User Manual - Page 33
and Maintenance Your LQ-1500 is now set up. You've connected it to your computer and set the switches. Now you're ready to learn how to use the controls and indicators on the printer to operate it correctly. We'll also give you some advice on how to maintain your LQ-1500 and keep it - Epson LQ-1500 | User Manual - Page 34
line feed (LF) buttons on the control panel to move the paper. The ON LINE and READY lights will be off. You can return the printer to on-line operation at any time, just by pressing the ON LINE button. l FF button -- stands for form feed. When you're off line - Epson LQ-1500 | User Manual - Page 35
interface between your computer and printer. You may also consult your software dealer for further information. Maintenance As with any mechanical device, the best maintenance of your LQ-1500 is preventive maintenance. You've already started by choosing a clean, dust-free location with a comfortable - Epson LQ-1500 | User Manual - Page 36
Changing the ribbon cartridge and cleaning the printer are the only maintenance tasks that you should do. There are no user-serviceable parts inside the LQ-1500. Leave any other types of maintenance (fuses, print heads, etc.) for your Epson dealer or authorized service center. The LQ-1500's print - Epson LQ-1500 | User Manual - Page 37
guide unit is used to feed single-sheet paper into the LQ-1500. As you may recall, Chapter 1 gave you the details for installing the sheet guide LQ-1500 will handle pin-feed paper from 4 to 16 inches wide. Pin-feed paper is used with an optional tractor unit which pulls the paper through the printer - Epson LQ-1500 | User Manual - Page 38
. It is the black lever located on the left side of the printer at the end of the platen (as shown in Figure 3-1). This lever has two settings: engaged (back) and released (forward). Figure 3-1. Adjustment levers The first setting, engaged, is used with the single-sheet feed operation which is also - Epson LQ-1500 | User Manual - Page 39
the LQ-1500. The printer does most of the work and does it the same way every time. Your main responsibility is to set each sheet of paper in the sheet guide unit evenly and press the correct button. We're sure you'll agree this method is much easier than setting up your paper manually each - Epson LQ-1500 | User Manual - Page 40
. 6. Set the print head adjustment lever for the paper you are using. Remember that upright is the right adjustment for most paper. 7. Replace the front cover and dust cover. Loading single-sheet paper Now that you have prepared the printer, you can load the paper into the sheet guide unit. Remember - Epson LQ-1500 | User Manual - Page 41
use the paper feed knob to advance the paper to the proper position. This problem is caused by not having the paper far enough down in the printer when you press the SHEET LOAD button. You may damage your printer parts if you do this repeatedly with the power ON. If the paper is - Epson LQ-1500 | User Manual - Page 42
LQ-1500 with pin-feed paper is not difficult, but it does require that you have the optional tractor unit purchased separately from your dealer. As with single-sheet feed, the printer on either side of the printer. These brackets have two functions: they hold the sheet guide unit and the tractor unit - Epson LQ-1500 | User Manual - Page 43
load the pin-feed paper. Follow the steps outlined below and refer to Figure 3-5. 1. Set DIP switch 1-2 in the down position to enable the paper-out detector. This allows the printer to stop printing and signal when you are out of pin-feed paper. 2.Open the paper bail by pulling it forward - Epson LQ-1500 | User Manual - Page 44
Figure 3-4. Tractor unit installation 36 - Epson LQ-1500 | User Manual - Page 45
Figure 3-5. Printer parts used with pin-feed paper 4. Set the paper support skids evenly from the approximate center platen release lever is closed (back). Inserting pin-feed paper Now that you have prepared the printer, you can load the pin-feed paper by following these steps: 1. Make sure you have - Epson LQ-1500 | User Manual - Page 46
and release the platen release lever (pull it forward) when the top of the paper reaches the two pin-feeders. The paper should now be free to move without using the paper feed knob (see Figure 3-7). 3. Adjust the pin-feeders to the paper width by sliding them inward to line up - Epson LQ-1500 | User Manual - Page 47
the pinfeeder covers, readjust the paper, and close them again. 7. Close the paper bail. 8. Set the print head adjustment lever according to the thickness of your paper. 9. Turn the paper feed knob tractor unit dust cover. 11. Turn the printer on. The ON LINE and READY lights should now be on. 39 - Epson LQ-1500 | User Manual - Page 48
When using the LQ-1500 with pin-feed paper, we recommend that you arrange your stack of paper in one of two ways. First, if you use a stack of paper and have to place it behind the printer, make sure that it is not higher than the surface of the sheet guide unit. Placing - Epson LQ-1500 | User Manual - Page 49
cover. 2. Tear the paper at the perforation nearest the rear of the printer. 3. Set the printer in the off-line mode by pressing the ON LINE but- ton. the paper path until it is free from the printer. Removing the tractor unit If the tractor unit is installed on the printer, you will have to remove - Epson LQ-1500 | User Manual - Page 50
. The pegs at each end of the unit will slide out from the slots on the printer. The LQ-1500 Self-Test Now that you are an expert on loading your LQ-1500, you're ready to print. The LQ-1500 self-test is a built-in program which generates a complete printing of all standard characters. The self - Epson LQ-1500 | User Manual - Page 51
(switch 2-7 down) Version 1.7 Letter quality (switch 2-7 up) Version 1.7 3. Turn the printer OFF to end the test. Otherwise, it will continue to print indefinitely. Now, it's time to start learning to communicate with your LQ-1500. Chapter 4 shows you how to do this efficiently and effectively. 43 - Epson LQ-1500 | User Manual - Page 52
send instructions from your computer to your printer. If you already know how to program your printer, you'll want to know how control codes work with the LQ-1500. program a printer, you can use your applications software to find out how to control the LQ-1500. Computer-to-Printer-Communications - Epson LQ-1500 | User Manual - Page 53
with virtually any kind of computer without having to worry about their ability to talk to each other. Your LQ-1500 printer can communicate with any computer that uses ASCII. How Many Names Can One Code Have? Although these codes are standard from computer to computer, the - Epson LQ-1500 | User Manual - Page 54
it is called. You may find that this can be quite a problem. Your computer's manual may say to use ASCII 10 while your spreadsheet program recommends a this manual it is abbreviated as . You will use this code often with the LQ-1500 because it allows you to use the many features of the printer. - Epson LQ-1500 | User Manual - Page 55
Abbreviation You now have the basics about codes. This knowledge should help you understand and use the information contained in your software documentation to take advantage of the LQ-1500's many features. 48 - Epson LQ-1500 | User Manual - Page 56
of their use, can be found in the LQ-1500 Programmer's Manual. In some cases the explanations given here describe the apparent function of the commands, rather than the actual mechanical movements of the printer. For example, since the printer prints in both directions, the line feed command - Epson LQ-1500 | User Manual - Page 57
return (n can range from 0 to 255). Function: Select 1/8-inch line spacing Format: Symbol "0" Decimal 27 48 Hexadecimal 1B 30 Remarks: Sets the line spacing for subsequent line feed commands to 1/8 inch. Function: Select 1/6-inch line spacing Format: Symbol Decimal "2" 27 50 - Epson LQ-1500 | User Manual - Page 58
to n/180 inch. 1/180 inch is the vertical distance between dots on the LQ-1500 (n can range from 0 to 255). Function: Set n/60-inch line spacing. Format: Symbol "A" n Decimal 27 65 n Hexadecimal 1B 41 n Remarks: Sets the line spacing for subsequent line feed commands to n/60 inches - Epson LQ-1500 | User Manual - Page 59
in pin-feed paper (n can range from 1 to 127). Function: Cancel bottom margin Format: ASCII "O" Decimal 27 79 Hexadecimal 1B 4F Remarks: Sets the bottom margin to 0 lines. The command uses the letter "O", not the number zero. Function: Vertical tab Format: ASCII Decimal 11 - Epson LQ-1500 | User Manual - Page 60
. Subsequent vertical tab codes will advance the paper to the next vertical tab position in the selected channel (c can range from 0 to 7). Function: Set vertical tabs in tab channels Format: ASCII "b" c n1 n2 . . . Decimal 27 98 c n1 n2 . . . Hexadecimal 1B 62 c n1 n2 ... 0 00 - Epson LQ-1500 | User Manual - Page 61
head to the left margin. If auto-line feed is on, paper is also advanced one line. Function: Set right margin Format: ASCII "Q" n Decimal 27 81 n Hexadecimal 1B 51 n Remarks: Sets a right margin at n character columns of the current character width. The value of n can range from 1 to - Epson LQ-1500 | User Manual - Page 62
be entered in ascending order. Function: Set intercharacter space Format: ASCII Decimal n 27 32 n Hexadecimal 1B 20 n Remarks: Increases the space between characters by n dots (n can range from 0 to 127). Function: Absolute dot position Format: ASCII (ESC) "$" n1 n 2 Decimal - Epson LQ-1500 | User Manual - Page 63
Horizontal Spacing Commands (continued) Function: Move print head Format: ASCII (ESC) "\" n1 n2 Decimal 27 92 n1 n2 Hexadecimal 1B 5C n1 n2 Remarks: Moves the print head a specified distance from the last character printed. It can move the print head either left or right. The distance, in - Epson LQ-1500 | User Manual - Page 64
: Cancel elite width print Format: ASCII "I'" Decimal 27 80 Hexadecimal 1B 50 Remarks: Cancels elite width print and returns the LQ-1500 to pica width print. Function: Proportional print on/off Format: ASCII "p' n Decimal 27 112 n Hexadecimal 1B 70 n Remarks: This command - Epson LQ-1500 | User Manual - Page 65
Print Style Commands (continued) Function: One-line expanded width print Format: ASCII Decimal 27 14 Hexadecimal 1B 0E Remarks : This command selects expanded width print for the remainder of the current line (unless explicitly canceled sooner). This command is the same as (SO). - Epson LQ-1500 | User Manual - Page 66
Print Style Commands (continued) Function: Select compressed width print Format: ASCII Decimal 27 15 Hexadecimal 1B OF Function: Cancel compressed width print Format: ASCII Decimal 18 Hexadecimal 12 Function: Select emphasized print Format: ASCII "E" Decimal - Epson LQ-1500 | User Manual - Page 67
ASCII "5" Decimal 27 53 Hexadecimal 1B 35 Remarks: This command cancels italic printing and returns you to the standard character set. Function: Underline on/off Format : ASCII (ESC) "-" n Decimal 27 45 n Hexadecimal 1B 2D n Remarks : This command turns underlining on (n = 1) or - Epson LQ-1500 | User Manual - Page 68
defined characters of the currently selected style. The function of this command is covered in the LQ-I500 Programmer's Manual. Function: Copy normal character set into userdefined character set Format: ASCII ":" Decimal 27 58 Hexadecimal 1B 3A 0 0 0 00 00 00 Remarks - Epson LQ-1500 | User Manual - Page 69
characters that change in the intemational character sets. n Country 0 U.S.A. 1 France 2 Germany 3 United Kingdom 4 Denmark 5 Sweden 6 Italy 7 Spain 8 Japan 9 Norway 10 Denmark II Graphics Commands Function: Single-density dot graphics Format : ASCII (ESC) "K" nl n2 data - Epson LQ-1500 | User Manual - Page 70
Format: ASCII (ESC) "Z" nl n2 data Decimal 27 90 nl n2 data Hexadecimal 1B 5A nl n 2 data Remarks: This function prints quadruple-density dot graphics at 240 dots per inch. The values of nl and n2 define the number of bytes of data according to the formula nl + n2 x 256. Each byte - Epson LQ-1500 | User Manual - Page 71
to any of the four other dot graphics com- mands. The functions of this command are covered in the LQ-1500 Programmer's Manual. Miscellaneous Commands Function: Delete line Format: ASCII Decimal 24 Hexadecimal 18 Remarks: Clears the current line from the printer's data buffer. 64 - Epson LQ-1500 | User Manual - Page 72
off-line state. It will ignore all codes until it receives a select printer code. Function: Select printer Format: ASCII Decimal 17 Hexadecimal 11 Remarks: Returns the LQ-1500 to an on-line state. It enables the printer to receive data again after it has been deactivated by a deselect - Epson LQ-1500 | User Manual - Page 73
the eighth data bit to 1. Function: Clear eighth-bit Format: ASCII "=" Decimal 27 61 Hexadecimal 1B 3D Remarks: Sets the eighth data bit to 0. Function: Cancel eighth-bit control Format: ASCII (ESC) "#" Decimal 27 35 Hexadecimal 1B 23 Remarks: Cancels control of the eighth - Epson LQ-1500 | User Manual - Page 74
the print head doesn't actually move to the left, the LQ-1500 combines the two characters and prints them as one.) Function: Initialize printer Format: ASCII "@" Decimal 27 64 Hexadecimal 1B 40 Remarks: Resets the printer to the power-on state, including top of form. Function: Disable - Epson LQ-1500 | User Manual - Page 75
Format: ASCII (ESC) "9" Decimal 27 57 Hexadecimal 1B 39 Remarks: Turns the paper detector on so that it will report when the printer runs out of paper. Function: Return print head to home position (one-line unidirectional printing) Format: ASCII " - Epson LQ-1500 | User Manual - Page 76
the following four pages are charts showing each of the printing styles that the LQ-1500 can produce. Following each example is the ASCII code (decimal) that will Letter Quality and Draft sets. The second chart shows the printing styles that are available in the Letter Quality set. The third and - Epson LQ-1500 | User Manual - Page 77
The Select Print Quality command will select either the Letter Quality or the Draft set. The Select Print Quality command looks like this: "x" 0 To select the Draft set "x" 1 To select the Letter Quality set In BASIC this command would look like this: LPRINT CHR$(27) "x" CHR$(0); or - Epson LQ-1500 | User Manual - Page 78
- Epson LQ-1500 | User Manual - Page 79
72 - Epson LQ-1500 | User Manual - Page 80
73 - Epson LQ-1500 | User Manual - Page 81
Appendix C The LQ-1500 Character Set ASCII Draft LQ Prop. 32 33 ! ! ! " " " 34 35 # * # 36 $ $ 37 % % % 38 & & & 39 ' , , 40 ( ( ( 41 ) ) ) 42 * * * 43 + + + 44 , , , 45 ... - - 46 - , , 47 / / / 48 0 0 0 49 1 1 1 50 2 2 2 51 - Epson LQ-1500 | User Manual - Page 82
ASCII Draft LQ Prop. 94 ^ ^ ^ 95 96 97 a a a 98 b b b 99 c c C 100 d d d 101 e e 102 f f i" 103 g g 104 h h ii 105 i i i 106 j j j 107 k k k 108 l l 1 109 mm m 110 n n n 111 o o 0 112 p p P 113 q q q 114 r r r 115 s s 8 - Epson LQ-1500 | User Manual - Page 83
225 a a a 226 b b b 227 c c C 228 d d d 229 e e e 230 f f f 231 g g g 232 h h h 233 i i i 234 j j j 235 k k k ASCII Draft LQ Prop. 236 l l l 237 mm m 238 n n n 239 0 0 0 240 P P P 241 q q q 242 243 rs r s r s 244 t t t 245 - Epson LQ-1500 | User Manual - Page 84
Draft International Characters Letter quality ProDortional 78 - Epson LQ-1500 | User Manual - Page 85
Appendix D Widths of the Proportional Characters This table lists the widths of the LQ-1500's proportional characters. The values given are in 360ths of an inch (for example: a value of 36 is 36/ to know. The leftspace, body and right-space widths are all values that are internal to the LQ-1500. 79 - Epson LQ-1500 | User Manual - Page 86
r- Total width Right-space Body Left-space Figure D-1. A character and its widths Character LQ Proportional (normal) ASCII code Leftspace BUY Rightspace Total width 80 - Epson LQ-1500 | User Manual - Page 87
LQ Proportional (normal) (continued) 81 - Epson LQ-1500 | User Manual - Page 88
Character LQ Proportional (normal) (continued) ASCII code Leftspace Body Right- Total 82 - Epson LQ-1500 | User Manual - Page 89
Character LQ Proportional (normal) (continued) ASCII code Left space Body Right space Total Text 83 - Epson LQ-1500 | User Manual - Page 90
Character LQ Proportional (superscript/subscript) ASCII\ code Left space Body Right space wTotail dth - Epson LQ-1500 | User Manual - Page 91
LQ Proportional (superscript/subscript) (continued) 85 - Epson LQ-1500 | User Manual - Page 92
86 - Epson LQ-1500 | User Manual - Page 93
Appendix E ASCII Code Conversion Chart This chart can be used to convert between the different names for ASCII codes. The codes from 0 to 32 have both decimal and hexidecima1 numbers, abbreviations, and the control keys used to type them. The codes above 32 have the character that prints instead of - Epson LQ-1500 | User Manual - Page 94
Decimal 25 26 27 28 29 30 31 32 Hexadecimal 19 1A 1B 1C 1D 1E 1F 20 Abbreviation Control key Control-Y Control-Z Control-[ Decimal 33 34 35 36 37 38 39 40 41 42 43 44 45 46 47 48 49 50 51 52 53 54 55 56 57 58 59 60 61 62 63 64 65 66 67 Hexadecimal - Epson LQ-1500 | User Manual - Page 95
Decimal 103 104 105 106 107 108 109 110 111 112 113 114 Decimal 127 128 129 130 131 132 133 134 135 136 137 138 139 140 141 142 143 Decimal 161 162 163 164 165 166 Hexadecimal 67 68 69 6A 6B 6C 6D 6E 6F 70 71 72 Character I m n O P q r Decimal 115 116 117 118 119 120 121 122 123 124 125 126 - Epson LQ-1500 | User Manual - Page 96
Decimal 173 174 175 176 177 178 179 180 181 182 183 184 185 186 187 188 189 190 191 192 193 194 195 196 197 198 199 200 201 202 203 204 205 206 207 208 209 210 211 212 213 Hexadecimal AD AE AF BO B1 B2 B3 B4 B5 B6 B7 B8 B9 BA BB BC BD BE BF co Cl C2 C3 C4 C5 C6 C7 C8 C9 CA CB cc CD CE CF D0 Dl D2 - Epson LQ-1500 | User Manual - Page 97
Appendix F Specifications of the Epson LQ-1500 Printing Printing Method Printing Speed Character sets Character matrix Column width Line spacing Impact dot matrix, with 24-pin print head Draft 200 characters per second Letter Quality 67 characters per second 96 regular, 96 italic, 32 international - Epson LQ-1500 | User Manual - Page 98
Dimensions Weight Power required Environment Ribbon Printer MTBF Print head life Single-sheet, friction feed, 7.2 to Temperature: 5°to 35°C Humidity: 10 to 80%, non condensing Black cloth ribbon in cartridge Ribbon life: 3 x 10° draft characters 5 x 10⁶ lines (print head excluded) 2 x 10⁹ strokes - Epson LQ-1500 | User Manual - Page 99
2 Assembly of printer 5 of sheet guide 12 Backspace 67 BASIC 46 Bell 23, 24, 67 Buttons 25 FF (Form feed) 26 LF (Line feed) 27 ON LINE 26 SHEET LOAD 27,32 Cable, connection of 18 Carriage return 46, 54 Cartridge, ribbon 9 Character matrix 91 Character set 75, 91 Character set commands 61 Characters - Epson LQ-1500 | User Manual - Page 100
spacing commands 54 Horizontal tab 55 IEEE 488 interface card 15, 24 Indicators 25 Initialize printer 67 Input buffer 22 Installation interface card 17 power cord 24 ribbon cartridge 9 sheet guide 12 tractor unit 34 Inter-character space 55 Interface card 15, 24 installation of 17 International - Epson LQ-1500 | User Manual - Page 101
pin-feed 34 single-sheet 31 Location, selection 3 LQ-1500 Application Notes 2 LQ-1500 Programmer's Manual 2, 49 Maintenance 27 cleaning 27 other 28 Margin 8 Paper feed knob 5 Paper feeders 29 PAPER OUT light 26,27 Paper support skids 37 Paper, types 29, 92 loading pin-feed paper 34 loading single- - Epson LQ-1500 | User Manual - Page 102
57, 70 Underline 60 Printing, method 91 proportional 57 speed 91 Programmer's manual, LQ-1500 2, 49 Proportional print 57, 70 READY light 25 Repeat printing 66 Ribbon cartridge 9, 92 installation 9 Ribbon guide 8 Select printer 65 Select signal 23, 24 Self-test 42 Serial interface 15, 24 Sheet - Epson LQ-1500 | User Manual - Page 103
55 vertical 52 Technical specifications 91 Tractor unit 29 installation 34 removal 41 Underline print 60 Unidirectional printing 68 Unpacking, of print 2 User-defined characters 61 Vertical spacing commands 50 Vertical tab 52 Vertical tab, in channel 53 Weight, of printer 92 Widths of proportional - Epson LQ-1500 | User Manual - Page 104
service under this warranty. This warranty applies only if your Epson product fails to function properly under normal use and within the manufacturer's specifications. Batteries, as well as optional software OR OTHERWISE, WITH RESPECT TO YOUR EPSON PRODUCT, EXCEPT AS SET FORTH HEREIN. SOME STATES DO - Epson LQ-1500 | User Manual - Page 105
- Epson LQ-1500 | User Manual - Page 106
- Epson LQ-1500 | User Manual - Page 107
you want to send to the printer. For example, to set a right margin at column 60, the LQ-1500 command is: "Q" 60 Sets up to 32 horizontal tabs at character positions n1. n2, n3, etc. (1 n 137). n "$" nl n2 " \ " nl n2 Increases the space between characters by n dots - Epson LQ-1500 | User Manual - Page 108
. Deletes the preceding character. Turns printer to off-line state. Turns printer to on-line state. (ESC) "V" n data "V" Repeats data, n times (1 n 255). ">" Sets the eighth data bit to 1. "=" Sets the eighth data bit to 0. "#" Cancels - Epson LQ-1500 | User Manual - Page 109
look like this: (ESC) "!" "I" (I is ASCII 73) Note: Proportional overrides pica/elite. Condensed works only in draft print. DIP Switch Settings Settings for switch 1 Switch 1-1 1-2 1-3 1-4 Function 2K byte input buffer Paper-out detector Automatic line feed Reserved for future use Up Disable - Epson LQ-1500 | User Manual - Page 110
-R Control-S Control-T Control-U Control-V Control-W Control-X Control-Y Control-Z Control-I Dec 85 86 87 88 89 90 91 92 93 94 95 96 97 98 99 100 101 102 103 104 105 106 107 108 109 110 Hex Char 55 U 56 V 57 W 58 X 59 Y 5A Z 5B 5C \I 5D 5E ! 5F ____ 60 - Epson LQ-1500 | User Manual - Page 111
Dec Hex Char 111 6F o 112 70 P 113 71 q 114 72 r 115 73 S 116 74 t 117 75 u 118 76 v 119 77 w 120 78 x 121 79 Y 122 7A z 123 7B [ 124 125 126 7C 1 77DE -}- Dec Hex Abbrev 127 7F 128 80 129 81 130 82 (STX> 131 83 132 84 133
-
 1
1 -
 2
2 -
 3
3 -
 4
4 -
 5
5 -
 6
6 -
 7
7 -
8
-
9
-
10
-
11
-
12
-
13
-
14
-
15
-
16
-
17
-
18
-
19
-
20
-
21
-
22
-
23
-
24
-
25
-
26
-
27
-
28
-
29
-
30
-
31
-
32
-
33
-
34
-
35
-
36
-
37
-
38
-
39
-
40
-
41
-
42
-
43
-
44
-
45
-
46
-
47
-
48
-
49
-
50
-
51
-
52
-
53
-
54
-
55
-
56
-
57
-
58
-
59
-
60
-
61
-
62
-
63
-
64
-
65
-
66
-
67
-
68
-
69
-
70
-
71
-
72
-
73
-
74
-
75
-
76
-
77
-
78
-
79
-
80
-
81
-
82
-
83
-
84
-
85
-
86
-
87
-
88
-
89
-
90
-
91
-
92
-
93
-
94
-
95
-
96
-
97
-
98
-
99
-
100
-
101
-
102
-
103
-
104
-
105
-
106
-
107
-
108
-
109
-
110
-
111
 |
 |