Epson LQ-1500 User Manual - Page 47
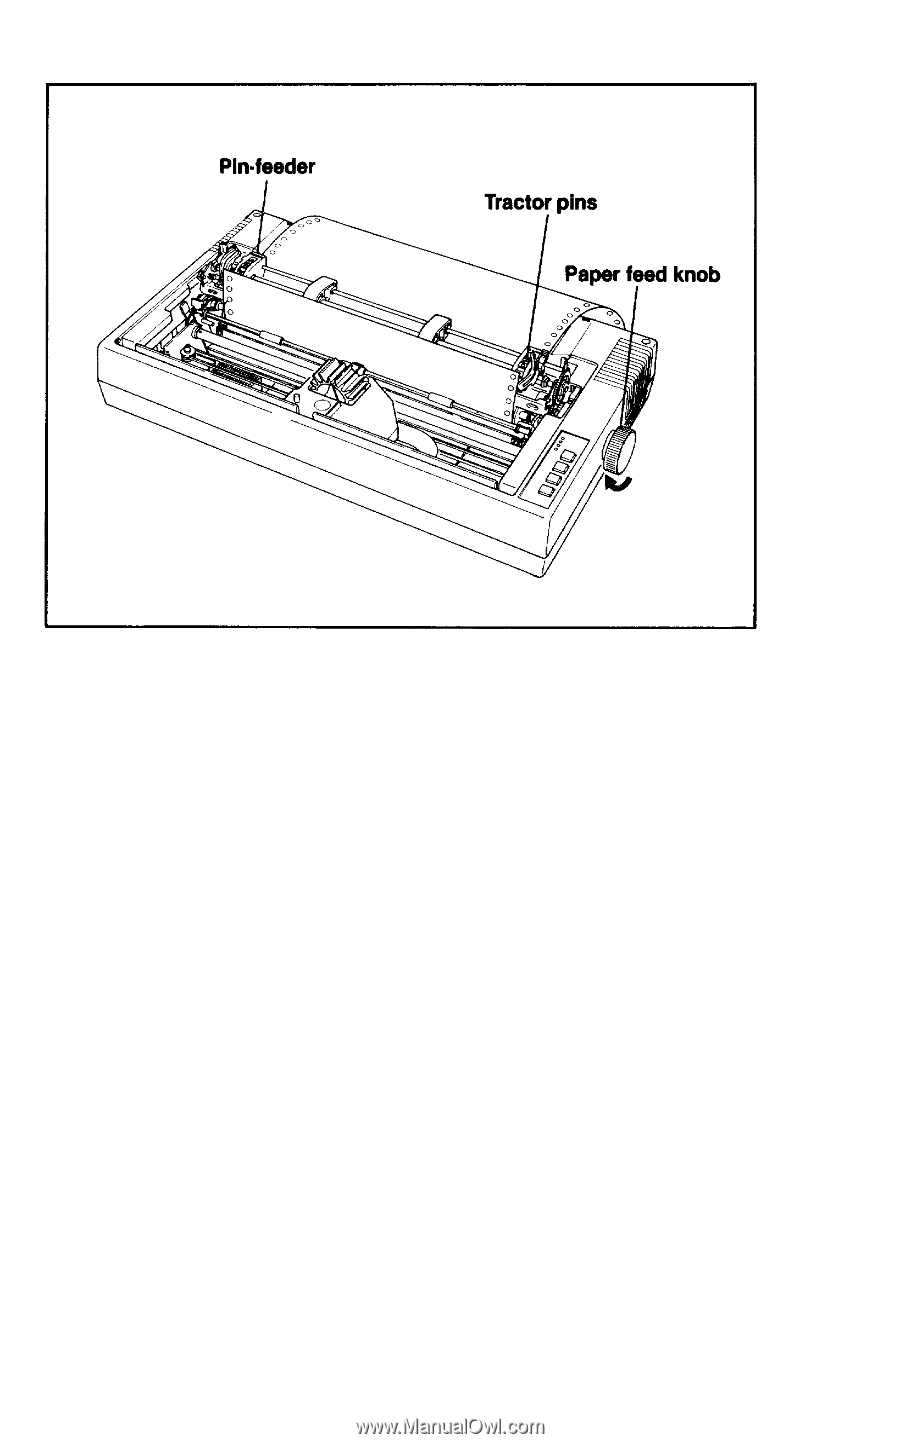
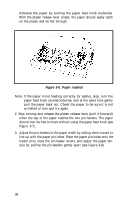
Aligning pin frames, your paper.
 |
View all Epson LQ-1500 manuals
Add to My Manuals
Save this manual to your list of manuals |
Page 47 highlights
Figure 3-7. Aligning pin frames Note: Position wide paper so that the printable surface is between 1 and 136 on your paper bail (the holes will be outside of these margins on the left and right). 5. Lock the pin-feeders in place by pushing the gray pin-feeder lock levers back. 6. Confirm that the tractor pins are centered in the paper pin-holes and that the paper tension is correct. If they are not, open the pinfeeder covers, readjust the paper, and close them again. 7. Close the paper bail. 8. Set the print head adjustment lever according to the thickness of your paper. 9. Turn the paper feed knob clockwise to advance the paper until the print head is positioned just under the first perforation which separates one page from another. 10. Install the tractor unit dust cover. 11. Turn the printer on. The ON LINE and READY lights should now be on. 39
-
 1
1 -
2
-
3
-
4
-
5
-
6
-
7
-
8
-
9
-
10
-
11
-
12
-
13
-
14
-
15
-
16
-
17
-
18
-
19
-
20
-
21
-
22
-
23
-
24
-
25
-
26
-
27
-
28
-
29
-
30
-
31
-
32
-
33
-
34
-
35
-
36
-
37
-
38
-
39
-
40
-
41
-
 42
42 -
 43
43 -
 44
44 -
 45
45 -
 46
46 -
 47
47 -
 48
48 -
 49
49 -
 50
50 -
 51
51 -
 52
52 -
53
-
54
-
55
-
56
-
57
-
58
-
59
-
60
-
61
-
62
-
63
-
64
-
65
-
66
-
67
-
68
-
69
-
70
-
71
-
72
-
73
-
74
-
75
-
76
-
77
-
78
-
79
-
80
-
81
-
82
-
83
-
84
-
85
-
86
-
87
-
88
-
89
-
90
-
91
-
92
-
93
-
94
-
95
-
96
-
97
-
98
-
99
-
100
-
101
-
102
-
103
-
104
-
105
-
106
-
107
-
108
-
109
-
110
-
111
 |
 |