Epson LQ-1500 User Manual - Page 49
Removing Pin-feed Paper, Removing the Tractor Unit, Paper path
 |
View all Epson LQ-1500 manuals
Add to My Manuals
Save this manual to your list of manuals |
Page 49 highlights
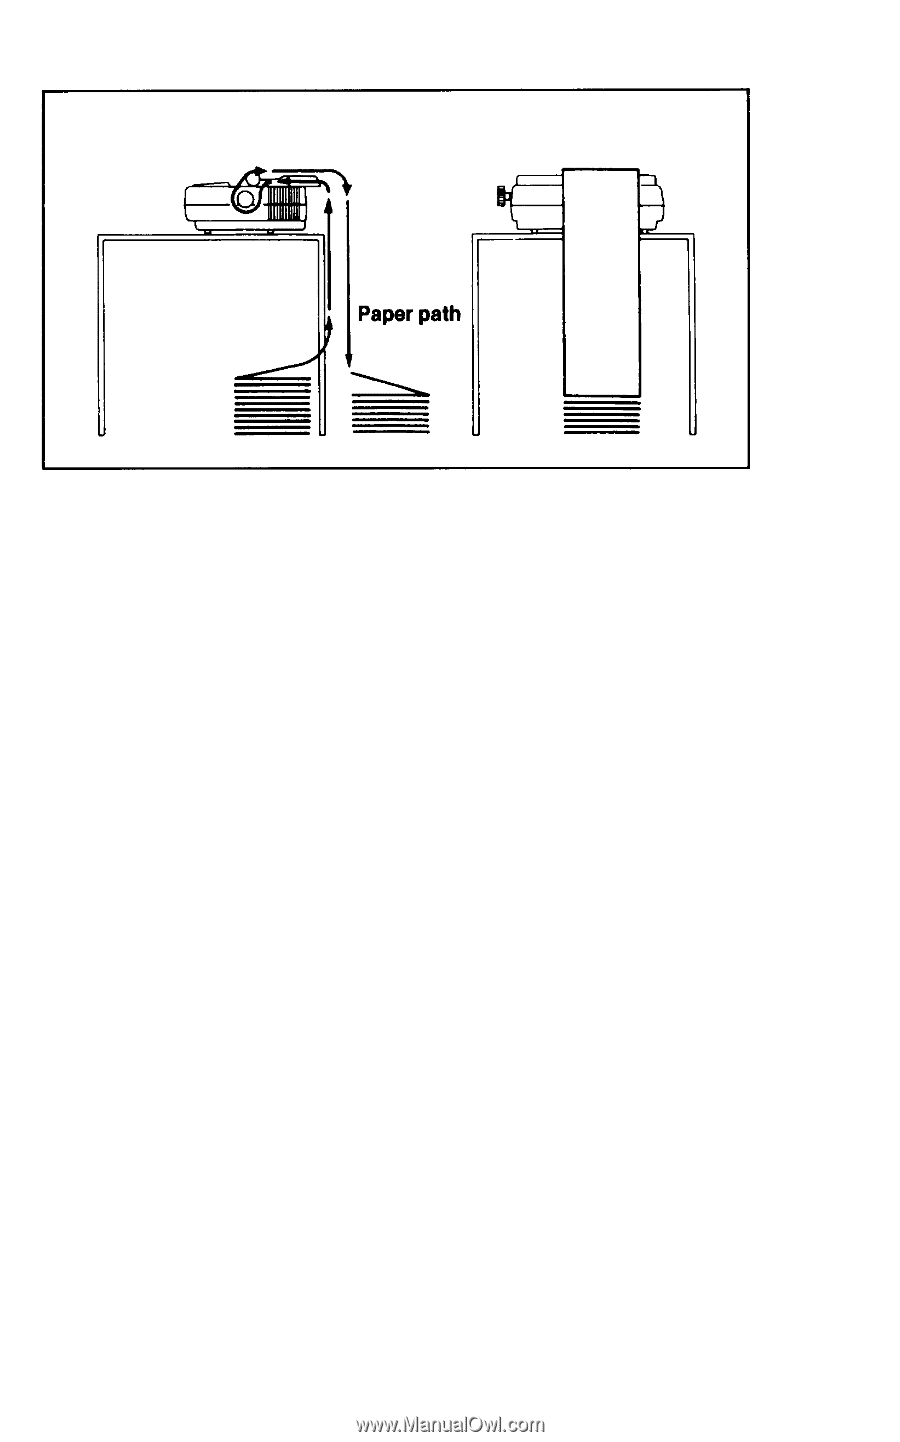
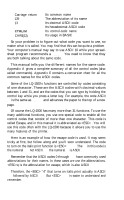
Figure 3-9. Paper path Removing pin-feed paper If you want to remove the pin-feed paper from the printer, follow the steps outlined below: 1.Remove the (tractor) dust cover. 2. Tear the paper at the perforation nearest the rear of the printer. 3. Set the printer in the off-line mode by pressing the ON LINE but- ton. The ON LINE and READY lights should now be off. 4. Open the pin-feeder covers (on the tractor unit) and remove the paper from the pins. Make sure the platen release lever is in the forward (released position). 5. Gently pull the paper up through the paper path until it is free from the printer. Removing the tractor unit If the tractor unit is installed on the printer, you will have to remove it to use the single and automatic sheet feed options. Follow the steps outlined below to remove the tractor unit from the printer and refer to Figure 3-10. 41
-
 1
1 -
2
-
3
-
4
-
5
-
6
-
7
-
8
-
9
-
10
-
11
-
12
-
13
-
14
-
15
-
16
-
17
-
18
-
19
-
20
-
21
-
22
-
23
-
24
-
25
-
26
-
27
-
28
-
29
-
30
-
31
-
32
-
33
-
34
-
35
-
36
-
37
-
38
-
39
-
40
-
41
-
42
-
43
-
 44
44 -
 45
45 -
 46
46 -
 47
47 -
 48
48 -
 49
49 -
 50
50 -
 51
51 -
 52
52 -
 53
53 -
 54
54 -
55
-
56
-
57
-
58
-
59
-
60
-
61
-
62
-
63
-
64
-
65
-
66
-
67
-
68
-
69
-
70
-
71
-
72
-
73
-
74
-
75
-
76
-
77
-
78
-
79
-
80
-
81
-
82
-
83
-
84
-
85
-
86
-
87
-
88
-
89
-
90
-
91
-
92
-
93
-
94
-
95
-
96
-
97
-
98
-
99
-
100
-
101
-
102
-
103
-
104
-
105
-
106
-
107
-
108
-
109
-
110
-
111
 |
 |