Fluke 125B/S Calibration Guide - Page 40
LED, Beeper, LCD, and Front Panel Functional Checks, WiFi Functional Check (Version Dependent)
 |
View all Fluke 125B/S manuals
Add to My Manuals
Save this manual to your list of manuals |
Page 40 highlights
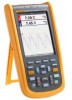
123B/124B/125B Calibration Manual LED, Beeper, LCD, and Front Panel Functional Checks To go to the test mode: 1. Push . 2. Push and at the same time. To test the LED: • LED 1 is a Red LED in the power switch • LED 2 is a Green LED in the power switch; • LED 3 is a blue LED in the WiFi button 1. Push to turn on and turn off the three LED lights. To test the Beeper: 1. Push to go to the next page of the menu. 2. Select Beeper. toggles the Beeper on and off. 3. Verify the Beeper sounds. To test the LCD: 1. Push for the LCD test. The entire screen shows as red. 2. Push several times. The screen changes to dark, white, green, blue, and exits the test. To test the Front Panel: 1. Push for the FP test. The screen shows a button menu. 2. Push the buttons as directed on the display. When you pushed all of the buttons, the front panel test exits automatically. To exit the functional tests: 1. Push to show the next page of menu. 2. Push to Exit. WiFi Functional Check (Version Dependent) The Test Tool may include a WiFi radio if certified for your region. The WiFi interface plugs into a USB connector that is located under the battery door. If a WiFi adapter is present, a simple communication test is adequate. To test: 1. Push . The UI shows WiFi Off. 2. Push to detect the WIFI adapter. If WIFI is detected, the UI shows WiFi On, the will light, and shows on the display. 32
-
 1
1 -
2
-
3
-
4
-
5
-
6
-
7
-
8
-
9
-
10
-
11
-
12
-
13
-
14
-
15
-
16
-
17
-
18
-
19
-
20
-
21
-
22
-
23
-
24
-
25
-
26
-
27
-
28
-
29
-
30
-
31
-
32
-
33
-
34
-
 35
35 -
 36
36 -
 37
37 -
 38
38 -
 39
39 -
 40
40 -
 41
41 -
 42
42 -
 43
43 -
 44
44 -
 45
45 -
46
-
47
-
48
-
49
-
50
-
51
-
52
-
53
-
54
 |
 |
