Fluke 125B/S Calibration Guide - Page 43
HF Gain Calibration Input Connections, READY, Table 13. HF Gain Calibration Points Fast
 |
View all Fluke 125B/S manuals
Add to My Manuals
Save this manual to your list of manuals |
Page 43 highlights
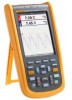
A B BB120 50Ω BNC Industrial ScopeMeter Calibration Adjustment 5522A CALIBRATOR BB120 PM9093/001 PM9091/001 (1.5 m) PM9092/001 (0.5 m) Figure 10. HF Gain Calibration Input Connections 3. Connect the Calibrator Scope Out to CH A & CH B with a 50 Ω terminator. Only one 50 Ω terminator should be connected at the connection farthest from the calibrator. Make sure the cable between CH A and CH B is as short as possible. 4. Set up the Calibrator: a. Supply a 1 kHz fast rising edge square wave (Output SCOPE, MODE edge). b. Set the Calibration Step in Table 13. c. Push . 5. On the Test Tool: a. Push to start the calibration. b. Wait until READY shows as the calibration status on the display. c. Push to select the next calibration step. 6. Repeat steps 4 through 5 for each Calibration Step in Table 13. Table 13. HF Gain Calibration Points Fast Calibration Step Delay (CL 0280) 1.0 V LF Gain (CL 0300) 0.5 V LF Gain (CL 0310) 0.1 V LF Gain (CL 0320) 2.5 V [1] After you start the first step in this table cell, other steps are done automatically. Calibrator Setting [1] (1 kHz, Scope Mode EDGE) 35
-
 1
1 -
2
-
3
-
4
-
5
-
6
-
7
-
8
-
9
-
10
-
11
-
12
-
13
-
14
-
15
-
16
-
17
-
18
-
19
-
20
-
21
-
22
-
23
-
24
-
25
-
26
-
27
-
28
-
29
-
30
-
31
-
32
-
33
-
34
-
35
-
36
-
37
-
 38
38 -
 39
39 -
 40
40 -
 41
41 -
 42
42 -
 43
43 -
 44
44 -
 45
45 -
 46
46 -
 47
47 -
 48
48 -
49
-
50
-
51
-
52
-
53
-
54
 |
 |
