Fluke 28IIEX Fluke 28IIEx User Manual - Page 21
Table 4. Pushbuttons, Button, Switch, Position, Function, Yellow
 |
View all Fluke 28IIEX manuals
Add to My Manuals
Save this manual to your list of manuals |
Page 21 highlights
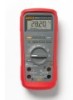
Button (Yellow) C D Switch Position Any position M Any position MIN MAX recording Frequency counter Table 4. Pushbuttons True-rms Digital Multimeter Features Function Set to capacitance Set to temperature Turn on ac low-pass filter Set dc or ac current Set dc or ac current Change and set the range for the set function. To go to autoranging, hold the button down for 1 second. Sets to °C or °F. AutoHOLD (formerly TouchHold) captures the current measurement on the display. When a new, stable measurement is sensed, the Product beeps and shows the new measurement. Stops and starts recording. Does not erase recorded values. Stops and starts the frequency counter. 11
-
 1
1 -
2
-
3
-
4
-
5
-
6
-
7
-
8
-
9
-
10
-
11
-
12
-
13
-
14
-
15
-
 16
16 -
 17
17 -
 18
18 -
 19
19 -
 20
20 -
 21
21 -
 22
22 -
 23
23 -
 24
24 -
 25
25 -
 26
26 -
27
-
28
-
29
-
30
-
31
-
32
-
33
-
34
-
35
-
36
-
37
-
38
-
39
-
40
-
41
-
42
-
43
-
44
-
45
-
46
-
47
-
48
-
49
-
50
-
51
-
52
-
53
-
54
-
55
-
56
-
57
-
58
-
59
-
60
-
61
-
62
-
63
-
64
 |
 |

True-rms Digital Multimeter
Features
11
Table 4. Pushbuttons
Button
Switch
Position
Function
(Yellow)
Set to capacitance
Set to temperature
Turn on ac low-pass filter
Set dc or ac current
Set dc or ac current
C
Any
position
Change and set the range for the set function. To go to autoranging, hold the button down for
1 second.
M
Sets to
°
C or
°
F.
D
Any
position
MIN MAX
recording
Frequency
counter
AutoHOLD (formerly TouchHold) captures the current measurement on the display. When a
new, stable measurement is sensed, the Product beeps and shows the new measurement.
Stops and starts recording. Does not erase recorded values.
Stops and starts the frequency counter.