Fluke 28IIEX Fluke 28IIEx User Manual - Page 52
How to Replace the Fuses, Service and Parts
 |
View all Fluke 28IIEX manuals
Add to My Manuals
Save this manual to your list of manuals |
Page 52 highlights
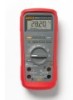
28 II Ex Users Manual How to Replace the Fuses Examine or replace the fuses in the Product as follows (See Figure 11): 1. Turn the rotary switch to OFF and remove the test leads from the terminals 2. Refer to step 2 in the "How to Replace the Batteries" section above to remove the battery door. 3. Carefully lift out the fuse assembly () from the fuse compartment. 4. Remove the 11 A fuse by carefully prying one end loose, then lift the fuse out of its bracket (). 5. Install ONLY specified replacement fuses with the amperage, voltage, and speed ratings shown in Table 10. The 440-mA fuse is attached to the fuse assembly. You must use a new fuse assembly to replace the 440 mA fuse. 6. Install the fuse assembly into the fuse compartment. 7. Refer to steps four through six in the "How to Replace the Batteries" section above to replace the battery door. Service and Parts If the Product fails, examine the batteries and fuses. Refer to this manual to make sure the Product is used correctly. Replacement parts and accessories are shown in Table 10 and Figure 12. To order parts and accessories, refer to the "How to Contact Fluke" section. 42
-
 1
1 -
2
-
3
-
4
-
5
-
6
-
7
-
8
-
9
-
10
-
11
-
12
-
13
-
14
-
15
-
16
-
17
-
18
-
19
-
20
-
21
-
22
-
23
-
24
-
25
-
26
-
27
-
28
-
29
-
30
-
31
-
32
-
33
-
34
-
35
-
36
-
37
-
38
-
39
-
40
-
41
-
42
-
43
-
44
-
45
-
46
-
 47
47 -
 48
48 -
 49
49 -
 50
50 -
 51
51 -
 52
52 -
 53
53 -
 54
54 -
 55
55 -
 56
56 -
 57
57 -
58
-
59
-
60
-
61
-
62
-
63
-
64
 |
 |
