Garmin eTrex Legend H Owner's Manual - Page 41
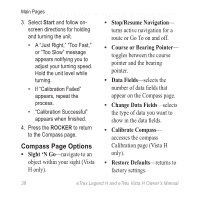
Sight 'N Go Navigation, Using the Course or, Bearing Pointer, Sight 'N Go, ROCKER, Set Course
 |
UPC - 753759084653
View all Garmin eTrex Legend H manuals
Add to My Manuals
Save this manual to your list of manuals |
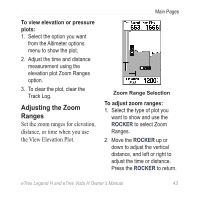
Page 41 highlights
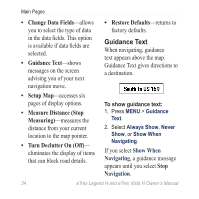
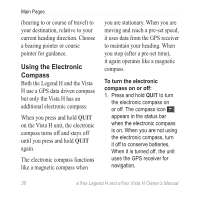
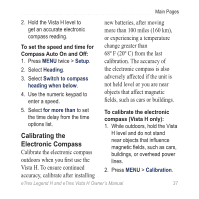
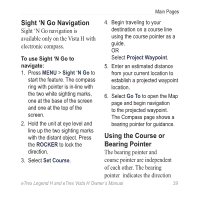
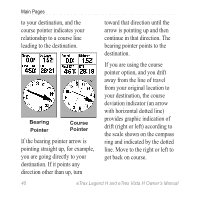
Main Pages Sight 'N Go Navigation Sight 'N Go navigation is available only on the Vista H with electronic compass. 4. Begin traveling to your destination on a course line using the course pointer as a guide. OR To use Sight 'N Go to navigate: 1. Press MENU > Sight 'N Go to start the feature. The compass ring with pointer is in-line with the two white sighting marks, one at the base of the screen and one at the top of the screen. 2. Hold the unit at eye level and line up the two sighting marks with the distant object. Press the ROCKER to lock the direction. Select Project Waypoint. 5. Enter an estimated distance from your current location to establish a projected waypoint location. 6. Select Go To to open the Map page and begin navigation to the projected waypoint. The Compass page shows a bearing pointer for guidance. Using the Course or Bearing Pointer The bearing pointer and 3. Select Set Course. course pointer are independent of each other. The bearing pointer indicates the direction eTrex Legend H and eTrex Vista H Owner's Manual 39
-
 1
1 -
2
-
3
-
4
-
5
-
6
-
7
-
8
-
9
-
10
-
11
-
12
-
13
-
14
-
15
-
16
-
17
-
18
-
19
-
20
-
21
-
22
-
23
-
24
-
25
-
26
-
27
-
28
-
29
-
30
-
31
-
32
-
33
-
34
-
35
-
 36
36 -
 37
37 -
 38
38 -
 39
39 -
 40
40 -
 41
41 -
 42
42 -
 43
43 -
 44
44 -
 45
45 -
 46
46 -
47
-
48
-
49
-
50
-
51
-
52
-
53
-
54
-
55
-
56
-
57
-
58
-
59
-
60
-
61
-
62
-
63
-
64
-
65
-
66
-
67
-
68
 |
 |
