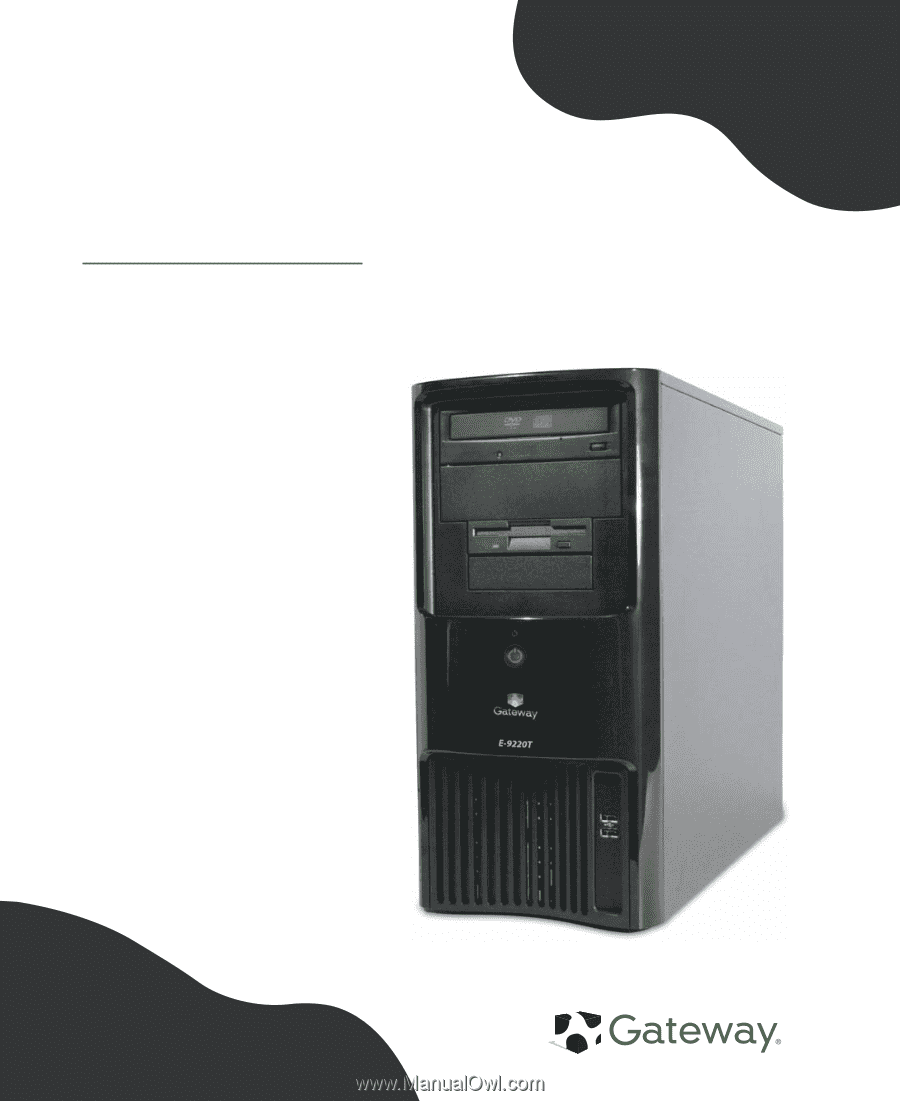
Gateway E-9220T Gateway E-9220T Server User Guide
Gateway E-9220T Manual
 |
View all Gateway E-9220T manuals
Add to My Manuals
Save this manual to your list of manuals |
Gateway E-9220T manual content summary:
- Gateway E-9220T | Gateway E-9220T Server User Guide - Page 1
Gateway E-9220T Server User Guide - Gateway E-9220T | Gateway E-9220T Server User Guide - Page 2
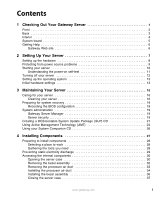
2 Back 3 Interior 4 System board 5 Getting Help 6 Gateway Web site 6 2 Setting Up Your Server 7 Setting up the hardware 8 Protecting from power source problems 9 Starting your server 10 Understanding the power-on self-test 11 Turning off your server 12 Setting up the operating system 13 - Gateway E-9220T | Gateway E-9220T Server User Guide - Page 3
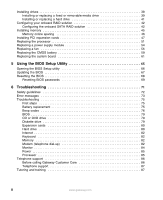
79 CD or DVD drive 79 Diskette drive 79 Expansion cards 80 Hard drive 80 Internet 82 Keyboard 82 Memory 82 Modem (telephone dial-up 82 Monitor 84 Power 85 Processor 85 Telephone support 86 Before calling Gateway Customer Care 86 Telephone support 87 Tutoring and training 87 ii www - Gateway E-9220T | Gateway E-9220T Server User Guide - Page 4
Server Specifications 89 System specifications 90 System board specifications 91 Environmental specifications 92 Electronic specifications 93 Memory map 93 Interrupts 93 Additional specifications 94 B BIOS Settings 95 C Safety, Regulatory, and Legal Information 103 Index 113 www.gateway - Gateway E-9220T | Gateway E-9220T Server User Guide - Page 5
iv www.gateway.com - Gateway E-9220T | Gateway E-9220T Server User Guide - Page 6
Chapter 1 Checking Out Your Gateway Server • Locating drives, ports, jacks, and controls • Locating system board components • Getting help 1 - Gateway E-9220T | Gateway E-9220T Server User Guide - Page 7
Chapter 1: Checking Out Your Gateway Server Front DVD/CD drive Additional 5.25-inch drive bay Power button/ Power indicator LED Diskette drive Additional 3.5-inch drive bay USB ports 2 www.gateway.com - Gateway E-9220T | Gateway E-9220T Server User Guide - Page 8
supply LEDs Case cover thumbscrew Power supply module latch Card retention bar Back Power supply modules Power supply LEDs Power connector Power supply module latch NIC (RJ-45) USB ports Serial port Keyboard port Mouse port PCI slots (shown with EMI shields) Video port (on PCI card) www.gateway - Gateway E-9220T | Gateway E-9220T Server User Guide - Page 9
Chapter 1: Checking Out Your Gateway Server Interior Power supply modules Cover release latch 5.25-inch drive bays 3.5-inch drive bays Front fan Processor air duct Internal 3.5-inch drive bays Memory slots Battery Back fan 4 www.gateway.com - Gateway E-9220T | Gateway E-9220T Server User Guide - Page 10
Front fan connector Power connector Memory slots J3F3 jumper Diskette drive connector Power button connector System board Rear fan connector CMOS Battery NIC (RJ-45) IDE connector USB connectors SATA connectors USB connectors Serial port Keyboard and mouse ports) Main power connector PCIe slot - Gateway E-9220T | Gateway E-9220T Server User Guide - Page 11
help you use your server. Gateway Web site Gateway provides a variety of information on its Web site to help you use your server. Visit the Gateway Web site at support.gateway.com for: ■ Technical documentation and product guides ■ Technical tips and support ■ Updated hardware drivers ■ Order status - Gateway E-9220T | Gateway E-9220T Server User Guide - Page 12
Chapter 2 Setting Up Your Server • Using your server safely • Starting and turning off your server • Restarting (rebooting) your server • Setting up the operating system 7 - Gateway E-9220T | Gateway E-9220T Server User Guide - Page 13
and air circulation. ■ Use the instructions on your server's setup poster to set up your hardware. ■ Use an uninterruptible power supply (UPS) with surge protection for protection from power outages and power spikes. Warning Your server comes with a 3-wire AC power cords fitted with the correct - Gateway E-9220T | Gateway E-9220T Server User Guide - Page 14
problems Protecting from power source problems Line conditioners, and uninterruptible power supplies can help protect your server against power source problems. Line conditioners A line conditioner protects your server from the small fluctuations in voltage from an electrical supply. Most servers - Gateway E-9220T | Gateway E-9220T Server User Guide - Page 15
turned off and the power cords are unplugged. To start the server: 1 Press the power button. Power button/power indicator LED When the power indicator LED is... Green Off Slowly blinking It means... The server is turned on. The server is turned off. Low power state (S1 - S3) 10 www.gateway.com - Gateway E-9220T | Gateway E-9220T Server User Guide - Page 16
power-on self-test (POST) routine checks the server memory and components. If POST finds any problems, the server displays error messages. Write down any error messages that you see, then see "Error messages" on page 73 and "Beep codes" on page 76 for troubleshooting information. www.gateway.com - Gateway E-9220T | Gateway E-9220T Server User Guide - Page 17
's documentation or online help for instructions on shutting down the operating system. Whenever possible, you should use the operating system's shut down procedure instead of pressing the power button. 2 If your server did not turn off automatically, press the power button. If nothing happens when - Gateway E-9220T | Gateway E-9220T Server User Guide - Page 18
for your specific network. If you are installing an operating system because it was not already installed by Gateway, see the appropriate installation guide for instructions. Initial hardware settings Your server comes from the manufacturer with the correct initial hardware settings to operate your - Gateway E-9220T | Gateway E-9220T Server User Guide - Page 19
Chapter 2: Setting Up Your Server 14 www.gateway.com - Gateway E-9220T | Gateway E-9220T Server User Guide - Page 20
Chapter 3 Maintaining Your Server • Caring for your server • Preparing for system recovery • System administration • Using Active Management Technology 15 - Gateway E-9220T | Gateway E-9220T Server User Guide - Page 21
. Your server cleaning kit could include: ■ A soft, lint-free cloth ■ Glass cleaner ■ An aerosol can of air with a narrow, straw-like extension ■ Isopropyl alcohol ■ Cotton swabs ■ A tape drive cleaning cartridge (if a tape drive is installed) ■ A CD or DVD drive cleaning kit 16 www.gateway.com - Gateway E-9220T | Gateway E-9220T Server User Guide - Page 22
your server. To avoid possible injury from electrical shock, unplug the power cords and all other cables connected to the server. ■ Use a damp, lint-free cloth to clean your server and other parts of your server system. the tape from the drive whenever the drive is not in use. www.gateway.com 17 - Gateway E-9220T | Gateway E-9220T Server User Guide - Page 23
start the server and attempt to fix the problem. See your operating system's documentation or online help for instructions on server set up and working. To record your BIOS configuration: 1 Print the appendix for BIOS Settings in this guide. 2 Restart your server, then press F2 when the Gateway - Gateway E-9220T | Gateway E-9220T Server User Guide - Page 24
multiple computers on a Windows network from a single window, then implement commands and policies across the network with a single action. With Gateway Server Manager, you can run system management tasks which are triggered by certain events or conditions. Printed documentation comes with the - Gateway E-9220T | Gateway E-9220T Server User Guide - Page 25
password The supervisor password must be set up before a user password can be set. To control access to the server, set a user password. The supervisor can set the level of access granted to the user password. The user . 5 Save your changes and exit the BIOS Setup utility. 20 www.gateway.com - Gateway E-9220T | Gateway E-9220T Server User Guide - Page 26
CD: 1 Put a blank CD into your CD burner. 2 Log on to your Internet connection. 3 Go to support.gateway.com. 4 Click Downloads, then Browse all downloads. 5 Select Servers for Step 1. 6 Select E-9220T for Step 2. 7 Select your operating system for Step 3. 8 Select BIOS downloads for Step 4. 9 Click - Gateway E-9220T | Gateway E-9220T Server User Guide - Page 27
. 4 Insert the bootable CD into the CD drive. 5 Exit the BIOS Setup utility and let the server continue to boot. 6 After the updates are completed, restart your server, then press F2 when the Gateway logo screen appears during startup. The BIOS Setup utility opens. 7 Use the down arrow key to select - Gateway E-9220T | Gateway E-9220T Server User Guide - Page 28
power on/off or OS state. ■ Remote Troubleshooting manual inventory tracking and human error, reducing asset accounting costs and increasing tracking accuracy. ■ Non-Volatile Storage-Survives power the BIOS Setup utility. The next time your server is rebooted, the AMT console will open. gateway.com 23 - Gateway E-9220T | Gateway E-9220T Server User Guide - Page 29
the AMT interface (Example: 10.225.200.101) ■ The Subnet Mask (Example: 255.255.255.0) ■ The Default Gateway (Example: 10.225.200.1) ■ The Preferred DNS Server (Example: 10.225.200.254) ■ The Alternate DNS Server (Example: 10.225.200.253) ■ The Domain Name (Example: irveng.local) 5 Press ESC to exit - Gateway E-9220T | Gateway E-9220T Server User Guide - Page 30
initial screen you have access to the following information for the computer you are currently using: ■ System Information ■ Processor Information ■ Memory Information ■ Disk Information ■ Event Log ■ Remote ■ Network Configuration You can also change Network Settings and manage User Accounts. 9 To - Gateway E-9220T | Gateway E-9220T Server User Guide - Page 31
Your Server Using your System Companion CD You can use your System Companion CD to: ■ Install hardware drivers ■ Install programs ■ View server documentation Instructions for using the CD are provided in Using Your System Companion CD, a booklet which is included with the CD. 26 www.gateway.com - Gateway E-9220T | Gateway E-9220T Server User Guide - Page 32
Opening and closing the server case • Installing and replacing major components You must open your server case to install components. If you are not comfortable with these procedures, get help from a more experienced computer user or computer service technician, or contact Gateway Customer Care. 27 - Gateway E-9220T | Gateway E-9220T Server User Guide - Page 33
(in case you need help from Gateway Customer Care). The telephone must be directly connected to a telephone jack and cannot be connected to your server. Gathering the tools you need Some tools and supplies that you may need to work on your server are: ■ A notebook to take notes ■ A Phillips - Gateway E-9220T | Gateway E-9220T Server User Guide - Page 34
any object into the vent holes of the power supply module. ■ Avoid static-causing surfaces such as carpeted floors, plastic, and packing foam. ■ Avoid working on the server when your work area is extremely humid. cards. Never slide expansion cards or components over any surface. www.gateway.com 29 - Gateway E-9220T | Gateway E-9220T Server User Guide - Page 35
before you turn on the server. Operating the server without the cover in place can damage server components. To open the server case: 1 Follow the instructions in "Preventing static electricity discharge" on page 29. 2 Turn off the server, then unplug the power cords and all other cables connected - Gateway E-9220T | Gateway E-9220T Server User Guide - Page 36
Accessing the internal components 5 Swing the side panel away from the computer. 6 Lift the panel away from the server and place it out of the way. www.gateway.com 31 - Gateway E-9220T | Gateway E-9220T Server User Guide - Page 37
Chapter 4: Installing Components Removing the bezel assembly To remove the bezel assembly: 1 Follow the instructions in "Opening the server case" on page 30. 2 After removing the side panel, press the three black plastic from the left side of the computer, then remove the bezel. 32 www.gateway.com - Gateway E-9220T | Gateway E-9220T Server User Guide - Page 38
static electricity discharge" on page 29. 2 Follow the instructions in "Opening the server case" on page 30. 3 Remove the cables from the air duct cable clip. 4 Grasp the air duct handle and remove the processor air duct from the chassis. Air duct handle Processor air duct www.gateway.com 33 - Gateway E-9220T | Gateway E-9220T Server User Guide - Page 39
snag or unplug the fan cable when you install the processor air duct. Processor air duct installation tabs Processor air duct installation holes 34 www.gateway.com - Gateway E-9220T | Gateway E-9220T Server User Guide - Page 40
Accessing the internal components 2 Press the processor air duct into place. 3 Place the diskette cable and hard drive power cable behind the cable clip on the processor air duct. www.gateway.com 35 - Gateway E-9220T | Gateway E-9220T Server User Guide - Page 41
with the slots on the right side of the computer. 3 Press the right side of the bezel firmly until it snaps into place. 36 www.gateway.com - Gateway E-9220T | Gateway E-9220T Server User Guide - Page 42
Accessing the internal components To close the server case: 1 Make sure that all of the internal cables are arranged inside the case so they top of the computer to secure it into place. 3 Replace the case cover thumbscrew. 4 Reconnect the power cords and all other cables. www.gateway.com 37 - Gateway E-9220T | Gateway E-9220T Server User Guide - Page 43
CD or DVD drive and one 3.5-inch diskette drive. Your server also has an additional 5.25-inch drive bay and an additional 3.5-inch drive bay. Your server can have as many as four SATA (standard) or on configuring the drive, setting drive jumpers, and attaching cables. 38 www.gateway.com - Gateway E-9220T | Gateway E-9220T Server User Guide - Page 44
, CD, DVD, hard drive, or tape drive. To install a drive in an external drive bay: 1 Follow the instructions in "Preventing static electricity discharge" on page 29. 2 Follow the instructions in "Opening the server case" on page 30. 3 If you are replacing a CD, DVD, or diskette drive, go to Step - Gateway E-9220T | Gateway E-9220T Server User Guide - Page 45
the drive slightly, until the lever can be moved forward enough to lock the drive into place. 10 Connect the power and data cables. 11 Follow the instructions on "Installing the bezel assembly" on page 36. 12 Follow the instructions in "Closing the server case" on page 37. 40 www.gateway.com - Gateway E-9220T | Gateway E-9220T Server User Guide - Page 46
a hard drive in an internal drive bay: 1 Follow the instructions in "Preventing static electricity discharge" on page 29. 2 Follow the instructions in "Opening the server case" on page 30. 3 If you are replacing a drive . See the drive's documentation for further instructions. www.gateway.com 41 - Gateway E-9220T | Gateway E-9220T Server User Guide - Page 47
to lock the drive into place. 8 Connect the power and data cables. 9 Follow the instructions in "Closing the server case" on page 37. 10 Format and partition No fault tolerance. One or two No Data is lost if a drive (on this fails. server) More disk space Two Yes required. Reduces usable - Gateway E-9220T | Gateway E-9220T Server User Guide - Page 48
the SATA RAID option ROM into memory because other option ROMs are already loaded. This is not a functional problem and can be disregarded. If you receive this message, press F1 to continue. 9 Configure the RAID options, then exit the RAID BIOS console. 10 Reboot the server. www.gateway.com 43 - Gateway E-9220T | Gateway E-9220T Server User Guide - Page 49
defined the current volume, confirm your settings when prompted. 8 Repeat Step 2 through Step 7 to configure additional volumes. 9 Exit the RAID Configuration utility and reboot the server. 44 www.gateway.com - Gateway E-9220T | Gateway E-9220T Server User Guide - Page 50
memory in your server. Your server supports from 256 MB to 8 GB total memory. Supported DIMM sizes include 256 MB, 512 MB, 1 GB, and 2 GB. Caution Memory memory installed incorrectly, your server will not start up. The BIOS configures the memory loads per memory channel is supported, and therefore - Gateway E-9220T | Gateway E-9220T Server User Guide - Page 51
automatically. 5 Follow the instructions in "Closing the server case" on page 37. 6 Restart your server and open the BIOS Setup utility. Verify the System Memory listed in the Main menu. When you exit the BIOS Setup utility, make sure that the operating system loads completely. 46 www.gateway.com - Gateway E-9220T | Gateway E-9220T Server User Guide - Page 52
card. Caution This server does not have PCI hot- or remove a PCI card without turning off your server and disconnecting it from the AC power source. PCI slot 1 2 3 4 5 the instructions in "Preventing static electricity discharge" on page 29. 2 Follow the instructions in "Opening the server case - Gateway E-9220T | Gateway E-9220T Server User Guide - Page 53
Do not touch the contacts on the bottom part of the expansion card. Touching the contacts can cause electrostatic damage to the card. 48 www.gateway.com - Gateway E-9220T | Gateway E-9220T Server User Guide - Page 54
do not bend the card sideways. 7 Swing the card retention bar back into place and tighten the captive thumbscrew. Card retention bar. Captive thumbscrew www.gateway.com 49 - Gateway E-9220T | Gateway E-9220T Server User Guide - Page 55
Chapter 4: Installing Components 8 Connect any cables to the card. For more information, see the instructions in the card's documentation. 9 Follow the instructions in "Closing the server case" on page 37. 10 See the card's documentation for software installation instructions. 50 www.gateway.com - Gateway E-9220T | Gateway E-9220T Server User Guide - Page 56
MB (Pentium 4), or 2×1 MB (Pentium D), L2 caches. The server automatically detects the processors each time you turn it on. Whenever you instructions in "Preventing static electricity discharge" on page 29. 3 Follow the instructions in "Opening the server case" on page 30. 4 Follow the instructions - Gateway E-9220T | Gateway E-9220T Server User Guide - Page 57
of the processor socket ■ The processor is flush with the socket. 10 Press the processor locking lever down until it clicks into place. 52 www.gateway.com - Gateway E-9220T | Gateway E-9220T Server User Guide - Page 58
surrounding the processor, then gradually and evenly tighten the four captive screws to secure the heat sink to the system board. 13 Follow the instructions in "Installing the processor air duct" on page 34. 14 Follow the instructions in "Closing the server case" on page 37. www.gateway.com 53 - Gateway E-9220T | Gateway E-9220T Server User Guide - Page 59
power supplies fails, the other power supply module supports the server while you replace the failed module. You do not need to turn off the server or disconnect peripheral devices to replace a failed power supply module. Warning The power supply modules in this server contain no user-serviceable - Gateway E-9220T | Gateway E-9220T Server User Guide - Page 60
the green latch on the power supply module, grasp the handle and pull the module straight out from the server. 5 Slide the new power supply module into the empty power supply bay until the green latch snaps into place. 6 Plug the power cord into the new power supply module. www.gateway.com 55 - Gateway E-9220T | Gateway E-9220T Server User Guide - Page 61
replacement fan. To replace a front fan: 1 Follow the instructions in "Preventing static electricity discharge" on page 29. 2 Follow the instructions in "Opening the server case" on page 30. 3 Remove the processor air duct away from the chassis. 6 Pull the fan from the chassis. 56 www.gateway.com - Gateway E-9220T | Gateway E-9220T Server User Guide - Page 62
a back fan: 1 Follow the instructions in "Preventing static electricity discharge" on page 29. 2 Follow the instructions in "Opening the server case" on page 30. 3 Unplug the fan cable from the fan connector on the system board. Fan cable Fan retention screw www.gateway.com Fan retention screw 57 - Gateway E-9220T | Gateway E-9220T Server User Guide - Page 63
is oriented the same way (air flow) as the old fan. 7 Plug the fan cable into the fan connector on the system board. 8 Follow the instructions in "Closing the server case" on page 37. 58 www.gateway.com - Gateway E-9220T | Gateway E-9220T Server User Guide - Page 64
this guide. 2 Follow the instructions in "Opening the BIOS Setup utility" on page 66. 3 Record the BIOS settings on your printout, then close the utility. 4 Turn off your server, then follow the instructions in from the battery until the battery pops up. 8 Remove the old battery. www.gateway.com 59 - Gateway E-9220T | Gateway E-9220T Server User Guide - Page 65
correctly, then press the new battery into the socket until it snaps into place. 10 Follow the instructions in "Closing the server case" on page 37. 11 Turn on the server. 12 Press F2 when the Gateway logo screen appears during startup. The BIOS Setup utility opens. 13 Restore any BIOS settings that - Gateway E-9220T | Gateway E-9220T Server User Guide - Page 66
" on page 29. 2 Follow the instructions in "Opening the server case" on page 30. 3 Remove the processor air duct by following the instructions in "Removing the processor air duct" on page 33. 4 Remove the memory modules by following the instructions in "Installing memory" on page 45. 5 Remove all - Gateway E-9220T | Gateway E-9220T Server User Guide - Page 67
Chapter 4: Installing Components 8 Remove the seven (7) screws securing the system board to the case. Screw Screw Screw Screw Screw Screw Screw 62 www.gateway.com - Gateway E-9220T | Gateway E-9220T Server User Guide - Page 68
the instructions in "Replacing the processor" on page 51. 14 Connect the power and data cables. 15 Reinstall the expansion cards by following the instructions in "Installing PCI expansion cards" on page 47. 16 Follow the instructions in "Closing the server case" on page 37. www.gateway.com - Gateway E-9220T | Gateway E-9220T Server User Guide - Page 69
Chapter 4: Installing Components 17 Turn on your server. 18 Press F2 when the Gateway logo screen appears during startup. The BIOS Setup utility opens. 19 Check BIOS settings to make sure that they detect the server's new hardware, then save your changes (if any) and close the BIOS Setup utility. - Gateway E-9220T | Gateway E-9220T Server User Guide - Page 70
Chapter 5 Using the BIOS Setup Utility • Opening the BIOS Setup utility • Updating the BIOS • Resetting the BIOS settings to their factory defaults • Resetting the BIOS passwords 65 - Gateway E-9220T | Gateway E-9220T Server User Guide - Page 71
on page 95. To open the BIOS Setup utility: 1 Restart your server. 2 Press F2 when the Gateway logo screen appears during startup. The BIOS Setup utility opens. When more information, see "Server security" on page 19. ■ Power gives you access to settings for system power management. ■ Boot gives - Gateway E-9220T | Gateway E-9220T Server User Guide - Page 72
of the BIOS from support.gateway.com, then unzip the file. Important Make sure you write down the location of the unzipped files, so you can locate them later. 2 Print the appendix for BIOS Settings in this guide. 3 Restart your server, then press F2 when the Gateway logo screen appears during - Gateway E-9220T | Gateway E-9220T Server User Guide - Page 73
Print the appendix for BIOS Settings in this guide. 2 Restart your server. 3 Press F2 when the Gateway logo screen appears during startup. The BIOS Setup utility opens. 4 Record any custom BIOS settings on your printout. 5 Follow the instructions in "Preventing static electricity discharge" on page - Gateway E-9220T | Gateway E-9220T Server User Guide - Page 74
case" on page 37. 10 Reconnect the power cords and turn on the server. The BIOS memory is cleared. 11 Turn off the server, then disconnect the power cords and all other cables connected to the server. 12 Follow the instructions in "Opening the server case" on page 30 13 Place the jumper back onto - Gateway E-9220T | Gateway E-9220T Server User Guide - Page 75
. 6 Turn off the server, then disconnect the power cords and all other cables connected to the server. 7 Follow the instructions in "Opening the server case" on page 30. 8 Place the jumper back onto pins 1-2. 9 Follow the instructions in "Closing the server case" on page 37. 70 www.gateway.com - Gateway E-9220T | Gateway E-9220T Server User Guide - Page 76
Chapter 6 Troubleshooting • Interpreting error messages and codes • Troubleshooting • Getting telephone support and training If the suggestions in this chapter do not correct the problem, see "Telephone support" on page 86 for more information about how to get help. 71 - Gateway E-9220T | Gateway E-9220T Server User Guide - Page 77
to troubleshoot your server problem if: ■ Power cords or plugs are damaged ■ Liquid has been spilled into your server ■ Your server was dropped ■ The case was damaged Instead, unplug your server and contact a qualified computer technician. If your server was damaged during shipment from Gateway - Gateway E-9220T | Gateway E-9220T Server User Guide - Page 78
server restarts. Make sure that the settings are correct. ■ Reset the BIOS. For more information, see "Resetting the BIOS" on page 68. Invalid partition table ■ The master boot record may be corrupt. For troubleshooting information, see "The master boot record is corrupted" on page 81. www.gateway - Gateway E-9220T | Gateway E-9220T Server User Guide - Page 79
, then open the BIOS Setup utility by pressing and holding F2 while your server restarts. Save the memory configuration. Missing operating system ■ The master boot record may be corrupt. For troubleshooting information, see "The master boot record is corrupted" on page 81. System Event Log Full - Gateway E-9220T | Gateway E-9220T Server User Guide - Page 80
to troubleshoot your server problem if: ■ Power cords or plugs are damaged ■ Liquid has been spilled into your server ■ Your server was dropped ■ The case was damaged Instead, unplug your server and contact a qualified computer technician. If your server was damaged during shipment from Gateway - Gateway E-9220T | Gateway E-9220T Server User Guide - Page 81
error occurs during the power-on self-test (POST), the BIOS displays an error message that describes the problem. The BIOS also sounds be defective. The BIOS cannot switch to Protected mode. Troubleshooting steps Reseat the memory modules or replace with modules you know are good. www.gateway.com - Gateway E-9220T | Gateway E-9220T Server User Guide - Page 82
8 9 10 11 Troubleshooting Description Troubleshooting steps General exception error (processor exception error). Same as for 4 beeps. Same as for 5 beeps Display memory error (system video adapter . Same as for 4 beeps. The cache memory test failed. Same as for 4 beeps. www.gateway.com 77 - Gateway E-9220T | Gateway E-9220T Server User Guide - Page 83
Chapter 6: Troubleshooting DIM code checkpoints The Device Device Initialization (function 1) - Initializes all static devices that include manual configured onboard peripherals, memory and I/O decode windows in PCI-PCI bridges, and noncompliant S1, S2, S3, S4, or S5. 78 www.gateway.com - Gateway E-9220T | Gateway E-9220T Server User Guide - Page 84
from the power supply connection). If necessary, reverse one end of the cable so the red-striped edge of the data ribbon cable faces Pin 1 on the diskette drive. Make sure that the pins are not bent or misaligned. For more information, see "Installing drives" on page 38. www.gateway.com 79 - Gateway E-9220T | Gateway E-9220T Server User Guide - Page 85
. ■ Open your server and make sure that the cables are connected correctly to the diskette drive and the system board. The red-striped edge of the data ribbon cable indicates Pin 1 and corresponds with Pin 1 on the diskette drive (typically on the side farthest from the power supply connection). If - Gateway E-9220T | Gateway E-9220T Server User Guide - Page 86
Troubleshooting Your server does not recognize a SCSI drive ■ Make sure that the SCSI controller is enabled in the BIOS Setup utility. ■ Reinstall the device driver . You are having problems with a SATA drive drive. ■ Make sure that the power cable and SATA cables are attached securely gateway.com 81 - Gateway E-9220T | Gateway E-9220T Server User Guide - Page 87
Chapter 6: Troubleshooting Internet See also Modem. You cannot connect to the Internet ■ Make sure that your account with your Internet Service Provider (ISP) is set up correctly. Contact your ISP technical support for help. ■ Make sure that you do not have a problem with your modem. For more - Gateway E-9220T | Gateway E-9220T Server User Guide - Page 88
Troubleshooting ■ Remove any line splitters or surge protectors from your telephone line, then check for a dial tone by plugging a working telephone into the telephone jack. ■ If you have additional telephone services popping sounds). Line noise is a common problem that can cause the modem to connect - Gateway E-9220T | Gateway E-9220T Server User Guide - Page 89
is limited to 48K. Your ISP may not support 48K uploads. The modem is not recognized by your server ■ If the modem shares the telephone line with and restart your server. ■ Reinstall the modem device driver. For more information, see Using Your System Companion CD. ■ Open your server and reseat the - Gateway E-9220T | Gateway E-9220T Server User Guide - Page 90
but you may not be seeing an image on the monitor. For monitor troubleshooting, see "Monitor" on page 84. ■ If your server is equipped with redundant power supply modules, check the LEDs on the power supply modules. ■ If your server is plugged into a UPS, make sure that the UPS is connected securely - Gateway E-9220T | Gateway E-9220T Server User Guide - Page 91
6: Troubleshooting Telephone support Before calling Gateway Customer Care If you have a technical problem with your server, follow these recommendations before contacting Gateway Customer Care: ■ Make sure that your server is connected correctly to a grounded AC outlet that is supplying power. ■ If - Gateway E-9220T | Gateway E-9220T Server User Guide - Page 92
support Gateway offers a wide range of customer service, technical support, and information services. Telephone numbers You can access the following services through your telephone to get answers to your questions: Resource Service description NEW Gateway's fee-based software tutorial service - Gateway E-9220T | Gateway E-9220T Server User Guide - Page 93
Chapter 6: Troubleshooting 88 www.gateway.com - Gateway E-9220T | Gateway E-9220T Server User Guide - Page 94
Appendix A Server Specifications The following specifications are for the standard configuration. Your server may contain optional equipment. All specifications are subject to change. 89 - Gateway E-9220T | Gateway E-9220T Server User Guide - Page 95
full-length, full-height PCI expansion cards Single 400 W fixed power supply (standard). Two 520 W, hot-swap, redundant power suppy modules (optional).) Supports Windows Server 2003 (all) and Small Business Server 2003 (all) Compatible with: ■ Windows NT ■ Novell NetWare 5.1 and 6.5 ■ Red Hat - Gateway E-9220T | Gateway E-9220T Server User Guide - Page 96
support (Pentium D only) Supports Intel Celeron, Pentium 4, or Pentium D CPUs with 1024 KB cache Intel E7230 chipset ■ Supports 533 MHz or 800 MHz Front Side Bus (FSB) ■ E7230 Memory the ICH7 supporting entry level RAID functionality, including RAID levels 0, ■ PXE support ACPI compliance Supports S0, S1, - Gateway E-9220T | Gateway E-9220T Server User Guide - Page 97
environmental conditions. At no time should the server run under conditions which violate these specifications. Variable Temperature Altitude Humidity Shock AC input power Requirements Maximum rate of change: 18°F -127 V, 10.0 A, 50/60 Hz max. 200-240 V, 5.0 A, 50/60 Hz max. 92 www.gateway.com - Gateway E-9220T | Gateway E-9220T Server User Guide - Page 98
64 MB Function DOS region, base system memory Video or SMM memory Expansion card BIOS and buffer area System BIOS Extended system BIOS PCI memory space Interrupts The following table reflects a typical APIC mode Timer/counter, HPET #0 Serial port A Serial port B Parallel port www.gateway.com 93 - Gateway E-9220T | Gateway E-9220T Server User Guide - Page 99
#0,1,2 SIO3 Additional specifications For more information about your server, such as memory size, hard drive size, and processor type, visit Gateway's Support page at support.gateway.com. The Support page also has links to additional Gateway documentation and detailed specifications for your own - Gateway E-9220T | Gateway E-9220T Server User Guide - Page 100
Appendix B BIOS Settings You can print this appendix, then record your custom BIOS settings on the printout. 95 - Gateway E-9220T | Gateway E-9220T Server User Guide - Page 101
Appendix B: To view all BIOS settings: 1 Restart your server. 2 Press F2 when the Gateway logo screen appears during startup. The BIOS Setup utility opens. 3 : BIOS Version Processor (Type, Speed) System Bus Speed System Memory Speed L2 Cache RAM Hyper-Threading Technology Enabled Disabled 96 www - Gateway E-9220T | Gateway E-9220T Server User Guide - Page 102
BIOS menu Advanced BIOS submenu Setting System Memory (Total) Memory Mode Memory Channel A Slot 0 Memory Channel A Slot 1 Memory Channel B Slot 0 Memory Channel B Slot 1 System Time System Date /DD/YYYY English French German Italian Spanish Boot Configuration Numlock Off On www.gateway.com 97 - Gateway E-9220T | Gateway E-9220T Server User Guide - Page 103
Enable Disable Enable Disable Enable Disable Enable Disabled Enabled Legacy Enhanced IDE RAID Disable Enable Value Value Value Value Value Value Value (Default = 0) 98 www.gateway.com - Gateway E-9220T | Gateway E-9220T Server User Guide - Page 104
Enable Disable Enable Primary Video Adapter Auto Ext PCIE Graphics (PEG) Ext PCI Graphics PCI Express Configuration Link to sub-menu on page 102 www.gateway.com 99 - Gateway E-9220T | Gateway E-9220T Server User Guide - Page 105
Appendix B: BIOS menu Security BIOS submenu Setting PCI Latency Timer Management Configuration ASF Support Enter AMT BX Setup USB Configuration USB 2.0 USB ZIP Emulation Type Set Supervisor Access View Only Limited Access Full Access Disable Enable Disable Enable 100 www.gateway.com - Gateway E-9220T | Gateway E-9220T Server User Guide - Page 106
Wake on LAN from S5 ACPI Suspend State Stay off Last state Power on Stay off Power on S1 State S3 State Boot Menu Type Normal Advance Boot Device Priority CD/DVD-ROM Enable Boot to Removable Devices Disable Enable Boot to Network Disable Enable USB Boot Disable Enable www.gateway.com 101 - Gateway E-9220T | Gateway E-9220T Server User Guide - Page 107
Appendix B: The following second level submenu is accessed from the submenu indicated in the first column. BIOS submenu BIOS 2nd level submenu PCI Express Configuration Setting Value PEG Negotiated Width Compliance Test Pattern (Value) Enable Disable 102 www.gateway.com - Gateway E-9220T | Gateway E-9220T Server User Guide - Page 108
Appendix C Safety, Regulatory, and Legal Information • Safety information • Legal and Regulatory Information 103 - Gateway E-9220T | Gateway E-9220T Server User Guide - Page 109
before cleaning the system. Warning This unit has two power supplies. To remove power from all internal circuitry you must disconnect both power cords. ■ Unplug the system from the wall outlet and refer servicing to qualified personnel if: ■ The power cord or plug is damaged. ■ Liquid has been - Gateway E-9220T | Gateway E-9220T Server User Guide - Page 110
Important Warning Do not use Gateway products in areas classified as hazardous locations. Such areas include patient care areas of medical and dental facilities, oxygen-laden environments, or industrial facilities. To - Gateway E-9220T | Gateway E-9220T Server User Guide - Page 111
Class A Statement The server is designated as complying not expressly approved by Gateway could void the FCC Part 68-compliant. See installation instructions for details. The Ringer service may be required. The telephone company may request that you disconnect the equipment until the problem - Gateway E-9220T | Gateway E-9220T Server User Guide - Page 112
Gateway Companies, Inc. 610 Gateway Drive, North Sioux City, SD 57049 (605) 232-2000 Fax: (605) 232-2023 Product: ■ Gateway E-9220T Server For In some cases, the inside wiring associated with a single-line individual service may be extended by means of a certified connector assembly. The customer - Gateway E-9220T | Gateway E-9220T Server User Guide - Page 113
C: Users should make sure, for their own protection, that the electrical ground connections of the power utility, telephone lines, and internal metallic water pipe system, if present, are connected together. the Ringer Equivalence Numbers of all the devices does not exceed 5. 108 www.gateway.com - Gateway E-9220T | Gateway E-9220T Server User Guide - Page 114
(DHHS) Radiation Performance Standard. Should the unit ever need servicing, contact an authorized service location. Warning Use of controls or adjustments or performance of procedures other than those specified in this manual may result in hazardous radiation exposure. To prevent exposure to - Gateway E-9220T | Gateway E-9220T Server User Guide - Page 115
. Call Gateway to see if this program is available in your area. ■ If you need further assistance in recycling, reusing, or trading in your "end of life" product, you may contact us at the Customer Care number listed in your product's user guide and we will be glad to help you with - Gateway E-9220T | Gateway E-9220T Server User Guide - Page 116
logo, GATEWAY, Gateway Astro, Gateway@Work, Gateway Connected touch pad, Gateway Connected music player, Gateway Cyber:)Ware, Gateway Education:)Ware, Gateway Flex Case, Gateway Gaming:)Ware, Gateway GoBack, Gateway Gold, Gateway Learning:)Ware, Gateway Magazine, Gateway Micro Server, Gateway Money - Gateway E-9220T | Gateway E-9220T Server User Guide - Page 117
Appendix C: 112 www.gateway.com - Gateway E-9220T | Gateway E-9220T Server User Guide - Page 118
80 case interior 4 opening 30 CD System Companion 26 troubleshooting 79 CD or DVD drive installing 39, 41 location 2 troubleshooting 79 Certificate of Authenticity 86 checkpoints ACPI runtime 78 DIM code 78 cleaning keyboard 17 screen 17 servers 16 tape drive 17 CMOS battery 59 see battery - Gateway E-9220T | Gateway E-9220T Server User Guide - Page 119
rear 3 replacing 56 finding specifications 94 G Gateway 6 Customer Care 86 Learning Libraries 87 Web address 6 Gateway Server Manager 19 H hard drive indicator 2 LED indicator 2 troubleshooting 80 heat sink installing 51 help telephone support 86 tutoring 87 hot-swap power supply module 54 114 www - Gateway E-9220T | Gateway E-9220T Server User Guide - Page 120
cleaning screen 17 Gateway Server Manager 19 general guidelines 16 recording BIOS configuration 18 master boot record 81 memory installing 45 map 93 troubleshooting 82 messages 73 modem connection speed 83 troubleshooting 82 monitor cleaning 17 port 3 troubleshooting 84 motherboard see system board - Gateway E-9220T | Gateway E-9220T Server User Guide - Page 121
problems 9 static electricity 29 troubleshooting 85 uninterruptible power supply (UPS) 9 power supply uninterruptible 9 power supply module installing 54 power/sleep LED 10 power sparing memory online 46 specifications 89, 94 electronic 93 environmental 92 system board 91 starting server 10 static - Gateway E-9220T | Gateway E-9220T Server User Guide - Page 122
keyboard 82 master boot record 81 memory 82 modem 82 monitor 84 power 85 power source problems 9 processor 85 safety guidelines 72 SCSI drive 81 technical support 86 telephone support 86 video 84 turning off server 12 turning on server 10 U uninterruptible power supply (UPS) 9 updating BIOS 67 UPS - Gateway E-9220T | Gateway E-9220T Server User Guide - Page 123
118 www.gateway.com - Gateway E-9220T | Gateway E-9220T Server User Guide - Page 124
MAN E-9220T PATTON SRV GDE R0 08/05
-
 1
1 -
 2
2 -
 3
3 -
 4
4 -
 5
5 -
 6
6 -
 7
7 -
8
-
9
-
10
-
11
-
12
-
13
-
14
-
15
-
16
-
17
-
18
-
19
-
20
-
21
-
22
-
23
-
24
-
25
-
26
-
27
-
28
-
29
-
30
-
31
-
32
-
33
-
34
-
35
-
36
-
37
-
38
-
39
-
40
-
41
-
42
-
43
-
44
-
45
-
46
-
47
-
48
-
49
-
50
-
51
-
52
-
53
-
54
-
55
-
56
-
57
-
58
-
59
-
60
-
61
-
62
-
63
-
64
-
65
-
66
-
67
-
68
-
69
-
70
-
71
-
72
-
73
-
74
-
75
-
76
-
77
-
78
-
79
-
80
-
81
-
82
-
83
-
84
-
85
-
86
-
87
-
88
-
89
-
90
-
91
-
92
-
93
-
94
-
95
-
96
-
97
-
98
-
99
-
100
-
101
-
102
-
103
-
104
-
105
-
106
-
107
-
108
-
109
-
110
-
111
-
112
-
113
-
114
-
115
-
116
-
117
-
118
-
119
-
120
-
121
-
122
-
123
-
124
 |
 |
Gateway E-9220T Server
User Guide