Gateway GT5014H 8511124 - Gateway Canada mBTX Hardware Reference Guide
Gateway GT5014H Manual
 |
View all Gateway GT5014H manuals
Add to My Manuals
Save this manual to your list of manuals |
Gateway GT5014H manual content summary:
- Gateway GT5014H | 8511124 - Gateway Canada mBTX Hardware Reference Guide - Page 1
HARDWARE REFERENCE RÉFÉRENCE MATÉRIELLE Gateway Computer Ordinateur Gateway - Gateway GT5014H | 8511124 - Gateway Canada mBTX Hardware Reference Guide - Page 2
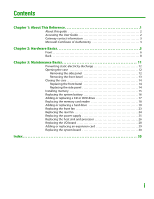
Contents Chapter 1: About This Reference 1 About this guide 2 Accessing the User Guide 2 Gateway contact information 3 Microsoft Certificate of Authenticity 3 Chapter 2: Hardware Basics 5 Front 6 Back 8 Chapter 3: Maintenance Basics 11 Preventing static electricity discharge 12 Opening the - Gateway GT5014H | 8511124 - Gateway Canada mBTX Hardware Reference Guide - Page 3
Contents www.gateway.com ii - Gateway GT5014H | 8511124 - Gateway Canada mBTX Hardware Reference Guide - Page 4
CHAPTER 1 About This Reference • About this guide • Accessing the User Guide • Gateway contact information • Microsoft Certificate of Authenticity 1 - Gateway GT5014H | 8511124 - Gateway Canada mBTX Hardware Reference Guide - Page 5
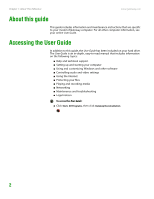
maintenance instructions that are specific to your model of Gateway computer. For all other computer information, see your online User Guide. Accessing the User Guide In addition to this guide, the User Guide has been included on your hard drive. The User Guide is an in-depth, easy-to-read manual - Gateway GT5014H | 8511124 - Gateway Canada mBTX Hardware Reference Guide - Page 6
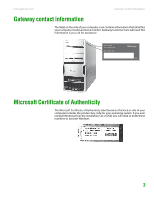
that identifies your computer model and serial number. Gateway Customer Care will need this information if you call for assistance. TTOeencclhhinSSeuusppupppooprrottrHPth:oounrse:: ((UCa.Sn.)ada) 9004394 Online support: Tech Support Phone: (U.S.) (Canada) Tech Support Hours: 9004394 Microsoft - Gateway GT5014H | 8511124 - Gateway Canada mBTX Hardware Reference Guide - Page 7
Chapter 1: About This Reference www.gateway.com 4 - Gateway GT5014H | 8511124 - Gateway Canada mBTX Hardware Reference Guide - Page 8
CHAPTER 2 Hardware Basics • Front • Back 5 - Gateway GT5014H | 8511124 - Gateway Canada mBTX Hardware Reference Guide - Page 9
computer hardware options and port locations may vary from the illustration below. Optical drive USB port (optional) www.gateway . To identify your drive type and for more information about your drive, see the User Guide. Plug a USB (Universal Serial Bus) device (such as a printer, scanner, camera, - Gateway GT5014H | 8511124 - Gateway Canada mBTX Hardware Reference Guide - Page 10
gateway in Standby/Resume mode or Hibernate mode. The power indicator lights when the computer is turned on. Lights when the hard drive is in use. Plug IEEE 6-pin IEEE 1394 ports. For more information, see the User Guide.. Headphone jack Microphone jack Plug powered, analog front speakers, an - Gateway GT5014H | 8511124 - Gateway Canada mBTX Hardware Reference Guide - Page 11
Basics Back Important Your computer hardware options and port locations may vary from the illustration below. www.gateway.com Power connector Case into this optional jack. For information on configuring this jack, see the User Guide. Plug an Ethernet network cable or a device (such as a DSL or - Gateway GT5014H | 8511124 - Gateway Canada mBTX Hardware Reference Guide - Page 12
gateway.com Back Component IEEE 1394 ports Icon Description Plug IEEE 1394 (also known as Firewire® or i.Link®) devices (such as a digital camcorder) into these 6-pin IEEE 1394 ports. For more information, see the User Guide , see the User Guide.. Before turning on your computer, make sure that - Gateway GT5014H | 8511124 - Gateway Canada mBTX Hardware Reference Guide - Page 13
Chapter 2: Hardware Basics www.gateway.com 10 - Gateway GT5014H | 8511124 - Gateway Canada mBTX Hardware Reference Guide - Page 14
CHAPTER 3 Maintenance Basics • Preventing static electricity discharge • Opening the case • Closing the case • Installing memory • Replacing the system battery • Adding or replacing a CD or DVD drive • Replacing the memory card reader • Adding or replacing a hard drive • Replacing the front fan • - Gateway GT5014H | 8511124 - Gateway Canada mBTX Hardware Reference Guide - Page 15
gateway.com Preventing static electricity discharge Warning To avoid exposure to dangerous electrical voltages and moving parts, turn off your computer panel: 1 Follow the instructions in "Preventing static electricity discharge" on page 12. 2 Shut down your computer, then disconnect the power - Gateway GT5014H | 8511124 - Gateway Canada mBTX Hardware Reference Guide - Page 16
www.gateway.com Opening the case 4 Remove the two thumbscrews on the side panel cover. Thumbscrews 5 Swing the side panel away from the back of your computer, then pull the panel off. Removing the front bezel To remove the front bezel: 1 Press the three bezel retention tabs, then swing the right - Gateway GT5014H | 8511124 - Gateway Canada mBTX Hardware Reference Guide - Page 17
gateway.com Replacing the front bezel To replace the front bezel: 1 Engage the tabs on the left side of the bezel with the slots in the left side of the computer right side of the bezel with the slots on the right side of the computer. 3 Press the right side of the bezel firmly until it snaps into - Gateway GT5014H | 8511124 - Gateway Canada mBTX Hardware Reference Guide - Page 18
www.gateway.com Installing memory Installing memory When you upgrade the computer memory, make sure that you install the correct type of memory module for your computer. Your computer uses DIMM memory. To install or replace DIMM memory: 1 Remove the side panel by following the instructions in " - Gateway GT5014H | 8511124 - Gateway Canada mBTX Hardware Reference Guide - Page 19
same or equivalent type recommended by the manufacturer. Dispose of used batteries following the manufacturer's instructions. Important Your computer's battery location may vary from the illustration below. If the computer clock does not keep time or the settings in the BIOS Setup utility are not - Gateway GT5014H | 8511124 - Gateway Canada mBTX Hardware Reference Guide - Page 20
www.gateway.com Adding or replacing a CD or DVD drive 10 Replace the side panel by following the instructions in "Replacing the side panel" on page 14. 11 Reconnect all external cables and the power cord. 12 Turn on your computer. 13 Open the BIOS Setup utility. 14 In the BIOS Setup utility, - Gateway GT5014H | 8511124 - Gateway Canada mBTX Hardware Reference Guide - Page 21
CHAPTER 3: Maintenance Basics www.gateway.com 4 Remove the two drive retention screws, then slide the 3. 8 Replace the front bezel by following the instructions in "Replacing the front bezel" on page 14. 9 Replace the side panel by following the instructions in "Replacing the side panel" on page 14. - Gateway GT5014H | 8511124 - Gateway Canada mBTX Hardware Reference Guide - Page 22
www.gateway.com Adding or replacing a hard drive 3 Remove the screws holding the bay. 9 Reinstall the bezel by following the instructions in "Replacing the front bezel" on page 14. 10 Reinstall the computer case's side panel by following the instructions in "Replacing the side panel" on page 14 - Gateway GT5014H | 8511124 - Gateway Canada mBTX Hardware Reference Guide - Page 23
CHAPTER 3: Maintenance Basics www.gateway.com 3 Disconnect the drive cables, noting their locations and orientation. (You will reconnect the cables after you install the new drive.) 4 Remove the front fan - Gateway GT5014H | 8511124 - Gateway Canada mBTX Hardware Reference Guide - Page 24
www.gateway.com 6 Remove the hard drive bay screw. Adding or replacing a hard drive Hard drive bay screw 7 Remove the hard drive bay from your computer. You may need to work the bay out of your computer by rocking the bay back and forth. If you are adding a new drive, go to Step 10 - Gateway GT5014H | 8511124 - Gateway Canada mBTX Hardware Reference Guide - Page 25
3: Maintenance Basics www.gateway.com 9 Note any jumper computer. 17 If Windows does not start, install Windows using the operating system CD that came with your computer, then install the drivers and applications using the drivers and applications disc that you created. Follow any instructions - Gateway GT5014H | 8511124 - Gateway Canada mBTX Hardware Reference Guide - Page 26
www.gateway.com Replacing the front fan Replacing the front fan Tips & Tricks You need a Phillips screwdriver to replace the front fan. To replace the front fan: 1 Remove the side panel by following the instructions in "Removing the side panel" on page 12. 2 Remove the front fan by pulling it - Gateway GT5014H | 8511124 - Gateway Canada mBTX Hardware Reference Guide - Page 27
fan. Screws Screws 4 Place the new fan on the back of your computer, then replace the screws that secure it to the back cover. 5 Reconnect the fan cable to the system board. 6 Replace the side panel by following the instructions in "Replacing the side panel" on page 14. 7 Reconnect all external - Gateway GT5014H | 8511124 - Gateway Canada mBTX Hardware Reference Guide - Page 28
your computer, then pull it down and remove it. 5 Install the new power supply into the case, then install the three screws to secure the power supply to the case. 6 Reconnect the power supply cables using your notes from Step 2. 7 Replace the side panel by following the instructions in "Replacing - Gateway GT5014H | 8511124 - Gateway Canada mBTX Hardware Reference Guide - Page 29
to replace the heat sink. To replace the heat sink and processor: 1 Remove the side panel by following the instructions in "Removing the side panel" on page 12. 2 For more stability, place your computer on its side. To avoid scratching the case, place it on a towel or other non-abrasive surface - Gateway GT5014H | 8511124 - Gateway Canada mBTX Hardware Reference Guide - Page 30
www.gateway.com Replacing the heat sink and processor 5 Loosen the four screws that secure the heat sink to the system board, then the fan cable to the system board, then insert the fan into place. 11 Replace the side panel by following the instructions in "Replacing the side panel" on page 14. 27 - Gateway GT5014H | 8511124 - Gateway Canada mBTX Hardware Reference Guide - Page 31
on page 12. 2 Remove the bezel by following the instructions in "Removing the front bezel" on page 13. 3 Disconnect the cable from the I/O panel. 4 Remove the screw that secures the I/O panel to your computer, then remove the I/O panel from your computer. Screw 5 Insert the new I/O panel board into - Gateway GT5014H | 8511124 - Gateway Canada mBTX Hardware Reference Guide - Page 32
www.gateway.com Adding or replacing an expansion card Adding or replacing an expansion card To add or replace an expansion card: 1 Remove the side panel by following the instructions in "Removing the side panel" on page 12. 2 If you are adding a new expansion card, go to the next step. If you are - Gateway GT5014H | 8511124 - Gateway Canada mBTX Hardware Reference Guide - Page 33
CHAPTER 3: Maintenance Basics www.gateway.com Replacing the system board To replace the system board: 1 Remove the side panel by following the instructions in "Removing the side panel" on page 12. 2 Disconnect any expansion card cables from the card and from the system board, noting their - Gateway GT5014H | 8511124 - Gateway Canada mBTX Hardware Reference Guide - Page 34
www.gateway.com Replacing the system board 5 Remove the fan by pulling it away from the system board. 6 Disconnect the fan cable from the system board. 7 Find - Gateway GT5014H | 8511124 - Gateway Canada mBTX Hardware Reference Guide - Page 35
CHAPTER 3: Maintenance Basics www.gateway.com 10 Remove the three screws that secure the power supply to your computer. Screws 11 Slide the power supply away from the back of your computer, then pull it down and remove it. 12 Remove the seven system board screws. Screws Screws 13 Lift the system - Gateway GT5014H | 8511124 - Gateway Canada mBTX Hardware Reference Guide - Page 36
www.gateway.com Replacing the system board 16 Loosen the four screws that secure the heat sink to the system board, then remove the heat sink. Screws - Gateway GT5014H | 8511124 - Gateway Canada mBTX Hardware Reference Guide - Page 37
cards you removed. 26 Replace the side panel by following the instructions in "Replacing the side panel" on page 14. © 2006 Gateway, Inc. All rights reserved. Gateway and eMachines are trademarks or registered trademarks of Gateway, Inc. in the United States and other countries. All other brands - Gateway GT5014H | 8511124 - Gateway Canada mBTX Hardware Reference Guide - Page 38
17 locating drive 6 replacing 17 Certificate of Authenticity 3 closing computer case 14 front bezel 14 connecting PS/2 keyboard 9 PS/2 9 front bezel removing 14 replacing 14 front I/O panel replacing 28 G Gateway contact information 3 H hard drive adding 19 indicator 7 replacing 19 headphone jack - Gateway GT5014H | 8511124 - Gateway Canada mBTX Hardware Reference Guide - Page 39
PS/2 port 9 USB port 6, 9 N network jack 8 O opening computer case 12 front bezel 13 optical drive locating 6 P parallel port 9 computer 7 turning on computer 7 TV out (S-Video out) jack 9 U USB port 6, 9 V video S-Video out jack 9 VGA port 9 voltage switch 9 W Windows Product Key Code 3 www.gateway - Gateway GT5014H | 8511124 - Gateway Canada mBTX Hardware Reference Guide - Page 40
Sommaire Chapitre 1 : À propos de cette référence 1 À propos de ce guide 2 Accès au Manuel de l'utilisateur 2 Coordonnées de Gateway 3 Certificat d'authenticité Microsoft 3 Chapitre 2 : Généralités relatives au matériel 5 Avant 6 Arrière 8 Chapitre 3 : Généralités relatives à la maintenance - Gateway GT5014H | 8511124 - Gateway Canada mBTX Hardware Reference Guide - Page 41
Sommaire www.gateway.com ii - Gateway GT5014H | 8511124 - Gateway Canada mBTX Hardware Reference Guide - Page 42
CHAPITRE 1 À propos de cette référence • À propos de ce guide • Accès au Manuel de l'utilisateur • Coordonnées de Gateway • Certificat d'authenticité Microsoft. 1 - Gateway GT5014H | 8511124 - Gateway Canada mBTX Hardware Reference Guide - Page 43
Chapitre 1 : À propos de cette référence www.gateway.com À propos de ce guide Ce guide contient des informations et des instructions de maintenance qui sont spécifiques à votre modèle d'ordinateur Gateway. Pour toutes les autres informations d'ordinateur, veuillez consulter votre Manuel de l' - Gateway GT5014H | 8511124 - Gateway Canada mBTX Hardware Reference Guide - Page 44
de votre ordinateur. Le service clientèle Gateway aura besoin de cette information lorsque vous appellerez pour obtenir de l'aide. OTTeencclhhinSSeuusppupppooprrottrPHth:oounrse:: ((UCa.Sn.)ada) 9004394 Online support: Tech Support Phone: (U.S.) (Canada) Tech Support - Gateway GT5014H | 8511124 - Gateway Canada mBTX Hardware Reference Guide - Page 45
Chapitre 1 : À propos de cette référence www.gateway.com 4 - Gateway GT5014H | 8511124 - Gateway Canada mBTX Hardware Reference Guide - Page 46
CHAPITRE 2 Généralités relatives au matériel • Avant • Arrière 5 - Gateway GT5014H | 8511124 - Gateway Canada mBTX Hardware Reference Guide - Page 47
être différents de l'illustration ci-dessous. Lecteur optique Port USB (en option) Prise de microphone Prise pour casque d'écoute www.gateway.com Lecteur optique (en option) Lecteur de carte mémoire (en option) Interrupteur d'alimentation / Voyant d'alimentation Voyant du disque dur Ports USB - Gateway GT5014H | 8511124 - Gateway Canada mBTX Hardware Reference Guide - Page 48
www.gateway.com Avant Composant Icône Lecteur de carte mémoire (en option) Interrupteur d'alimentation et voyant d'alimentation Voyant du disque dur Ports IEEE 1394 (en option) - Gateway GT5014H | 8511124 - Gateway Canada mBTX Hardware Reference Guide - Page 49
Arrière Important Les options matérielles et emplacements des ports de votre ordinateur peuvent être différents de l'illustration ci-dessous. www.gateway.com Connecteur d'alimentation Vis de serrage du couvercle du boîtier Prise pour haut-parleur arrière (en option) Prise Ethernet (réseau) Ports - Gateway GT5014H | 8511124 - Gateway Canada mBTX Hardware Reference Guide - Page 50
www.gateway.com Arrière Composant Ports IEEE 1394 Icône Description Branchez un appareil IEEE 1394 (aussi connu sous le nom de Firewire® ou de i.Link®) ( - Gateway GT5014H | 8511124 - Gateway Canada mBTX Hardware Reference Guide - Page 51
Chapitre 2 : Généralités relatives au matériel Composant Port de clavier PS/2 Port de souris PS/2 Icône Description Branchez un clavier PS/2 (Personal System/2®) dans ce port. Branchez une souris PS/2 dans ce port. www.gateway.com 10 - Gateway GT5014H | 8511124 - Gateway Canada mBTX Hardware Reference Guide - Page 52
CHAPITRE 3 Généralités relatives à la maintenance • Prévention de décharge d'électricité statique • Ouverture du boîtier • Fermeture du boîtier • Installation de la mémoire • Remplacement de la batterie système • Ajout ou remplacement d'un lecteur de CD ou de DVD • Remplacement du lecteur de carte - Gateway GT5014H | 8511124 - Gateway Canada mBTX Hardware Reference Guide - Page 53
à la maintenance www.gateway.com Prévention de les cartes d'extension par les bords ou leurs supports de fixation métalliques. Évitez de toucher les démonter le panneau latéral, procédez comme suit : 1 Suivez les instructions de « Prévention de décharge d'électricité statique » à la page 12 - Gateway GT5014H | 8511124 - Gateway Canada mBTX Hardware Reference Guide - Page 54
www.gateway.com Ouverture du boîtier 4 Enlevez les deux vis à oreilles du couvercle du panneau latéral. Vis à oreilles 5 Dégagez le panneau latéral en l'écartant - Gateway GT5014H | 8511124 - Gateway Canada mBTX Hardware Reference Guide - Page 55
Chapitre 3 : Généralités relatives à la maintenance Fermeture du boîtier www.gateway.com Remontage du cadre avant Pour remonter le cadre avant, procédez comme suit : 1 Insérez les onglets sur le côté gauche du cadre dans les - Gateway GT5014H | 8511124 - Gateway Canada mBTX Hardware Reference Guide - Page 56
www.gateway.com Installation de la mémoire Installation de la mémoire Lorsque vous mettez des barrettes de mémoire DIMM, procédez comme suit : 1 Démontez le panneau latéral en suivant les instructions de la section « Démontage du panneau latéral » à la page 12. 2 Pour une meilleure stabilité, - Gateway GT5014H | 8511124 - Gateway Canada mBTX Hardware Reference Guide - Page 57
Chapitre 3 : Généralités relatives à la maintenance www.gateway.com 6 Remontez le panneau latéral en suivant les instructions de la section « Remontage du panneau latéral » à la page 14. 7 Replacez l'ordinateur 8 Poussez l'onglet de dégagement de la batterie. La batterie sort de son support. 16 - Gateway GT5014H | 8511124 - Gateway Canada mBTX Hardware Reference Guide - Page 58
positif (+) de la nouvelle batterie est orienté vers le haut, puis enfoncez la batterie dans le support jusqu'à ce qu'elle s'enclenche en position. 10 Remontez le panneau latéral en suivant les instructions de la section « Remontage du panneau latéral » à la page 14. 11 Reconnectez tous les câbles - Gateway GT5014H | 8511124 - Gateway Canada mBTX Hardware Reference Guide - Page 59
Chapitre 3 : Généralités relatives à la maintenance www.gateway.com Important La couleur et la forme du panneau avant du composant de remplacement peuvent être différentes de celles du composant d'origine. 3 Si vous - Gateway GT5014H | 8511124 - Gateway Canada mBTX Hardware Reference Guide - Page 60
www.gateway.com Remplacement du lecteur de carte mémoire 8 Remontez le cadre avant en suivant les instructions de la section « Remontage du cadre avant » à la page 14. 9 Remontez le panneau latéral en suivant les instructions de la section « Remontage du panneau latéral » à la page 14. - Gateway GT5014H | 8511124 - Gateway Canada mBTX Hardware Reference Guide - Page 61
3 : Généralités relatives à la maintenance www.gateway.com 9 Réinstallez le cadre en suivant les instructions de la section « Remontage du cadre avant » à la page 14. 10 Réinstallez le panneau latéral du boîtier de l'ordinateur en suivant les instructions de la section « Remontage du panneau lat - Gateway GT5014H | 8511124 - Gateway Canada mBTX Hardware Reference Guide - Page 62
www.gateway.com Ajout ou remplacement d'un disque dur 5 Débranchez le câble du ventilateur de la carte système. 6 Retirez la vis de la baie du disque - Gateway GT5014H | 8511124 - Gateway Canada mBTX Hardware Reference Guide - Page 63
Chapitre 3 : Généralités relatives à la maintenance www.gateway.com 8 Retirez les quatre vis fixant le disque dur sur la baie de disque dur, puis retirez le disque dur de la baie. Vis Vis 9 - Gateway GT5014H | 8511124 - Gateway Canada mBTX Hardware Reference Guide - Page 64
www.gateway.com Remplacement du ventilateur avant 13 Rebranchez les câbles du lecteur en utilisant les notes que vous avez prises à l'étape 3. 14 Remontez le panneau latéral en suivant les instructions de la section « Remontage du panneau latéral » à la page 14. 15 Reconnectez tous les câbles - Gateway GT5014H | 8511124 - Gateway Canada mBTX Hardware Reference Guide - Page 65
Chapitre 3 : Généralités relatives à la maintenance www.gateway.com 4 Branchez le câble du nouveau ventilateur sur la carte système, puis insérez le nouveau ventilateur. 5 Remontez le panneau latéral en suivant les instructions de la section « Remontage du panneau latéral » à la page 14. - Gateway GT5014H | 8511124 - Gateway Canada mBTX Hardware Reference Guide - Page 66
www.gateway.com Remplacement du bloc d'alimentation 7 Reconnectez tous les câbles externes et le remplacer le bloc d'alimentation, procédez comme suit : 1 Démontez le panneau latéral en suivant les instructions de la section « Démontage du panneau latéral » à la page 12. 2 Débranchez les câbles - Gateway GT5014H | 8511124 - Gateway Canada mBTX Hardware Reference Guide - Page 67
www.gateway.com Remplacement du dissipateur thermique et du processeur Conseils et astuces Munissez-vous d'un tournevis cruciforme pour remplacer le dissipateur thermique. Pour remplacer le dissipateur thermique et le processeur : 1 Démontez le panneau latéral en suivant les instructions de - Gateway GT5014H | 8511124 - Gateway Canada mBTX Hardware Reference Guide - Page 68
www.gateway.com Remplacement du processeur) est alignée avec la broche 1 du support du processeur (indiquée par l'absence de trou de broche dans le support du processeur), et verrouillez ensuite le levier. 9 suivant les instructions de la section « Remontage du panneau latéral » à la page 14. 27 - Gateway GT5014H | 8511124 - Gateway Canada mBTX Hardware Reference Guide - Page 69
gateway.com Remplacement de la carte d'E/S Important La couleur et la forme du panneau avant du composant de remplacement peuvent être différentes de celles du composant d'origine. Pour remplacer le panneau E/S avant, procédez comme suit : 1 Démontez le panneau latéral en suivant les instructions - Gateway GT5014H | 8511124 - Gateway Canada mBTX Hardware Reference Guide - Page 70
www.gateway.com Ajout ou remplacement d'une carte d'extension Ajout ou remplacement d'une carte d'extension Pour ajouter ou remplacer une carte d'extension, procédez comme suit : 1 Démontez le panneau latéral en suivant les instructions de la section « Démontage du panneau latéral » à la page 12. - Gateway GT5014H | 8511124 - Gateway Canada mBTX Hardware Reference Guide - Page 71
Chapitre 3 : Généralités relatives à la maintenance www.gateway.com Remplacement de la carte système Pour remplacer la carte système, procédez comme suit : 1 Démontez le panneau latéral en suivant les instructions de la section « Démontage du panneau latéral » à la page 12. 2 Débranchez les câbles - Gateway GT5014H | 8511124 - Gateway Canada mBTX Hardware Reference Guide - Page 72
www.gateway.com Remplacement de la carte système 5 Enlevez le ventilateur en l'écartant de la carte système. 6 Débranchez le câble du ventilateur de la carte - Gateway GT5014H | 8511124 - Gateway Canada mBTX Hardware Reference Guide - Page 73
Chapitre 3 : Généralités relatives à la maintenance www.gateway.com 10 Enlevez les trois vis qui maintiennent le bloc d'alimentation à l'ordinateur. Vis 11 Glissez le bloc d'alimentation en l'écartant de l'arrière de l'ordinateur, - Gateway GT5014H | 8511124 - Gateway Canada mBTX Hardware Reference Guide - Page 74
www.gateway.com Remplacement de la carte système 16 Desserrez les vis rigraphiée sur le coin du processeur) est alignée avec la broche 1 du support du processeur (indiquée par l'absence de trou de broche dans le support du processeur), et verrouillez ensuite le levier. 20 Insérez le bloc d' - Gateway GT5014H | 8511124 - Gateway Canada mBTX Hardware Reference Guide - Page 75
Réinstallez les cartes d'extension précédemment enlevées. 26 Remontez le panneau latéral en suivant les instructions de la section « Remontage du panneau latéral » à la page 14. © 2006 Gateway, Inc. Tous droits réservés. Gateway et eMachines sont des marques de commerce ou des marques déposées de - Gateway GT5014H | 8511124 - Gateway Canada mBTX Hardware Reference Guide - Page 76
9 parallèle 9 réseau 8 scanneur 6, 9 série 9 sortie 9 Sortie S-vidéo (TV) 9 souris 6, 9, 10 souris PS/2 10 USB 6, 9 Coordonnées de Gateway 3 D décharge électrostatique 12 démarrer ordinateur 7 DIMM Voir mémoire disque dur ajout 20 remplacement 20 voyant 7 dissipateur thermique remplacement 26 - Gateway GT5014H | 8511124 - Gateway Canada mBTX Hardware Reference Guide - Page 77
de lecteur Zip 9 port Firewire 7, 9 port i.Link 7, 9 port IEEE 1394 7, 9 port parallèle 9 port PS/2 clavier 10 souris 10 port série 9 port USB 6, 9 36 www.gateway.com - Gateway GT5014H | 8511124 - Gateway Canada mBTX Hardware Reference Guide - Page 78
8511124 - MAN GW MBTX HW REF GDE FRCA RO
-
 1
1 -
 2
2 -
 3
3 -
 4
4 -
 5
5 -
 6
6 -
 7
7 -
8
-
9
-
10
-
11
-
12
-
13
-
14
-
15
-
16
-
17
-
18
-
19
-
20
-
21
-
22
-
23
-
24
-
25
-
26
-
27
-
28
-
29
-
30
-
31
-
32
-
33
-
34
-
35
-
36
-
37
-
38
-
39
-
40
-
41
-
42
-
43
-
44
-
45
-
46
-
47
-
48
-
49
-
50
-
51
-
52
-
53
-
54
-
55
-
56
-
57
-
58
-
59
-
60
-
61
-
62
-
63
-
64
-
65
-
66
-
67
-
68
-
69
-
70
-
71
-
72
-
73
-
74
-
75
-
76
-
77
-
78
 |
 |

HARDWARE REFERENCE
RÉFÉRENCE MATÉRIELLE
Gateway Computer
Ordinateur Gateway