HP 8550dn HP Color LaserJet 8550, 8550N, 8550DN, 8550GN, 8550MFP Printer - Get - Page 11
remove the orange packing spacers
 |
UPC - 088698946428
View all HP 8550dn manuals
Add to My Manuals
Save this manual to your list of manuals |
Page 11 highlights
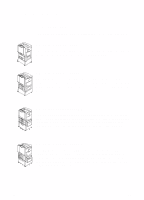
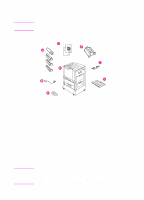
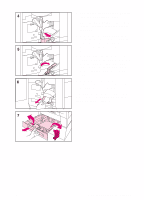
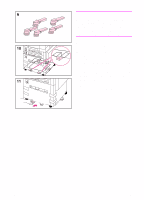
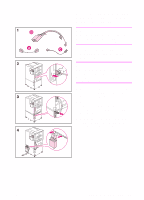
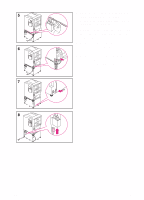
4 Remove the orange packing material from the lower (green) lever. 5 Press the white button on the lower (green) lever and swing the lever to the right. 6 Remove the packing material from inside the printer and then swing the lower (green) lever back to the left, making sure the lever clicks into place. 7 Firmly grip the handle in the center of tray 3, squeeze the release lever, and pull the tray out until it stops. Then remove the orange packing spacers from inside the tray and close the tray. 8 If the printer comes with a tray 2, repeat step 7 to remove the orange packing spacers from tray 2 If the printer came with a tray 4, continue with step 9. If the printer came with a stand, proceed to step 16. EN Step 2: Unpacking the Printer 7
-
 1
1 -
2
-
3
-
4
-
5
-
 6
6 -
 7
7 -
 8
8 -
 9
9 -
 10
10 -
 11
11 -
 12
12 -
 13
13 -
 14
14 -
 15
15 -
 16
16 -
17
-
18
-
19
-
20
-
21
-
22
-
23
-
24
-
25
-
26
-
27
-
28
-
29
-
30
-
31
-
32
-
33
-
34
-
35
-
36
-
37
-
38
-
39
-
40
-
41
-
42
-
43
-
44
-
45
-
46
-
47
-
48
-
49
-
50
-
51
-
52
-
53
-
54
-
55
-
56
-
57
-
58
-
59
-
60
-
61
-
62
-
63
-
64
 |
 |

EN
Step 2: Unpacking the Printer
7
4
Remove the orange packing material
from the lower (green) lever.
5
Press the white button on the lower
(green) lever and swing the lever to
the right.
6
Remove the packing material from
inside the printer and then swing the
lower (green) lever back to the left,
making sure the lever clicks into
place.
7
Firmly grip the handle in the center of
tray 3, squeeze the release lever, and
pull the tray out until it stops. Then
remove the orange packing spacers
from inside the tray and close the
tray.
8
If the printer comes with a tray 2,
repeat step 7 to remove the orange
packing spacers from tray 2
If the printer came with a tray 4, continue
with step 9. If the printer came with a
stand, proceed to step 16.