HP 8550dn HP Color LaserJet 8550, 8550N, 8550DN, 8550GN, 8550MFP Printer - Get - Page 33
Loading media in the optional, tray 4
 |
UPC - 088698946428
View all HP 8550dn manuals
Add to My Manuals
Save this manual to your list of manuals |
Page 33 highlights
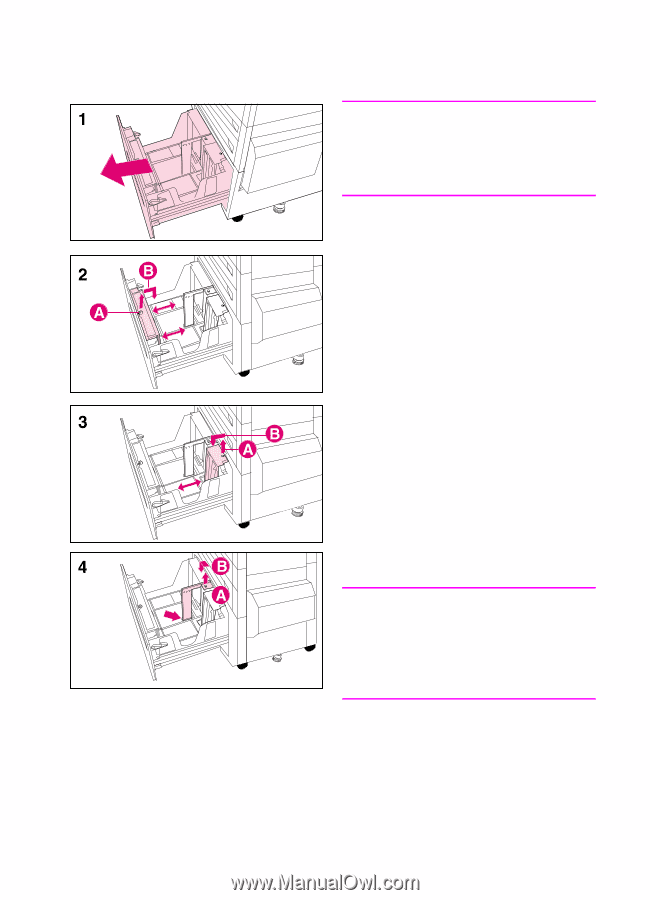
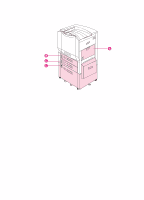
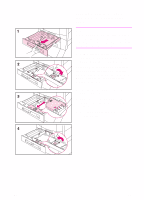
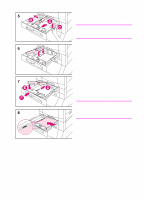
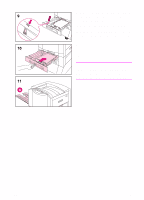
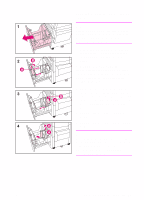
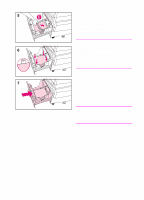
Loading media in the optional tray 4 Note Before loading media into tray 4, verify that the spacers were removed from the tray when "Step 2: Unpacking the Printer" was performed. 1 Firmly grip the handle in the center of the input tray, squeeze the release lever, and pull the tray out until it stops. Depending on your country, tray 4 arrives adjusted for either A4- or lettersized media. To load A4- or letter-sized media, proceed to step 5; otherwise, continue with step 2. 2 Adjust the front guide by pulling up on the pin (A), placing the guide into the slots on the top and bottom of the tray that correspond to the media size you are loading (B), and pushing in the pin. 3 Repeat step 2 to adjust the back guide. 4 Repeat step 2 to adjust the left media guide. Note To load 11-by-17 inch media, rotate the left media guide 90°, move it to the back of the tray, and place it into the slots on the top and bottom of the tray that correspond to 11-by-17. EN Step 7: Loading the Input Trays 29
-
 1
1 -
2
-
3
-
4
-
5
-
6
-
7
-
8
-
9
-
10
-
11
-
12
-
13
-
14
-
15
-
16
-
17
-
18
-
19
-
20
-
21
-
22
-
23
-
24
-
25
-
26
-
27
-
 28
28 -
 29
29 -
 30
30 -
 31
31 -
 32
32 -
 33
33 -
 34
34 -
 35
35 -
 36
36 -
 37
37 -
 38
38 -
39
-
40
-
41
-
42
-
43
-
44
-
45
-
46
-
47
-
48
-
49
-
50
-
51
-
52
-
53
-
54
-
55
-
56
-
57
-
58
-
59
-
60
-
61
-
62
-
63
-
64
 |
 |