HP 8550dn HP Color LaserJet 8550, 8550N, 8550DN, 8550GN, 8550MFP Printer - Get - Page 23
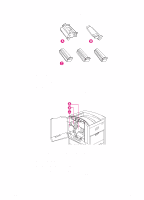
To install the imaging drum
 |
UPC - 088698946428
View all HP 8550dn manuals
Add to My Manuals
Save this manual to your list of manuals |
Page 23 highlights
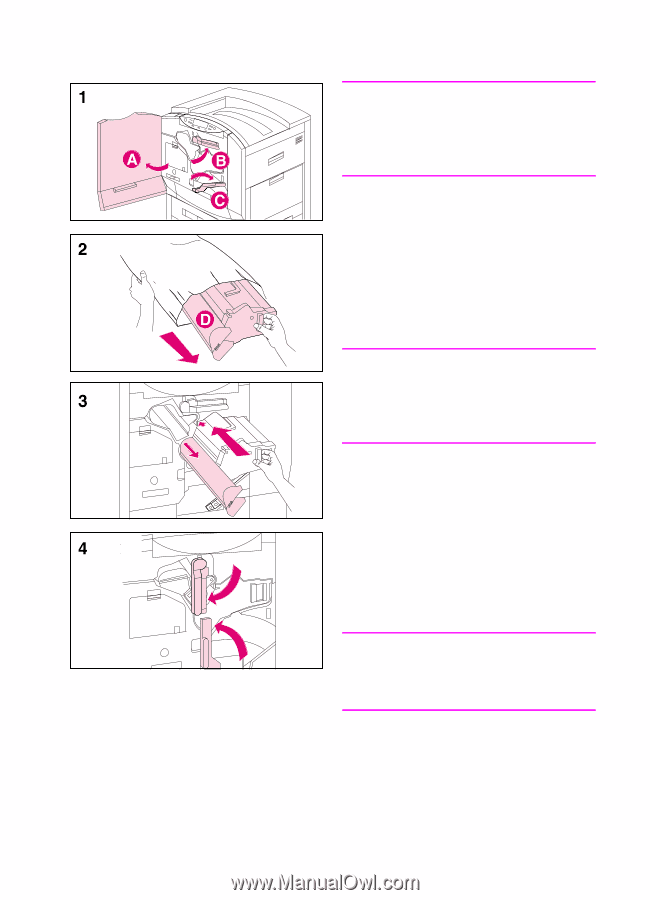
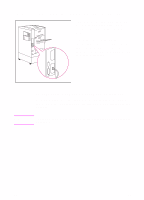
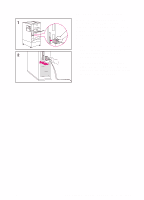
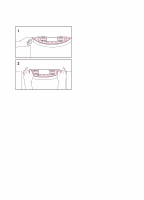
To install the imaging drum CAUTION To prevent damage to the printer, do not move the printer after the imaging drum or any of the toner cartridges have been installed. 1 Leave the printer powered on and open the front door of the printer (A). Swing the upper (blue) lever to the right (B). Press the white button on the lower (green) lever and swing the lever to the right (C). 2 Remove the imaging drum from its packaging. CAUTION A gray cover (D) protects the drum's cylinder. Do not remove this cover; it will come off when you perform step 3, below. 3 Line up the guides and push firmly to slide the new drum into the printer. The cylinder's cover will slide off as the drum enters the printer. Set the cover aside. 4 Swing the upper (blue) lever to the left. Then swing the lower (green) lever back to the left, making sure it clicks into place. Note If the lever does not return to its original position, make sure that the imaging drum is all the way in the printer. EN Step 6: Installing the Consumables 19
-
 1
1 -
2
-
3
-
4
-
5
-
6
-
7
-
8
-
9
-
10
-
11
-
12
-
13
-
14
-
15
-
16
-
17
-
 18
18 -
 19
19 -
 20
20 -
 21
21 -
 22
22 -
 23
23 -
 24
24 -
 25
25 -
 26
26 -
 27
27 -
 28
28 -
29
-
30
-
31
-
32
-
33
-
34
-
35
-
36
-
37
-
38
-
39
-
40
-
41
-
42
-
43
-
44
-
45
-
46
-
47
-
48
-
49
-
50
-
51
-
52
-
53
-
54
-
55
-
56
-
57
-
58
-
59
-
60
-
61
-
62
-
63
-
64
 |
 |