HP Neoware c50 TeemTalk® 5.0 for Windows CE & XPe User's Guide - Page 246
Display, Rows x Columns, Control, Enter, Reset, IBM5250 Monochrome, Attributes, Host Information
 |
View all HP Neoware c50 manuals
Add to My Manuals
Save this manual to your list of manuals |
Page 246 highlights
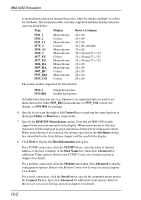
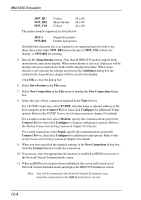
IBM 5250 Emulation as monochrome (green for normal characters, white for intense attribute) or colour for attributes. The terminal models currently supported and their display characteristics are listed below. Type Display Rows x Columns 5291_1 5292_2 5251_11 3179_2 3196_A1 3180_2 3477_FC 3477_FG 3486_BA 3487_HA 3487_HC 5555_B01 5555_C01 Monochrome Colour Monochrome Colour Monochrome Monochrome Colour Monochrome Monochrome Monochrome Colour Monochrome Colour 24 x 80 24 x 80 24 x 80 24 x 80 (default) 24 x 80 24 x 80 and 27 x 132 24 x 80 and 27 x 132 24 x 80 and 27 x 132 24 x 80 24 x 80 24 x 80 24 x 80 24 x 80 The printer models supported are listed below: 3812-1 5553-B01 Single byte printer Double byte printer If double byte character sets (e.g. Japanese) are supported and you wish to use them, then select either 5555_B01 (monochrome) or 5555_C01 (colour) for display, or 5553-B01 for printing. 6. Specify if you want the right or left Control keys to perform the same function as the keypad Enter or Reset keys, respectively. 7. Specify the IBM5250 Monochrome setting. Note that all IBM 5250 models support both monochrome and colour display. When monochrome is selected, characters will be displayed in green and intense fields will be displayed in white. When monochrome is not selected, the settings specified in the Attributes dialog box (described in the Setup Menus chapter) will be used for the display. 8. Click Next to display the Host Information dialog box. For a TCP/IP connection, click the TCP/IP button, enter the name or internet address of the host computer in the Host Name box, then click Advanced for additional Telnet options. Refer to the TCP/IP Connection Settings section in chapter 2 for details. For a modem connection, click the Modem button then click Advanced to display configuration options. Refer to the Modem Connection Settings section in chapter 2 for details. For a serial connection, click the Serial button, specify the communications port in the Connect To box, then click Advanced for additional serial options. Refer to the Serial Connection Settings section in chapter 2 for details. 12-2
-
 1
1 -
2
-
3
-
4
-
5
-
6
-
7
-
8
-
9
-
10
-
11
-
12
-
13
-
14
-
15
-
16
-
17
-
18
-
19
-
20
-
21
-
22
-
23
-
24
-
25
-
26
-
27
-
28
-
29
-
30
-
31
-
32
-
33
-
34
-
35
-
36
-
37
-
38
-
39
-
40
-
41
-
42
-
43
-
44
-
45
-
46
-
47
-
48
-
49
-
50
-
51
-
52
-
53
-
54
-
55
-
56
-
57
-
58
-
59
-
60
-
61
-
62
-
63
-
64
-
65
-
66
-
67
-
68
-
69
-
70
-
71
-
72
-
73
-
74
-
75
-
76
-
77
-
78
-
79
-
80
-
81
-
82
-
83
-
84
-
85
-
86
-
87
-
88
-
89
-
90
-
91
-
92
-
93
-
94
-
95
-
96
-
97
-
98
-
99
-
100
-
101
-
102
-
103
-
104
-
105
-
106
-
107
-
108
-
109
-
110
-
111
-
112
-
113
-
114
-
115
-
116
-
117
-
118
-
119
-
120
-
121
-
122
-
123
-
124
-
125
-
126
-
127
-
128
-
129
-
130
-
131
-
132
-
133
-
134
-
135
-
136
-
137
-
138
-
139
-
140
-
141
-
142
-
143
-
144
-
145
-
146
-
147
-
148
-
149
-
150
-
151
-
152
-
153
-
154
-
155
-
156
-
157
-
158
-
159
-
160
-
161
-
162
-
163
-
164
-
165
-
166
-
167
-
168
-
169
-
170
-
171
-
172
-
173
-
174
-
175
-
176
-
177
-
178
-
179
-
180
-
181
-
182
-
183
-
184
-
185
-
186
-
187
-
188
-
189
-
190
-
191
-
192
-
193
-
194
-
195
-
196
-
197
-
198
-
199
-
200
-
201
-
202
-
203
-
204
-
205
-
206
-
207
-
208
-
209
-
210
-
211
-
212
-
213
-
214
-
215
-
216
-
217
-
218
-
219
-
220
-
221
-
222
-
223
-
224
-
225
-
226
-
227
-
228
-
229
-
230
-
231
-
232
-
233
-
234
-
235
-
236
-
237
-
238
-
239
-
240
-
 241
241 -
 242
242 -
 243
243 -
 244
244 -
 245
245 -
 246
246 -
 247
247 -
 248
248 -
 249
249 -
 250
250 -
 251
251 -
252
-
253
-
254
-
255
-
256
-
257
-
258
-
259
-
260
-
261
-
262
-
263
-
264
-
265
-
266
-
267
-
268
-
269
-
270
-
271
-
272
-
273
-
274
-
275
-
276
-
277
-
278
-
279
-
280
-
281
-
282
-
283
-
284
-
285
-
286
-
287
-
288
-
289
-
290
-
291
-
292
-
293
-
294
-
295
-
296
-
297
-
298
-
299
-
300
-
301
-
302
-
303
-
304
-
305
-
306
-
307
-
308
-
309
-
310
-
311
-
312
-
313
-
314
-
315
-
316
-
317
-
318
-
319
-
320
-
321
-
322
-
323
-
324
-
325
-
326
-
327
-
328
-
329
-
330
-
331
-
332
-
333
-
334
-
335
-
336
-
337
-
338
-
339
-
340
-
341
-
342
-
343
-
344
-
345
-
346
-
347
-
348
-
349
-
350
-
351
-
352
-
353
-
354
-
355
-
356
-
357
-
358
-
359
-
360
-
361
-
362
-
363
-
364
-
365
-
366
-
367
-
368
-
369
-
370
-
371
-
372
-
373
-
374
-
375
-
376
-
377
-
378
-
379
-
380
-
381
-
382
-
383
-
384
-
385
-
386
-
387
-
388
-
389
-
390
-
391
-
392
-
393
-
394
-
395
-
396
-
397
-
398
-
399
-
400
-
401
-
402
-
403
-
404
-
405
-
406
-
407
-
408
-
409
-
410
-
411
-
412
-
413
-
414
-
415
-
416
-
417
-
418
-
419
-
420
-
421
-
422
-
423
-
424
-
425
-
426
-
427
-
428
-
429
-
430
-
431
-
432
-
433
-
434
-
435
-
436
-
437
-
438
-
439
-
440
-
441
-
442
-
443
-
444
-
445
-
446
-
447
-
448
-
449
-
450
-
451
-
452
-
453
-
454
-
455
-
456
-
457
-
458
-
459
-
460
-
461
-
462
-
463
-
464
-
465
-
466
-
467
-
468
-
469
-
470
-
471
-
472
-
473
-
474
-
475
-
476
-
477
-
478
-
479
-
480
-
481
-
482
-
483
-
484
 |
 |
