HP ProBook 4540s HP Notebook User Guide - Linux - Page 80
Managing a Computer Setup DriveLock password, Managing a DriveLock password - port replicator
 |
View all HP ProBook 4540s manuals
Add to My Manuals
Save this manual to your list of manuals |
Page 80 highlights
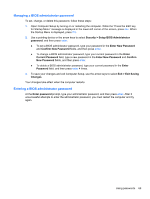
Managing a Computer Setup DriveLock password CAUTION: To prevent the DriveLock-protected hard drive from becoming permanently unusable, record the DriveLock user password and the DriveLock master password in a safe place away from your computer. If you forget both DriveLock passwords, the hard drive will be permanently locked and can no longer be used. DriveLock protection prevents unauthorized access to the contents of a hard drive. DriveLock can be applied only to the internal hard drive(s) of the computer. After DriveLock protection is applied to a drive, a password must be entered to access the drive. The drive must be inserted into the computer or an advanced port replicator in order for it to be accessed by the DriveLock passwords. To apply DriveLock protection to an internal hard drive, a user password and a master password must be set in Computer Setup. Note the following considerations about using DriveLock protection: ● After DriveLock protection is applied to a hard drive, the hard drive can be accessed only by entering either the user password or the master password. ● The owner of the user password should be the day-to-day user of the protected hard drive. The owner of the master password may be either a system administrator or the day-to-day user. ● The user password and the master password can be identical. ● You can delete a user password or master password only by removing DriveLock protection from the drive. DriveLock protection can be removed from the drive only with the master password. Managing a DriveLock password To set, change, or delete a DriveLock password in Computer Setup, follow these steps: 1. Turn on the computer, and then press esc while the "Press the ESC key for Startup Menu" message is displayed at the bottom of the screen. 2. Press f10 to enter Computer Setup. 3. Use a pointing device or the arrow keys to select Security > DriveLock Password, and then press follow the on-screen instructions. 4. To confirm DriveLock protection on the drive you have selected, type DriveLock in the confirmation field, and then press enter. NOTE: The DriveLock confirmation is case sensitive. Your changes go into effect when the computer restarts. Entering a DriveLock password Be sure that the hard drive is inserted into the computer (not into an optional docking device or external MultiBay). At the DriveLock Password prompt, type your user or master password (using the same kind of keys you used to set the password), and then press enter. After 2 incorrect attempts to enter the password, you must shut down the computer and try again. 70 Chapter 10 Security
-
 1
1 -
2
-
3
-
4
-
5
-
6
-
7
-
8
-
9
-
10
-
11
-
12
-
13
-
14
-
15
-
16
-
17
-
18
-
19
-
20
-
21
-
22
-
23
-
24
-
25
-
26
-
27
-
28
-
29
-
30
-
31
-
32
-
33
-
34
-
35
-
36
-
37
-
38
-
39
-
40
-
41
-
42
-
43
-
44
-
45
-
46
-
47
-
48
-
49
-
50
-
51
-
52
-
53
-
54
-
55
-
56
-
57
-
58
-
59
-
60
-
61
-
62
-
63
-
64
-
65
-
66
-
67
-
68
-
69
-
70
-
71
-
72
-
73
-
74
-
 75
75 -
 76
76 -
 77
77 -
 78
78 -
 79
79 -
 80
80 -
 81
81 -
 82
82 -
 83
83 -
 84
84 -
 85
85 -
86
-
87
-
88
-
89
-
90
-
91
-
92
-
93
-
94
-
95
-
96
-
97
-
98
-
99
-
100
-
101
-
102
-
103
-
104
-
105
-
106
-
107
-
108
-
109
-
110
 |
 |