Honeywell 3800G14E User Manual - Page 46
To Add a Prefix or Suffix, Example: Add a Suffix to a specific symbology
 |
View all Honeywell 3800G14E manuals
Add to My Manuals
Save this manual to your list of manuals |
Page 46 highlights
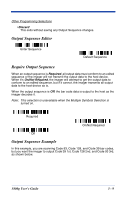
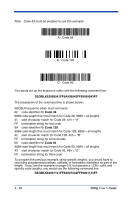
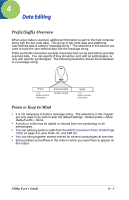
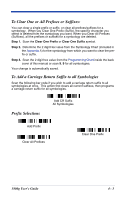
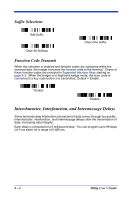
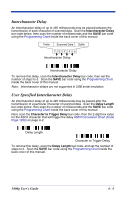
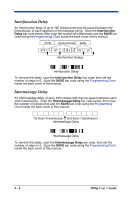
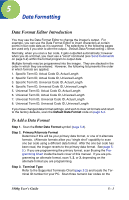
To Add a Prefix or Suffix: Step 1. Scan the Add Prefix or Add Suffix symbol (page 4-3). Step 2. Determine the 2 digit Hex value from the Symbology Chart (included in the Appendix A) for the symbology to which you want to apply the prefix or suffix. For example, for Code 128, Code ID is "j" and Hex ID is "6A". Step 3. Scan the 2 hex digits from the Programming Chart inside the back cover of this manual or scan 9, 9 for all symbologies. Step 4. Determine the hex value from the ASCII Conversion Chart (Code Page 1252) on page A-2, for the prefix or suffix you wish to enter. Step 5. Scan the 2 digit hex value from the Programming Chart inside the back cover of this manual. Step 6. Repeat Steps 4 and 5 for every prefix or suffix character. Step 7. To add the Code I.D., scan 5, C, 8, 0. To add AIM I.D., scan 5, C, 8, 1. To add a backslash (\), scan 5, C, 5, C. Note: To add a backslash (\) as in Step 7, you must scan 5C twice - once to create the leading backslash and then to create the backslash itself. Step 8. Scan Save to exit and save, or scan Discard to exit without saving. Repeat Steps 1-6 to add a prefix or suffix for another symbology. Example: Add a Suffix to a specific symbology To send a CR (carriage return)Suffix for UPC only: Step 1. Scan Add Suffix. Step 2. Determine the 2 digit hex value from the Symbology Chart (included in the Appendix A) for UPC. Step 3. Scan 6, 3 from the Programming Chart inside the back cover of this manual. Step 4. Determine the hex value from the ASCII Conversion Chart (Code Page 1252) on page A-2, for the CR (carriage return). Step 5. Scan 0, D from the Programming Chart inside the back cover of this manual. Step 6. Scan Save, or scan Discard to exit without saving. 4 - 2 3800g User's Guide
-
 1
1 -
2
-
3
-
4
-
5
-
6
-
7
-
8
-
9
-
10
-
11
-
12
-
13
-
14
-
15
-
16
-
17
-
18
-
19
-
20
-
21
-
22
-
23
-
24
-
25
-
26
-
27
-
28
-
29
-
30
-
31
-
32
-
33
-
34
-
35
-
36
-
37
-
38
-
39
-
40
-
 41
41 -
 42
42 -
 43
43 -
 44
44 -
 45
45 -
 46
46 -
 47
47 -
 48
48 -
 49
49 -
 50
50 -
 51
51 -
52
-
53
-
54
-
55
-
56
-
57
-
58
-
59
-
60
-
61
-
62
-
63
-
64
-
65
-
66
-
67
-
68
-
69
-
70
-
71
-
72
-
73
-
74
-
75
-
76
-
77
-
78
-
79
-
80
-
81
-
82
-
83
-
84
-
85
-
86
-
87
-
88
-
89
-
90
-
91
-
92
-
93
-
94
-
95
-
96
-
97
-
98
-
99
-
100
-
101
-
102
-
103
-
104
-
105
-
106
-
107
-
108
-
109
-
110
-
111
-
112
-
113
-
114
-
115
-
116
-
117
-
118
-
119
-
120
-
121
-
122
-
123
-
124
-
125
-
126
-
127
-
128
-
129
-
130
-
131
-
132
-
133
-
134
-
135
-
136
-
137
-
138
-
139
-
140
-
141
-
142
-
143
-
144
 |
 |