Invacare XLT Owners Manual - Page 22
Warning, Caution
 |
View all Invacare XLT manuals
Add to My Manuals
Save this manual to your list of manuals |
Page 22 highlights
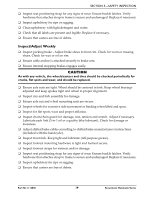
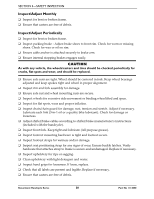
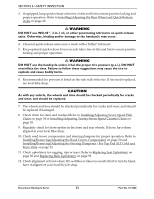
SECTION 3-SAFETY INSPECTION 3. If equipped, keep quick release axles free of dirt and lint to ensure positive locking and proper operation. Refer to Installing/Adjusting the Rear Wheel and Quick‐Release Axles on page 42. ƽ WARNING DO NOT use WD-40®, 3-in-1 oil, or other penetrating lubricants on quick-release axles. Otherwise, binding and/or damage to the handcycle may occur. 4. Clean/oil quick‐release axles once a week with a Teflon® lubricant. 5. Keep optional quick release levers on axle tubes free of dirt and lint to ensure positive locking and proper operation. ƽ WARNING DO NOT use the handcycle unless it has the proper tire pressure (p.s.i.). DO NOT overinflate the tires. Failure to follow these suggestions may cause the tire to explode and cause bodily harm. 6. Recommended tire pressure is listed on the side wall of the tire. If tire needs replaced, see local bike shop. CAUTION As with any vehicle, the wheels and tires should be checked periodically for cracks and wear, and should be replaced. 7. The wheels and tires should be checked periodically for cracks and wear, and should be replaced if damaged. 8. Check chain for slack and readjust.Refer to Installing/Adjusting Seven Speed Hub Chain on page 54 or Installing/Adjusting Twenty‐Seven Speed Cassette Chain on page 55. 9. Regularly check for loose spokes in the front and rear wheels. If loose, have them aligned at your local bike shop. 10. Check road crown compensator and steering dampner for proper operation. Refer to Installing/Removing/Adjusting the Road Crown Compensator on page 50 and Installing/Removing/Adjusting the Steering Dampener ‐ For Top End XLT Gold and Force Only on page 52. 11. Check upholstery for sagging, rips or tears. Refer to Replacing Seat Upholstery on page 58 and Replacing Back Upholstery on page 59. 12. Check alignment of front wheel. If it wobbles or takes too much effort to turn by hand, have it aligned at your local bicycle shop. Recumbent Handcycle Series 22 Part No 1114850
-
 1
1 -
2
-
3
-
4
-
5
-
6
-
7
-
8
-
9
-
10
-
11
-
12
-
13
-
14
-
15
-
16
-
 17
17 -
 18
18 -
 19
19 -
 20
20 -
 21
21 -
 22
22 -
 23
23 -
 24
24 -
 25
25 -
 26
26 -
 27
27 -
28
-
29
-
30
-
31
-
32
-
33
-
34
-
35
-
36
-
37
-
38
-
39
-
40
-
41
-
42
-
43
-
44
-
45
-
46
-
47
-
48
-
49
-
50
-
51
-
52
-
53
-
54
-
55
-
56
-
57
-
58
-
59
-
60
-
61
-
62
-
63
-
64
-
65
-
66
-
67
-
68
-
69
-
70
-
71
-
72
-
73
-
74
-
75
-
76
 |
 |
