Invacare XLT Owners Manual - Page 42
Wheels
 |
View all Invacare XLT manuals
Add to My Manuals
Save this manual to your list of manuals |
Page 42 highlights
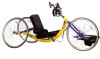
SECTION 7-WHEELS SECTION 7-WHEELS ƽ WARNING After any adjustments, repair or service and before use, make sure all attaching hardware is tightened securely - otherwise injury or damage may result. Installing/Adjusting the Rear Wheel and Quick-Release Axles NOTE: For this procedure, refer to FIGURE 7.1. 1. Make sure that the axle receiver hex nut is securely tightened before installing the rear wheels. Axle Receiver Hex Nut Quick-release Axle Locknut 2. Depress detent pin in the quick‐release axle and slide axle through the axle receiver. 3. Release detent pin ensuring that the locking pins are fully released. NOTE: Locking pins MUST protrude past the end of the axle receiver to fully release. Any excessive play MUST also be eliminated. Locking Pins Axle Receiver Detent Pin FIGURE 7.1 Installing/Adjusting the Rear Wheel and Quick-Release Axles 4. Increase or decrease end play by adjusting the locknut on the end of the quick‐release axle. ƽ WARNING Make sure detent pin is fully released before operating the handcycle. Keep locking pins clean. 5. Reinstall rear wheel on the handcycle. 6. Tilt handcycle onto either rear wheel and spin raised wheel. It should spin freely with no excessive drag. 7. Repeat procedure for opposite rear wheel. NOTE: If drag to either side occurs, repeat the procedure until the handcycle rolls correctly. Recumbent Handcycle Series 42 Part No 1114850
-
 1
1 -
2
-
3
-
4
-
5
-
6
-
7
-
8
-
9
-
10
-
11
-
12
-
13
-
14
-
15
-
16
-
17
-
18
-
19
-
20
-
21
-
22
-
23
-
24
-
25
-
26
-
27
-
28
-
29
-
30
-
31
-
32
-
33
-
34
-
35
-
36
-
 37
37 -
 38
38 -
 39
39 -
 40
40 -
 41
41 -
 42
42 -
 43
43 -
 44
44 -
 45
45 -
 46
46 -
 47
47 -
48
-
49
-
50
-
51
-
52
-
53
-
54
-
55
-
56
-
57
-
58
-
59
-
60
-
61
-
62
-
63
-
64
-
65
-
66
-
67
-
68
-
69
-
70
-
71
-
72
-
73
-
74
-
75
-
76
 |
 |
